For enthusiasts of the Triumph Spitfire 1500, achieving a sleek, European aesthetic often involves swapping out the original US-spec bumper under riders for their lower profile Euro counterparts. This modification is a popular choice for those looking to refine the lines of their classic British roadster, giving it a cleaner and more streamlined appearance. If you’re contemplating this upgrade, you’re in the right place. This guide will walk you through the process, drawing on the experiences of fellow Spitfire owners who have successfully made this conversion.
The discussion began in a forum where Pats54, a Triumph Spitfire 1500 owner, inquired about the feasibility of replacing his US-spec under riders with Euro-spec versions after acquiring a set of chrome bumpers. His question sparked a helpful exchange among community members, providing valuable insights into what’s involved in this modification.
Is Swapping to Euro Under Riders on a Spitfire 1500 Possible?
Absolutely. As confirmed by multiple forum members, swapping US-spec under riders for Euro-spec versions on a Triumph Spitfire 1500 is indeed possible and a relatively common modification. It’s considered a desirable upgrade for many owners aiming for a more European look.
Parts and Considerations for the Conversion
When undertaking this swap, several key points emerge from the forum discussion that are crucial for a smooth installation:
Source of Euro Under Riders
Several suppliers offer Euro-spec under riders for the Triumph Spitfire 1500. Two prominent names mentioned in the forum are:
-
Spitbits: Sethfree recommended ABS units from Spitbits, noting they were a direct fit with no trimming required at the time of his purchase. He highlighted that these units came with hardware, simplifying the installation process.
-
Rimmer Bros: Pats54 opted for Rimmer Bros under riders, attracted by potentially lower costs. However, Tinks-dad mentioned needing to slightly adjust the holes on Rimmer’s parts for proper fitment, indicating that some minor modifications might be necessary.
It’s worth noting that while Spitbits was praised for a direct fit, they might be a bit pricier. Rimmer Bros, while potentially more budget-friendly, could require minor adjustments during installation. Pricing and availability can change, so it’s always best to check current offers and read recent reviews before making a decision.
Installation Tips and Potential Challenges
Drawing from the experiences shared in the forum, here are key steps and potential challenges to be aware of during the swap:
-
Preparation is Key: Before starting, ensure you have all the necessary parts and tools. Sethfree mentioned that Spitbits supplied hardware with their under riders, which is a significant convenience.
-
Grill and Bracket Removal: The process begins by removing the grill. Sethfree also pointed out the need to remove a bracket located under the horns on each side of the vehicle.
-
Heavy Bracket Behind US Under Riders: A crucial step is dealing with the heavy metal bracket behind the US-spec under riders. Sethfree advised that after removing the large under riders, this heavy bracket, attached to the front of the bonnet hinge boxes, must be removed before mounting the Euro-spec units.
-
Hood Support: Andy-Sherry provided an essential safety tip: “Before you remove the big heavy bracket make sure the hood is propped up… as it will crash down when you remove the bolts.” This bracket apparently plays a role in supporting the hood, so securing the hood is vital to prevent damage.
-
Bottom Capnut Bracket: Sethfree noted that the bottom capnut bracket is bent under for US units. He chose to leave it as is and rely on the top bolts for securing the new Euro under riders to avoid potentially cracking the paint on the frame by bending it. This suggests that the bottom bracket might not perfectly align with the Euro-spec parts, but secure mounting is still achievable.
-
Potential Fitment Issues: Tinks-dad’s experience with Rimmer Bros parts indicates that you might need to slightly enlarge or adjust holes for a perfect fit. Sethfree also mentioned potential corrosion in the threads of the top mounting holes, which required careful threading of bolts. Inspecting and addressing any corrosion before installation is advisable.
-
Chrome Bumper Considerations: Racer490 brought up a significant point for those with rubber bumpers: “If you had rubber bumpers before the front will require you cutting down the hinge boxes in order to fit the chrome bumper.” This implies that if you’re also switching from rubber to chrome bumpers in conjunction with the under riders, the process becomes more involved, possibly requiring modifications to the hinge boxes. This detail is crucial for those upgrading from rubber bumpers.
-
Cost and Shipping: Sethfree advised Pats54 to consider the exchange rate, shipping costs, and potential import duties when ordering from UK-based suppliers like Rimmer Bros. He shared an experience of unexpected excise tax and port fees on a UK order, highlighting that the final cost can exceed the initial price plus shipping. For US buyers, ordering from a US supplier like Spitbits might mitigate these extra charges and potentially offer faster shipping.
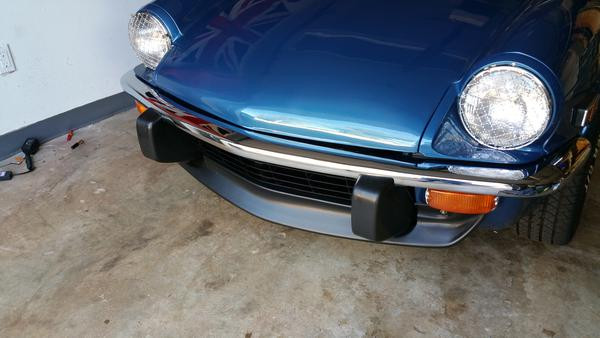 20150128_125230.jpg
Visual example of Euro-spec under riders installed on a Triumph Spitfire 1500, showcasing the cleaner, low-profile aesthetic achieved after the conversion.
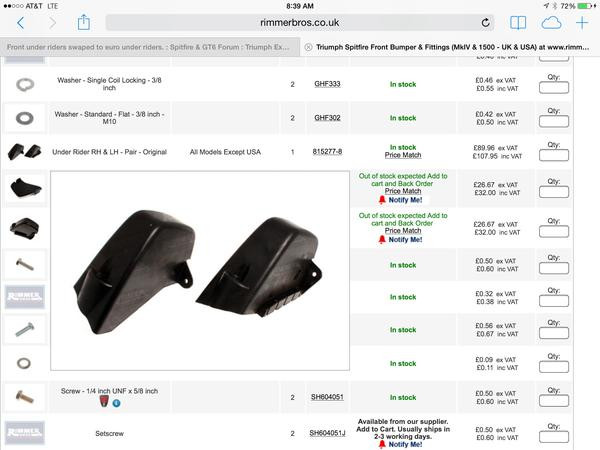 image.jpg
Close-up of US-spec bumper under riders on a Triumph Spitfire 1500, highlighting the bulkier design in contrast to the Euro-spec versions.
Conclusion: A Worthwhile Upgrade for Your Spitfire 1500
Swapping from US to Euro-spec under riders on your Triumph Spitfire 1500 is a popular and achievable modification that can significantly enhance the car’s visual appeal. While the process is generally straightforward, it’s important to be aware of potential minor fitment issues, especially when using aftermarket parts, and to take necessary safety precautions, such as supporting the hood during bracket removal. By considering the advice and experiences shared by fellow enthusiasts, you can confidently undertake this upgrade and enjoy the more refined European styling on your classic Triumph Spitfire 1500. Remember to factor in all costs, including shipping and potential import fees, when sourcing your Euro-spec under riders to make the most economical choice for your project.