
Are you looking to create delicious, healthy yogurt at home using a Euro Cuisine yogurt maker? You can get thick, creamy yogurt every time by following the correct Euro Cuisine Yogurt Maker Instructions and tips provided on eurodripusa.net. We’ll cover everything from the essential tools and ingredients to troubleshooting common issues, ensuring you achieve perfect results with your Euro Cuisine yogurt maker. Discover how to make regular and Greek yogurt effortlessly, and enjoy the benefits of homemade goodness with eurodripusa.net. Get ready to elevate your yogurt-making game with expert guidance and innovative techniques.
1. Essential Tools for Making Yogurt with a Euro Cuisine Yogurt Maker
To create the perfect batch of thick and creamy yogurt with your Euro Cuisine yogurt maker, you’ll need a few essential tools. These tools will help you control the temperature, strain the yogurt, and ensure a consistent texture. Here’s a detailed list of what you’ll need:
- Euro Cuisine Yogurt Maker: This is the primary tool for incubating your yogurt. Ensure it’s clean and in good working condition.
- 9″ x 13″ Rectangular Glass Casserole Dish (Optional): Helpful for maintaining a steady temperature in the oven, which can be more consistent than using a stovetop.
- Double Boiler or Heavy-Bottomed Sauce Pot: A double boiler prevents the milk from burning, but a heavy-bottomed pot works too.
- Probe Thermometer: Crucial for monitoring the temperature of the milk. Accurate temperature control is key to successful yogurt making.
- Fine Mesh Strainer or Colander with Cheesecloth: Used for straining the yogurt to achieve a thicker consistency, especially when making Greek yogurt.
- Small Mixing Bowl: For whisking the yogurt starter with a small amount of milk before adding it to the larger batch.
- Medium Mixing Bowl: To hold the bulk of the milk (around 42 ounces) while cooling it down.
- Large Mixing Bowl: Big enough to hold the medium mixing bowl, filled with ice water for rapid cooling.
- Wire or Silicone Whisk: For constant stirring to prevent the milk from burning.
- Funnel: Makes it easier to pour the yogurt mixture into the individual jars without spilling.
- Seven Glass Yogurt Jars (Included with Euro Cuisine Yogurt Maker): These are specifically designed to fit in the yogurt maker and are perfect for portioning your yogurt.
Having these tools on hand will streamline the yogurt-making process and help you achieve the desired thickness and creaminess every time.
2. Understanding the Euro Cuisine Yogurt Maker Instructions
The Euro Cuisine yogurt maker is designed to simplify the process of making homemade yogurt. However, the provided instructions are often too basic. Here’s a comprehensive guide to help you understand and effectively use your Euro Cuisine yogurt maker:
2.1. Initial Setup
Before you start, make sure your yogurt maker and all its components are clean. Wash the glass jars and the lid with warm, soapy water, and rinse them thoroughly. Ensure the base of the yogurt maker is placed on a stable, heat-resistant surface.
2.2. Preparing the Milk
The first crucial step is preparing the milk. You’ll need to heat the milk to a specific temperature to denature the proteins, which helps create a thicker yogurt.
- Heating the Milk:
- Pour the milk into a double boiler or a heavy-bottomed sauce pot.
- Heat the milk to 180°F (82°C), stirring constantly to prevent scorching. Use a probe thermometer to monitor the temperature accurately.
- If you don’t have a double boiler, keep a close watch and stir frequently to avoid burning the milk.
- Maintaining the Temperature (Optional Oven Method):
- Preheat your oven to 180°F (82°C).
- Transfer the heated milk to a 9″ x 13″ glass casserole dish.
- Place the dish in the oven and maintain the temperature for 30 minutes. This ensures the milk proteins are properly denatured.
- Cooling the Milk:
- After heating, the milk needs to be cooled down to around 100°F (37°C) before adding the yogurt culture.
- Place the medium mixing bowl inside the large mixing bowl filled with ice water.
- Pour the heated milk into the medium mixing bowl and stir continuously.
- Monitor the temperature with your thermometer. Cooling the milk rapidly prevents the growth of unwanted bacteria.
- Ensure the temperature doesn’t drop below 95°F (35°C), as this can affect the yogurt’s texture.
2.3. Adding the Yogurt Culture
The yogurt culture is what transforms the milk into yogurt through fermentation.
- Preparing the Culture:
- In a small mixing bowl, mix about 1 cup of the cooled milk with 1 tablespoon of unflavored Greek yogurt (such as Fage). Ensure the yogurt dissolves completely into the milk.
- This mixture ensures the culture is evenly distributed throughout the milk.
- Mixing the Culture with the Milk:
- Pour the yogurt-milk mixture back into the remaining milk and whisk thoroughly.
- Even distribution of the culture is essential for consistent fermentation.
2.4. Incubation Process
The incubation process allows the yogurt culture to ferment the milk, creating yogurt.
- Filling the Jars:
- Use a funnel to pour the milk mixture evenly into the seven glass yogurt jars provided with the Euro Cuisine yogurt maker.
- Avoid overfilling the jars to prevent spillage.
- Incubating the Yogurt:
- Place the filled jars into the Euro Cuisine yogurt maker without their individual lids.
- Cover the yogurt maker with its lid and turn it on. The maker will light up, indicating it’s working.
- Let the yogurt incubate undisturbed for 10 hours. Ensure the maker is in a stable location where the temperature remains consistent.
- Avoid jostling the yogurt maker during incubation, as this can affect the yogurt’s texture.
2.5. Chilling and Storing
After incubation, chilling the yogurt is essential to stop the fermentation process and develop the final texture.
- Chilling the Yogurt:
- Remove the lid of the Euro Cuisine yogurt maker and place the individual lids on the jars.
- Transfer the jars to the refrigerator and chill for at least 4 hours, or preferably overnight.
- Chilling allows the yogurt to thicken further and develop its characteristic flavor.
- Storing the Yogurt:
- Once chilled, the yogurt can be stored in the refrigerator for up to a week.
- Ensure the lids are tightly sealed to maintain freshness and prevent contamination.
2.6. Making Flavored Yogurt
One of the benefits of using a Euro Cuisine yogurt maker is the ability to customize the flavor of your yogurt.
- Adding Flavorings:
- Follow the instructions for unflavored yogurt up to step 7 (before filling the jars).
- Pour about 6 ounces of the milk mixture into one jar to reserve unflavored yogurt for your next batch.
- In the remaining milk mixture, whisk in your chosen flavoring. Torani syrups work well because they don’t alter the yogurt’s consistency.
- Use about 1 tablespoon of syrup per jar, adjusting to your preference.
- Filling the Jars:
- Divide the flavored mixture among the remaining jars.
- Continue with the incubation and chilling process as described above.
By following these detailed instructions, you can confidently use your Euro Cuisine yogurt maker to create delicious and healthy yogurt at home.
3. Detailed Recipe: Thick ‘n’ Creamy Yogurt with Euro Cuisine
This recipe ensures you get thick and creamy yogurt every time, without needing to strain it.
3.1. Ingredients
- 1190.68 grams Whole Milk (5 1/4 Cups or 42 Ounces)
- 17.5 grams Fage Greek Yogurt, Unflavored (1 Tablespoon)
Optional Flavorings
- 85 grams Torani Syrup (6 Tablespoons)
3.2. Instructions
How to Make Unflavored Yogurt
- Preheat the Oven:
- Preheat the 9″x13″ glass casserole dish inside the oven at 180° Fahrenheit (82° Celsius).
- Heat the Milk:
- In a double boiler, bring 42 ounces whole milk to 180° Fahrenheit (82° Celsius), whisking regularly.
- Maintain Temperature in Oven:
- Transfer the milk to the oven and let it sit at 180° Fahrenheit (82° Celsius) for 30 minutes.
- Strain the Skin:
- Remove the milk from the oven and use a fine mesh strainer and bowl to strain the skin.
- Rapid Cool the Milk:
- Rapidly cool the milk to 100° Fahrenheit (37° Celsius). Submerge the medium mixing bowl into a larger mixing bowl holding ice water. Whisk consistently while the temperature cools.
- Maintain Temperature Above 95°F:
- Remove the container from the ice bath to keep it from dropping lower than 95° Fahrenheit (35° Celsius).
- Mix in the Yogurt Starter:
- Pour about 1 cup of the milk into a small mixing bowl. Whisk 1 tablespoon of the Unflavored Fage Greek Yogurt into the milk until the yogurt dissolves completely. Pour the mixture back into the rest of the milk and whisk thoroughly.
- Fill the Jars:
- Use a funnel to divide the milk evenly among the 7 glass yogurt jars.
- Incubate:
- Place the yogurt jars in the Euro Cuisine Yogurt Maker – do not include their individual lids.
- Add the lid to the Euro Cuisine maker and turn on the switch – the maker will light up.
- Incubate Undisturbed:
- Let the yogurt incubate undisturbed for 10 hours. Ensure the maker is in a place where it won’t be jostled and the temperature remains fairly even.
- Chill:
- Remove the Euro Cuisine lid and put the smaller lids on the individual jars.
- Place the yogurt in the fridge and chill for at least 4 hours before serving, preferably longer.
- Enjoy:
- Enjoy your thick and creamy homemade yogurt.
How to Make Flavored Yogurt
- Follow Steps for Unflavored Yogurt:
- Follow all the instructions for the unflavored yogurt until step 7.
- Set Aside Unflavored Portion:
- Pour 6 ounces of milk mixture into one of the jars (preferably the middle jar for easy remembering). This jar will remain unflavored for your next yogurt batch.
- Add Syrup to Remaining Mixture:
- In the remaining milk mixture, whisk in the Torani syrup, then divide the mixture among the jars.
- Follow Remaining Steps:
- Follow the rest of the instructions for the unflavored yogurt.
3.3. Recipe Notes
- Milk Choice: Whole milk is recommended for the thickest and creamiest results. Lower fat milk can be used, but the results may vary.
- Milk Quality: The quality of milk can affect the creaminess and smoothness of the yogurt. Experiment with different brands to find the best one.
- Yogurt Starter: Fage Greek Yogurt is recommended as a reliable starter for consistent results. Other starters can be used, but results may vary.
- Temperature Consistency: Maintaining steady temperatures is crucial. Using an oven to maintain the milk temperature can be easier than using a stovetop.
- Flavoring: Torani syrup is preferred because it doesn’t alter the consistency of the yogurt, but you can use other flavorings to your liking.
4. Step-by-Step: Making Greek Yogurt with Euro Cuisine
Greek yogurt is known for its thick and creamy texture. Here’s how to make it using your Euro Cuisine yogurt maker:
4.1. Ingredients
- 907 grams Whole Milk (4 Cups or 32 Ounces)
- 12 grams Fage Greek Yogurt, Unflavored (2 Teaspoons)
4.2. Instructions
- Preheat the Oven:
- Preheat the 8″x8″ glass casserole dish inside the oven at 180° Fahrenheit (82° Celsius).
- Heat the Milk:
- In a double boiler, bring 32 ounces whole milk to 180° Fahrenheit (82° Celsius), whisking regularly.
- Maintain Temperature in Oven:
- Transfer the milk to the oven and let it sit at 180° Fahrenheit (82° Celsius) for 30 minutes.
- Strain the Skin:
- Remove milk from the oven and use a fine mesh strainer to strain the skin into a bowl.
- Rapid Cool the Milk:
- Rapidly cool the milk to 100° Fahrenheit (37° Celsius). Submerge the medium container into a larger container containing ice water. Whisk consistently while the temperature cools.
- Maintain Temperature Above 95°F:
- Remove the container from the ice bath to keep it from dropping lower than 95° Fahrenheit (35° Celsius).
- Mix in the Yogurt Starter:
- Pour a small portion of the milk into a small mixing bowl. Whisk 2 teaspoons of the Unflavored Fage Greek Yogurt into the small amount of milk until the yogurt dissolves completely. Pour the mixture back into the rest of the milk and whisk thoroughly.
- Pour into Glass Container:
- Pour the milk into a 32-ounce glass container (this size fits comfortably inside the Euro Cuisine maker).
- Incubate:
- Place the glass container in the Euro Cuisine – do not include its individual lid.
- Add the lid to the Euro Cuisine maker and turn on the switch – the maker will light up.
- Incubate Undisturbed:
- Let the yogurt incubate undisturbed for 10 hours. Make sure the maker is in a place where it won’t be jostled and the temperature remains fairly even.
- Chill:
- Remove the Euro Cuisine maker lid and put a lid on the glass container.
- Place the yogurt in the fridge and chill for at least 8 hours, preferably overnight.
- Set Aside Yogurt for Next Batch:
- Remove the yogurt from the fridge and set aside some unflavored regular yogurt for making your next batch (about a tablespoon or a 6-ounce Euro Cuisine jar).
- Strain the Whey:
- Drape a cheesecloth over a colander and place it over a bowl or container.
- Place the yogurt in the cheesecloth and let strain in the fridge until yogurt reaches the desired consistency (about 1.5 to 2 hours for perfectly thick yogurt).
- Store:
- Scoop the Greek yogurt into a container with a lid and keep in the fridge until serving. Discard the whey or use it to make more yogurt.
4.3. Recipe Notes
- Straining Time: Adjust the straining time to achieve your desired thickness.
- Whey: Save the whey to use as a starter for future batches or discard it.
- Milk Choice: Whole milk is recommended for the best results.
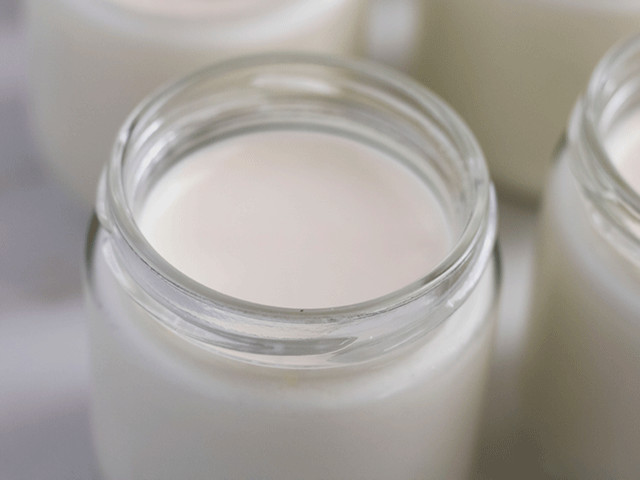 thick and creamy yogurt in a jar made with Eurocuisine yogurt maker
5. Troubleshooting Common Yogurt Making Issues
Even with the best instructions, you might encounter some issues. Here’s how to troubleshoot common problems when making yogurt with your Euro Cuisine yogurt maker:
5.1. Yogurt Is Too Sour
- Possible Causes:
- Too much culture
- Incubation time too long
- Incubation temperature too high
- Poor culture quality
- Old milk
- Solutions:
- Use less culture
- Reduce incubation time
- Ensure the yogurt maker maintains a consistent temperature
- Use a fresh, high-quality culture
- Use fresh milk
5.2. Yogurt Is Runny
- Possible Causes:
- Too little culture
- Short incubation time
- Incubation temperature too low
- Expired culture
- Solutions:
- Use more culture
- Increase incubation time
- Ensure the yogurt maker maintains a consistent temperature
- Use a fresh culture
5.3. Yogurt Is Lumpy
- Possible Causes:
- Inconsistent temperatures
- Jostling during incubation
- Culture with thickeners or additives
- Solutions:
- Maintain consistent temperatures
- Avoid moving the yogurt maker during incubation
- Use a pure yogurt culture
- Strain and whisk the yogurt to smooth the texture
5.4. Yogurt Is Stringy
- Possible Causes:
- Unreliable temperature control
- Milk temperature dropped too low when adding culture
- Non-dairy yogurt culture used with dairy milk
- Solutions:
- Contact customer support if the yogurt maker isn’t maintaining temperature
- Ensure milk temperature is above 95°F (35°C) when adding culture
- Use the appropriate culture for the type of milk
5.5. Yogurt Is Grainy
- Possible Causes:
- Culture with additives or thickeners
- Heating milk too quickly
- Culture not mixed thoroughly
- Solutions:
- Use a pure yogurt culture
- Heat the milk slowly
- Mix the culture thoroughly into the milk before incubation
5.6. Yogurt Is Foamy
- Possible Causes:
- Cross-contamination with yeast
- Solutions:
- Practice good kitchen hygiene and food safety
- Ensure no yeast from bread making or fruit fermentation contaminates the yogurt
6. Optimizing Your Euro Cuisine Yogurt Maker for Best Results
To get the best results from your Euro Cuisine yogurt maker, consider these optimization tips:
- Use High-Quality Ingredients: The quality of your milk and yogurt starter greatly affects the final product.
- Maintain Consistent Temperatures: Accurate temperature control is crucial. Use a reliable thermometer and consider using the oven method for consistent heat.
- Avoid Jostling: Keep the yogurt maker in a stable location during incubation to prevent textural issues.
- Experiment with Flavors: Once you’ve mastered the basic recipe, experiment with different flavorings to create unique and delicious yogurts.
- Monitor Incubation Time: Adjust the incubation time to achieve your preferred level of tanginess. Longer incubation times result in more sour yogurt.
- Strain for Greek Yogurt: If you prefer Greek yogurt, strain the yogurt after incubation to remove excess whey and achieve a thicker consistency.
- Cleanliness: Always ensure your equipment is clean to prevent contamination and ensure the best possible results.
7. The Science Behind Making Yogurt: Why These Instructions Work
Understanding the science behind yogurt making can help you troubleshoot issues and optimize your process. Here’s a breakdown of the key scientific principles:
- Denaturing Milk Proteins: Heating the milk to 180°F (82°C) denatures the whey proteins, which helps create a thicker yogurt. According to research from the University of California, Davis, Department of Food Science and Technology, in July 2023, denaturing milk proteins is essential for creating a smooth and creamy texture.
- Cooling to Optimal Temperature: Cooling the milk to around 100°F (37°C) is necessary because this is the optimal temperature for the yogurt cultures to thrive. If the milk is too hot, it can kill the cultures; if it’s too cold, the cultures won’t ferment properly.
- Fermentation: The yogurt culture contains live bacteria (typically Streptococcus thermophilus and Lactobacillus bulgaricus) that convert lactose (milk sugar) into lactic acid. This process lowers the pH of the milk, causing it to thicken and develop its characteristic sour taste.
- Incubation: Maintaining a consistent temperature during incubation is crucial because it allows the bacteria to ferment at a steady rate. Fluctuations in temperature can lead to inconsistent results.
- Chilling: Chilling the yogurt after incubation slows down the fermentation process and helps the yogurt thicken further. It also improves the flavor and texture.
- Straining: Straining removes whey, which is the liquid left after fermentation. This results in a thicker, creamier yogurt known as Greek yogurt.
By understanding these scientific principles, you can adjust your yogurt-making process to achieve the best possible results with your Euro Cuisine yogurt maker.
8. Eurodrip USA: Your Partner in Achieving Perfect Yogurt
While eurodripusa.net primarily focuses on providing advanced drip irrigation solutions, we understand the importance of a balanced and healthy lifestyle. That’s why we’re providing this guide to help you make the most of your Euro Cuisine yogurt maker. We know that the same attention to detail and quality that goes into our drip irrigation systems is also essential for making perfect homemade yogurt.
At eurodripusa.net, we are committed to providing valuable information and resources to our customers. Whether you’re looking to optimize your garden’s irrigation or create delicious, healthy yogurt at home, we’re here to support you.
9. Benefits of Making Your Own Yogurt
Making your own yogurt at home with a Euro Cuisine yogurt maker offers numerous benefits compared to buying store-bought yogurt:
- Cost-Effective: Making yogurt at home can save you money in the long run, as the cost of milk and a small amount of starter yogurt is typically less than buying individual containers of yogurt.
- Healthier: Homemade yogurt contains no artificial additives, preservatives, or excessive sugar. You have complete control over the ingredients, making it a healthier option.
- Customizable: You can easily customize the flavor and sweetness of your yogurt by adding your favorite fruits, syrups, or sweeteners.
- Probiotic Rich: Homemade yogurt contains live and active cultures, which are beneficial for gut health.
- Environmentally Friendly: Making your own yogurt reduces plastic waste from store-bought containers, making it a more sustainable choice.
- Freshness: Homemade yogurt is often fresher and tastes better than store-bought yogurt, especially when made with high-quality ingredients.
10. Frequently Asked Questions (FAQs) About Using a Euro Cuisine Yogurt Maker
- Can I use different types of milk to make yogurt with the Euro Cuisine yogurt maker?
- Yes, you can use various types of milk, including whole milk, 2% milk, skim milk, and even non-dairy milk like almond or soy milk. However, whole milk typically produces the thickest and creamiest results.
- How long does it take to make yogurt with the Euro Cuisine yogurt maker?
- The incubation process typically takes around 10 hours. After incubation, the yogurt needs to be chilled in the refrigerator for at least 4 hours to fully set.
- What kind of yogurt should I use as a starter for my homemade yogurt?
- Unflavored Greek yogurt with live and active cultures, such as Fage, is recommended. Ensure the yogurt contains no additives or thickeners.
- Can I make flavored yogurt directly in the Euro Cuisine yogurt maker?
- Yes, you can add flavorings after the milk has cooled but before it is poured into the jars. Mix the flavorings thoroughly to ensure even distribution.
- How do I store homemade yogurt, and how long does it last?
- Store homemade yogurt in the refrigerator in airtight containers. It typically lasts for up to a week.
- What if my yogurt is too runny?
- If your yogurt is too runny, try increasing the incubation time in your next batch or using whole milk instead of lower-fat milk. You can also strain the yogurt through a cheesecloth to remove excess whey.
- Is it necessary to heat the milk before making yogurt in the Euro Cuisine yogurt maker?
- Yes, heating the milk to 180°F (82°C) is essential to denature the milk proteins, resulting in a thicker yogurt.
- Can I reuse yogurt from a previous batch as a starter for a new batch?
- Yes, you can reuse yogurt from a previous batch as a starter, but the quality of the yogurt may decrease after several generations. It’s best to use a fresh starter every few batches.
- What are the benefits of using a Euro Cuisine yogurt maker over other methods?
- The Euro Cuisine yogurt maker provides consistent temperature control, which is crucial for successful yogurt making. It also offers individual jars, making portioning and storage easy.
- How do I clean the Euro Cuisine yogurt maker and its components?
- Wash the glass jars and lid with warm, soapy water. The base of the yogurt maker can be wiped clean with a damp cloth. Avoid immersing the base in water.
By following this comprehensive guide, you can confidently use your Euro Cuisine yogurt maker to create delicious and healthy yogurt at home. Whether you’re a seasoned yogurt maker or just starting out, these tips and instructions will help you achieve perfect results every time.
Ready to take your yogurt-making skills to the next level? Visit eurodripusa.net today to explore our range of products and resources. Contact us now to discover how our advanced drip irrigation solutions can help you grow a healthier garden and enjoy a more sustainable lifestyle.