
Looking for a unique and fun way to gift money? Tired of the same old cards and envelopes? As a content creator always searching for innovative ideas, I stumbled upon a particularly amusing and memorable method for presenting a cash gift: the Euro Gyro. This creative approach transforms ordinary euros into a playful and unexpected present, perfect for birthdays, graduations, holidays, or any special occasion, especially if the recipient has a trip to Europe on the horizon!
The inspiration for this quirky gift came about when brainstorming Christmas presents for my nephew, Timothy, who lives out of state. Gift-giving can be a delightful challenge, especially when you aim for something more imaginative than just a check. With Timothy’s high school graduation trip to Europe approaching, gifting euros seemed fitting. However, simply handing over some foreign currency lacked the element of surprise and fun I was after. During a dinner conversation, a humorous mix-up between “euros” and “gyros” sparked an idea – why not combine the two? And thus, the Euro Gyro was born!
This DIY project is surprisingly simple and guaranteed to bring a smile to the recipient’s face. It’s a fantastic way to present euros (or any currency, really!) in a memorable and engaging way. Here’s how you can create your own Euro Gyro:
Materials You’ll Need:
- Euros: The star of the show! Visit your local bank to exchange for euros. Many banks offer this service without fees and keep euros in stock for easy access.
- Felt: Tan, white, and red felt sheets. These will form the pita bread and gyro toppings. You can find felt at most craft stores or online, like these options on Amazon for felt sheets.
- Scissors: For cutting the felt into the desired shapes.
- Needle and Tan Thread: To sew the felt pita bread together.
- Polyfil Stuffing: To give your felt pita a puffy, realistic look. Consider Polyfil from Amazon.
- Easter Grass: Green Easter grass to mimic lettuce in the gyro. Easter grass options on Amazon are readily available.
- Gyro Wrapper: To complete the authentic gyro look. The easiest way to obtain one is from a restaurant that sells gyros.
- Arby’s Bag (or similar): Optional, but using a bag from a gyro-selling restaurant enhances the prank element.
Step-by-Step Guide to Crafting Your Euro Gyro:
-
Prepare the Pita Bread Base: Cut two circles from the tan felt, approximately the size of a pita bread. Using a whipstitch and tan thread, sew the two circles together, leaving a small opening.
 Tan felt circles cut for pita bread
 -
Stuff and Sew the Pita: Gradually add Polyfil stuffing through the opening, a little at a time, until the felt pita reaches your desired puffiness. Once you’re satisfied with the shape, sew the opening closed.
-
Create the Gyro Fillings: Cut red felt into small semi-circles to represent tomato slices. Cut white felt to resemble tzatziki sauce – you can get creative with the shape! Fold your euro bills lengthwise. Take a bit of Easter grass to represent lettuce.
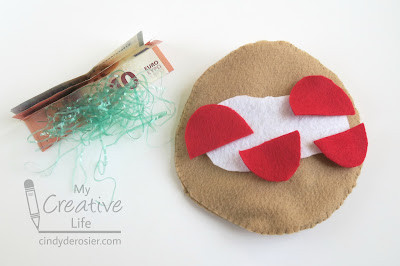 Euro bills, felt tomatoes and tzatziki, and Easter grass
 -
Assemble and Wrap Your Euro Gyro: Layer the folded euro bills (the “meat” of your gyro) inside the felt pita. Add your felt tomato slices, white felt “tzatziki”, and Easter grass “lettuce”.
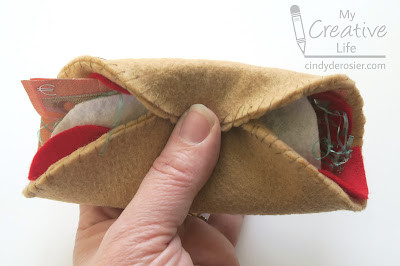 Layering euro bills and felt toppings into the felt pita
 -
Final Touches: Fold the felt pita over to resemble a gyro. Wrap it in a gyro wrapper. If you can’t get a wrapper, foil works just fine too! For an extra touch of authenticity, crumple up the Arby’s bag a bit and place your Euro Gyro inside.
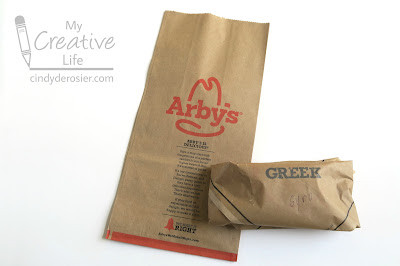 Euro Gyro wrapped in a gyro wrapper
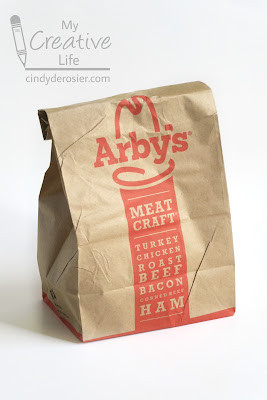 Euro Gyro in an Arby's bag
The Big Reveal – and Why This Gift Works
Presenting the Euro Gyro is part of the fun! You can hand it over with a straight face, pretending you simply got them lunch. The initial confusion followed by the realization that it’s a clever money gift is priceless. In my case, Timothy was thoroughly amused by the Euro Gyro, and that’s the ultimate goal – to make gift-giving a joyful and memorable experience.
This Euro Gyro DIY project is not only a creative way to give money but also a testament to thoughtful and personalized gifting. It shows you put in extra effort and imagination, making the gift far more special than just the cash itself. So, next time you’re looking for a unique money gift idea, consider crafting a Euro Gyro – it’s guaranteed to be a hit!