
This blog post is brought to you with the support of my Patreons.
I realized it’s been quite a while since I last updated this sewing project on my blog – it was back in 2014 when I moved to this current address! Time really flies. Considering this is an older tutorial, I appreciate your patience. I truly hope this guide will still be helpful as you embark on creating your own Eura dress.
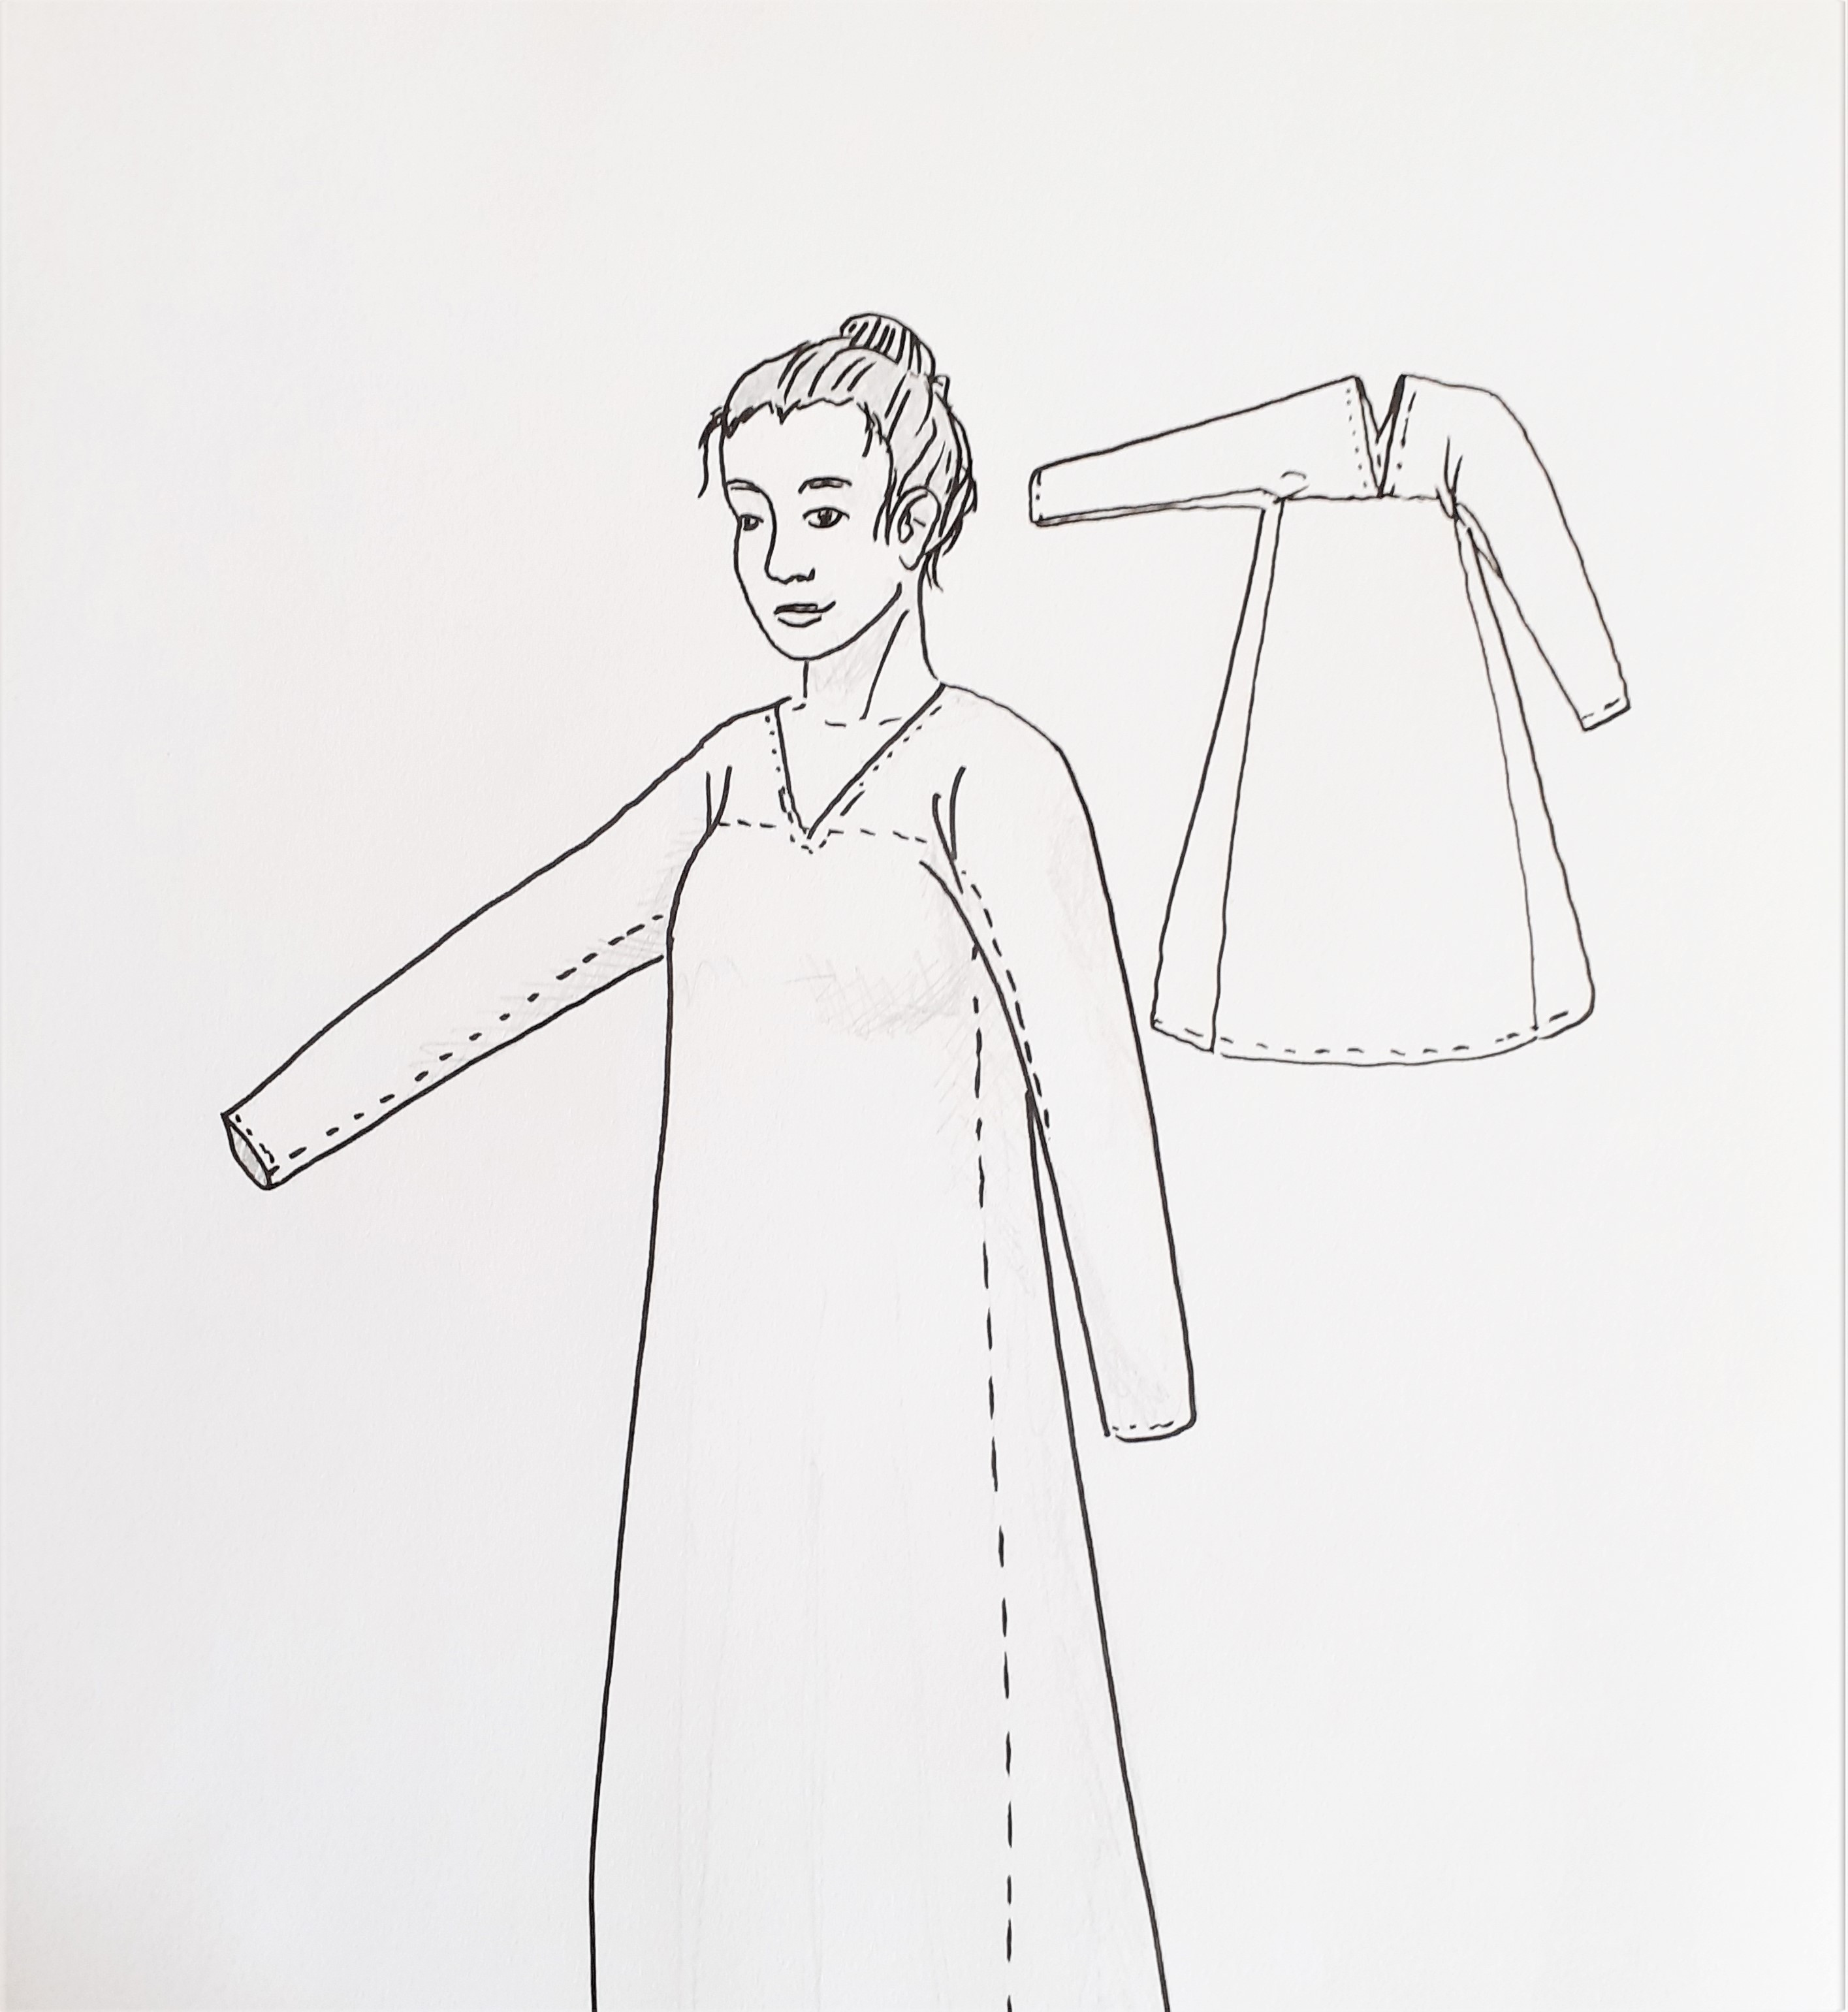 Pattern diagram for the Eura dress
Materials and Tools You’ll Need:
- Fabric (150 cm width): 200-240 cm length (linen or wool recommended for historical accuracy)
- Measuring tape
- Fabric scissors
- Tailor’s chalk or fabric marker
- Matching threads and hand sewing needle
- Long ruler or straight stick
Taking Accurate Measurements for Your Eura Dress
The Eura dress construction diverges from typical Viking and medieval garment patterns, making it a unique and interesting project. The initial measurements you take will determine the dimensions of your sleeve piece, which in turn dictates the rest of the pattern.
To measure the sleeve length, position the measuring tape at the center of your throat and extend it along your arm down to your thumbnail. This extended measurement ensures a comfortable range of motion and prevents sleeves that are too short.
For my measurements, this came out to 74 cm, while my standard sleeve pattern length is usually 66 cm.
Next, determine the base (width) of your sleeve. Place the measuring tape approximately one hand-width below your collarbone. Drape it across your shoulder towards your back, taking the measurement at your back when you reach a point parallel to your starting point at the front of your body. Having a friend assist with this step can be beneficial for accuracy.
My measurement here is 40 cm. This might be suitable for sizes small to medium. Larger sizes will likely require a greater measurement. If your measurements differ significantly from mine, it’s crucial to draft your pattern pieces in a way that works for your proportions. While the principle remains the same, your draft may look quite different from the example provided.
Important Note: The sleeve base measurement also serves as the upper width for both the front and back dress panels. The “15 cm” mark in the draft indicates approximately where my wrist would be. This isn’t the full wrist circumference because a long gore will be added to provide ample width for arm movement. In hindsight, I would advise making this initial wrist width measurement at least the circumference of your wrist. I can’t recall my exact reasoning for not doing so originally, but for a better fit, I recommend considering this adjustment.
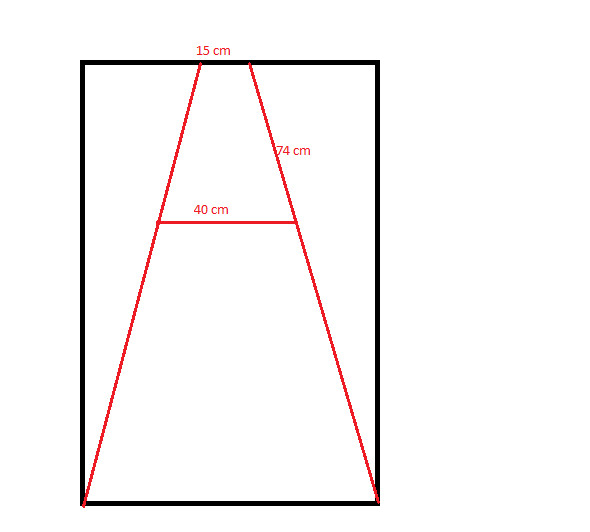 Diagram of Eura dress pattern pieces on folded fabric
This diagram illustrates my pattern pieces laid out on folded fabric. The fabric is folded in half widthwise (resulting in 75 cm), and the dress pieces are drafted along the length. This visual helps you estimate the fabric needed: the length of the sleeve measurement plus the desired dress length from about a hand-width below your collarbone to the bottom hem. Remember to include seam allowances, which aren’t marked on this older draft.
Drafting Your Personalized Eura Dress Pattern:
- Fold Your Fabric: Begin by folding your fabric in half lengthwise, selvedge to selvedge.
- Establish the Center Line: Mark a line down the center of the folded fabric using tailor’s chalk or a fabric marker. This will be your vertical guide (represented by red dots in the diagram).
- Wrist Width: Starting at the top of your center line (highest point on the fold), mark half of your desired wrist width on either side of the center line. This establishes the width of the sleeve at the wrist.
- Sleeve Length: Measure down from the wrist width marking along the center line, marking your sleeve length measurement. This is the green line in the diagram, extending from the wrist to the sleeve base.
- Sleeve Base Width: At the end of your sleeve length line (green line), mark half of your sleeve base width on each side of the center line. This is the purple line. Ensure this line is at a 90-degree angle to your sleeve length line.
- Sleeve Shape: Connect the edges of the purple sleeve base line to the wrist width markings using straight lines. These lines form the angled edges of the sleeves (thin lines surrounding the blue sleeve area). The blue area in the diagram represents the sleeve piece.
- Front and Back Panels: Extend lines straight down from the edges of the sleeve base (purple line) to the bottom corners of your folded fabric. These pink lines in the diagram outline the front and back body pieces (pink area). A long ruler or measuring tape is very helpful for creating these long, straight lines.
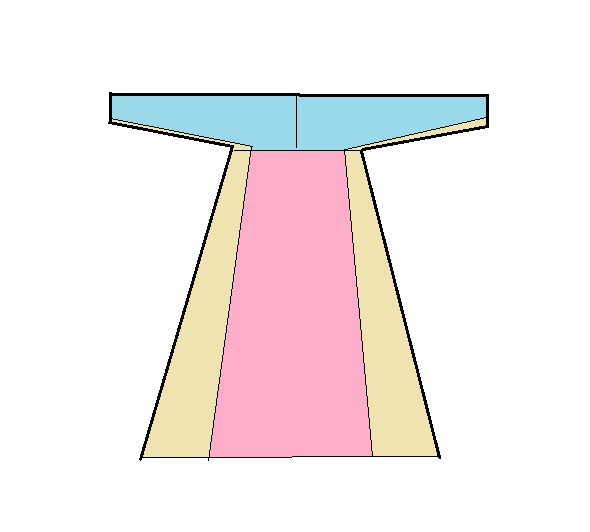
That’s your basic pattern draft! The blue section is for the sleeves, the pink sections are your front and back panels, and the yellow areas represent the fabric for your side gores. You will have one full gore piece and two half gore pieces due to the fabric fold. Cut out all pieces through both layers of the folded fabric. Using pins to secure the layers along your drawn lines can prevent fabric shifting during cutting.
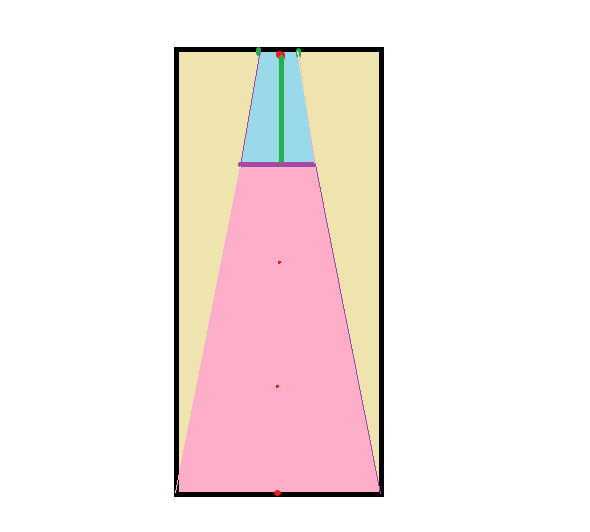 Diagram showing Eura dress pieces cut out
Step-by-Step Sewing Order for Your Eura Dress:
- Prepare the Side Gore: One of the side gore pieces will be cut in two halves due to the fabric fold. Sew these two halves together along their long edge to create one complete gore piece. Alternatively, to mimic historical techniques, you can create a “false seam” down the center of the full gore piece. False seams were sometimes used in historical garments to create a symmetrical appearance by sewing a very narrow seam in a single piece of fabric.
- Join Sleeve Bases: Sew the base edges of the sleeves together, but only sew a short seam of about 1-2 cm at each edge. This creates a small join at the shoulder and leaves an opening in the center for the neckline. Leaving this partial seam makes it easier to sew the rest of the dress pieces. The open area between the sleeve bases will form your neckline. You will finish the neckline later.
- Attach Sleeves to Front and Back Panels: Sew the sleeves to the front panel. I find it easiest to start at the center front point and sew outwards towards each edge of the front panel. Repeat this process to attach the sleeves to the back panel.
- Insert Side Gores: Add the side gores. I began sewing the gores from the hemline of the dress upwards towards the wrists. My reasoning was to maximize the use of the full width of the gore base, as the gore piece might be slightly longer than the sections it’s being attached to. (This approach might also explain why I initially made the wrist circumference quite small – I gained extra width from the side gore before trimming any excess fabric. However, in retrospect, starting from the wrist and sewing downwards towards the hem might provide better control for shaping the bottom hem evenly, allowing you to trim the corners of the side gores as needed). I highly recommend pinning or basting the side gores in place before sewing to ensure even distribution and prevent puckering.
- Hemming and Neckline: Try on the dress. Adjust the bottom hem and sleeve hems to your desired lengths. Fold the hems inwards and whipstitch them in place for a clean finish.
- Adjust the Neckline: Refine the neckline opening to your preference for both the front and back. On my dress, I closed the back neckline seam about 4 cm from the sleeve base join and then hemmed the entire neckline opening using whipstitch.
 Eura dress construction detail showing sleeve and gore
Tips for Adjustments and Fitting:
- Gore Length: Side gores might end up being slightly too long. Check the length before sewing them in completely and trim any excess fabric after reaching the wrist point.
- Overall Fit: This dress design tends to be loose-fitting. If you prefer a more fitted silhouette, adjust the seams along the side gores and the front/back panels to take it in as needed.
- Hemline Check: Put the garment on again to evaluate the bottom hem length and adjust it to achieve a visually pleasing and even hemline.
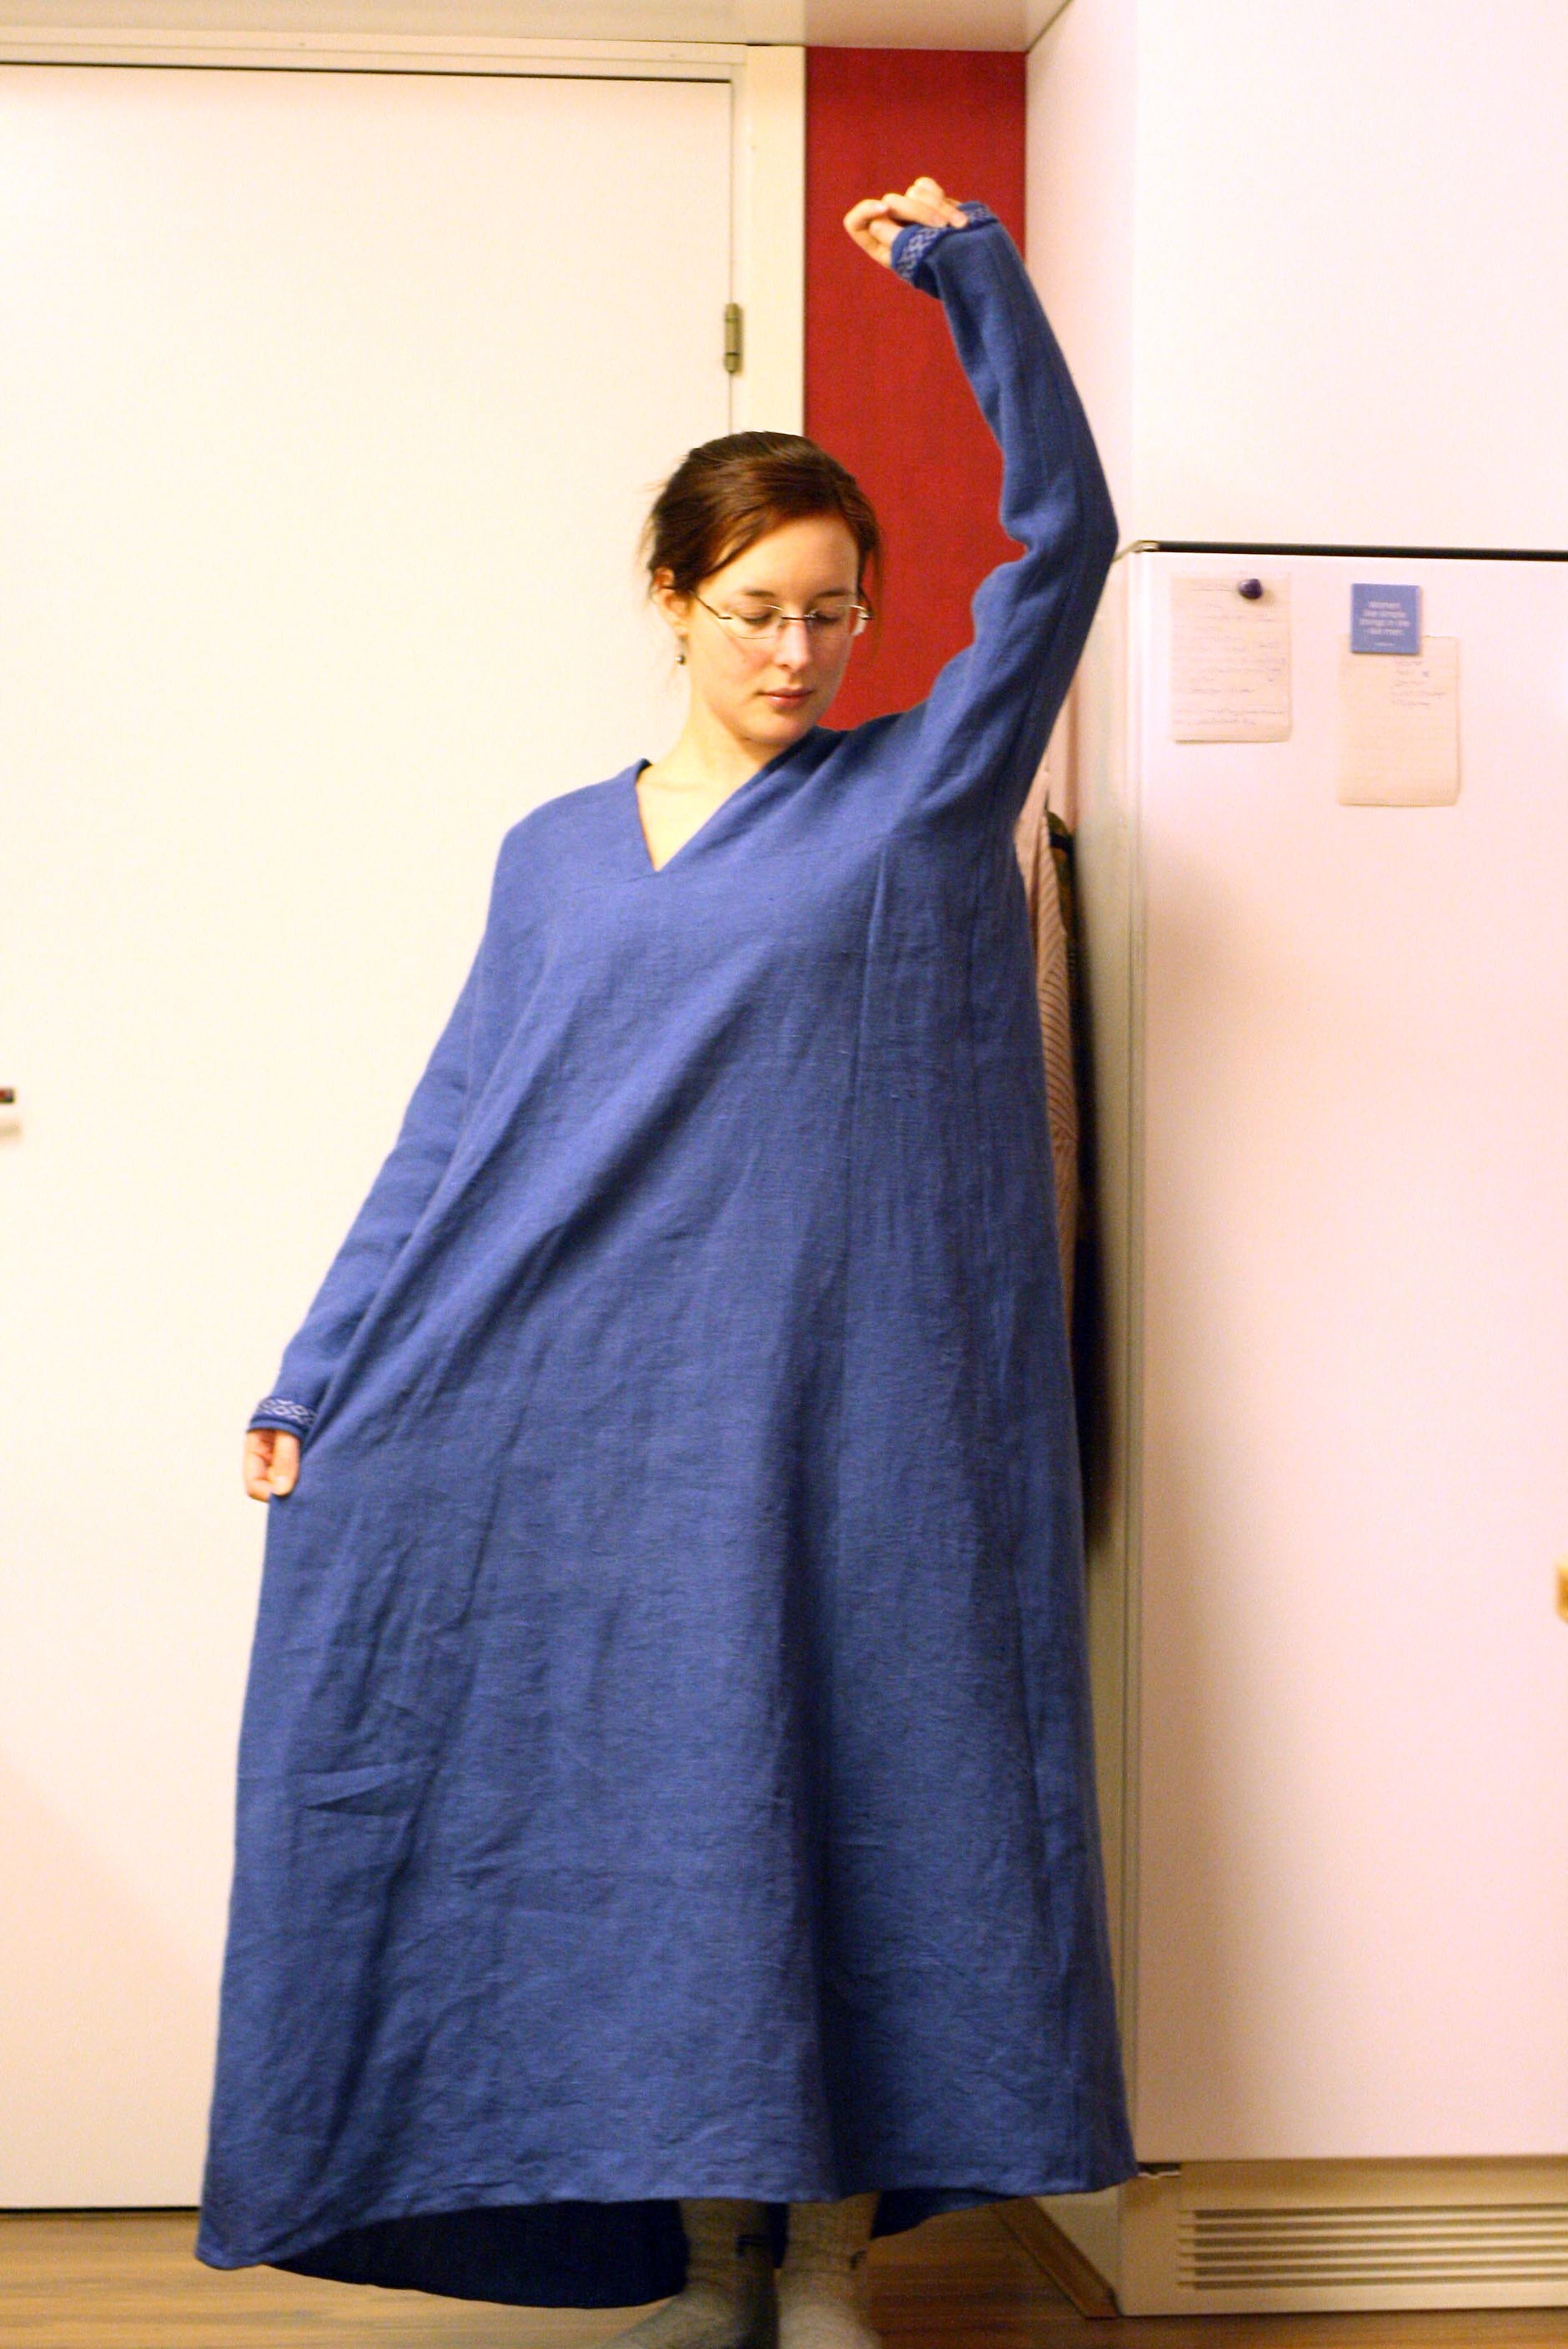 Finished Eura dress on a person
Delving into the History of the Eura Dress Find:
The Eura dress finds originate from Eura, Finland, and are dated back to the Iron Age. This remarkable discovery provides invaluable insights into Finnish clothing styles and wearing practices of the period. It has been extensively documented and recreated, becoming a significant element in Finnish historical clothing culture.
The Eura dress represents a distinct style compared to typical Swedish and Norwegian Viking Age attire. However, the peplos or overdress aspect shares similarities with other early peplos finds and the early Viking Age clothing from Gotland. Interestingly, the Eura dress’s unique construction method, as detailed in this tutorial, also bears resemblance to other Scandinavian finds, such as the medieval Uvdal dress discovered in Norway. This highlights the interconnectedness of textile traditions across the region.
Explore Further: Resources for Deeper Learning
- “Ancient Finnish costume” by Pirkko-Liisa Lehtosalo-Hilander: A comprehensive academic source on Finnish historical clothing.
- Article on the Uvdal dress: Medieval Tunics from Uvdal in Norway: Explore the similarities in construction techniques between Eura and Uvdal garments.
- “Prehistoric Eura”: This resource offers broader context about the Eura region and may include images of reconstructed Eura costumes, offering visual inspiration.
Thank you for exploring the fascinating world of historical sewing with this Eura dress tutorial! We hope you enjoy creating your own piece of Iron Age inspired clothing.