
For dedicated hunters, the pursuit of game is a significant investment of time, energy, and resources. Beyond scouting locations, meticulously selecting gear, ensuring proper meat care, and managing logistical challenges, preserving the trophy often becomes an afterthought. However, thoughtfully considering trophy care before even stepping into the field is crucial. Among the various methods for preserving your hunting achievements, the European mount stands out as a favorite. A skillfully cleaned skull provides an economical and aesthetically pleasing display option for most hunters. For those inclined towards DIY projects, achieving a professional-quality Euro mount is entirely feasible with the right techniques and attention to detail. This guide will walk you through the process of creating your own impressive Euro Mount Deer skull.
Initial Steps: Head Removal and Skinning for Your Euro Mount

Alt text: Hunter carefully removing deer head at atlas joint in the field, preparing for euro mount trophy.
The journey to a stunning euro mount deer trophy begins the moment your hunt is successful. A common issue encountered when hunters seek professional euro mount services is the presence of excessive neck meat and vertebrae still attached to the skull. To streamline the skull cleaning process and conserve meat, remove the deer head at the atlas joint, the point where the skull base connects to the neck’s last vertebra. Detaching the head at this juncture significantly simplifies subsequent steps.
If your hunt is within your home state and crossing state lines isn’t a factor, it’s advisable to leave the hide intact on the skull. The hide acts as a natural barrier, preventing the meat from drying out and dehydrating the skull, which can complicate the whitening stage later on. However, if you’re hunting out of state and regulations require skull preparation for transport, a few methods exist. Begin by removing the hide from the head. A replaceable scalpel blade knife is ideal for this task. Initiate an incision at the back of the head/neck area and carefully run the knife spine along the skull’s top, between the eyes, and down to the snout. Crucially, always direct the knife blade away from the bone to avoid scoring the skull, which will be noticeable on the finished euro mount. If the skull has antlers, utilize a flat-head screwdriver to gently pry the hide away from the antler bases (burs). This prevents accidental knife slips that could mar the bone around the antler bases, leaving unsightly marks on your final euro mount deer display.
Methodically work the hide off the skull, progressing down each side, around the eyes, and tear ducts. Sever the ears at their skull base and continue towards the lower jaw area. Exercise extra caution around the nose to prevent inadvertently cutting away bone or cartilage.
Preparing the Skull: Removing the Lower Jaw and Eyes
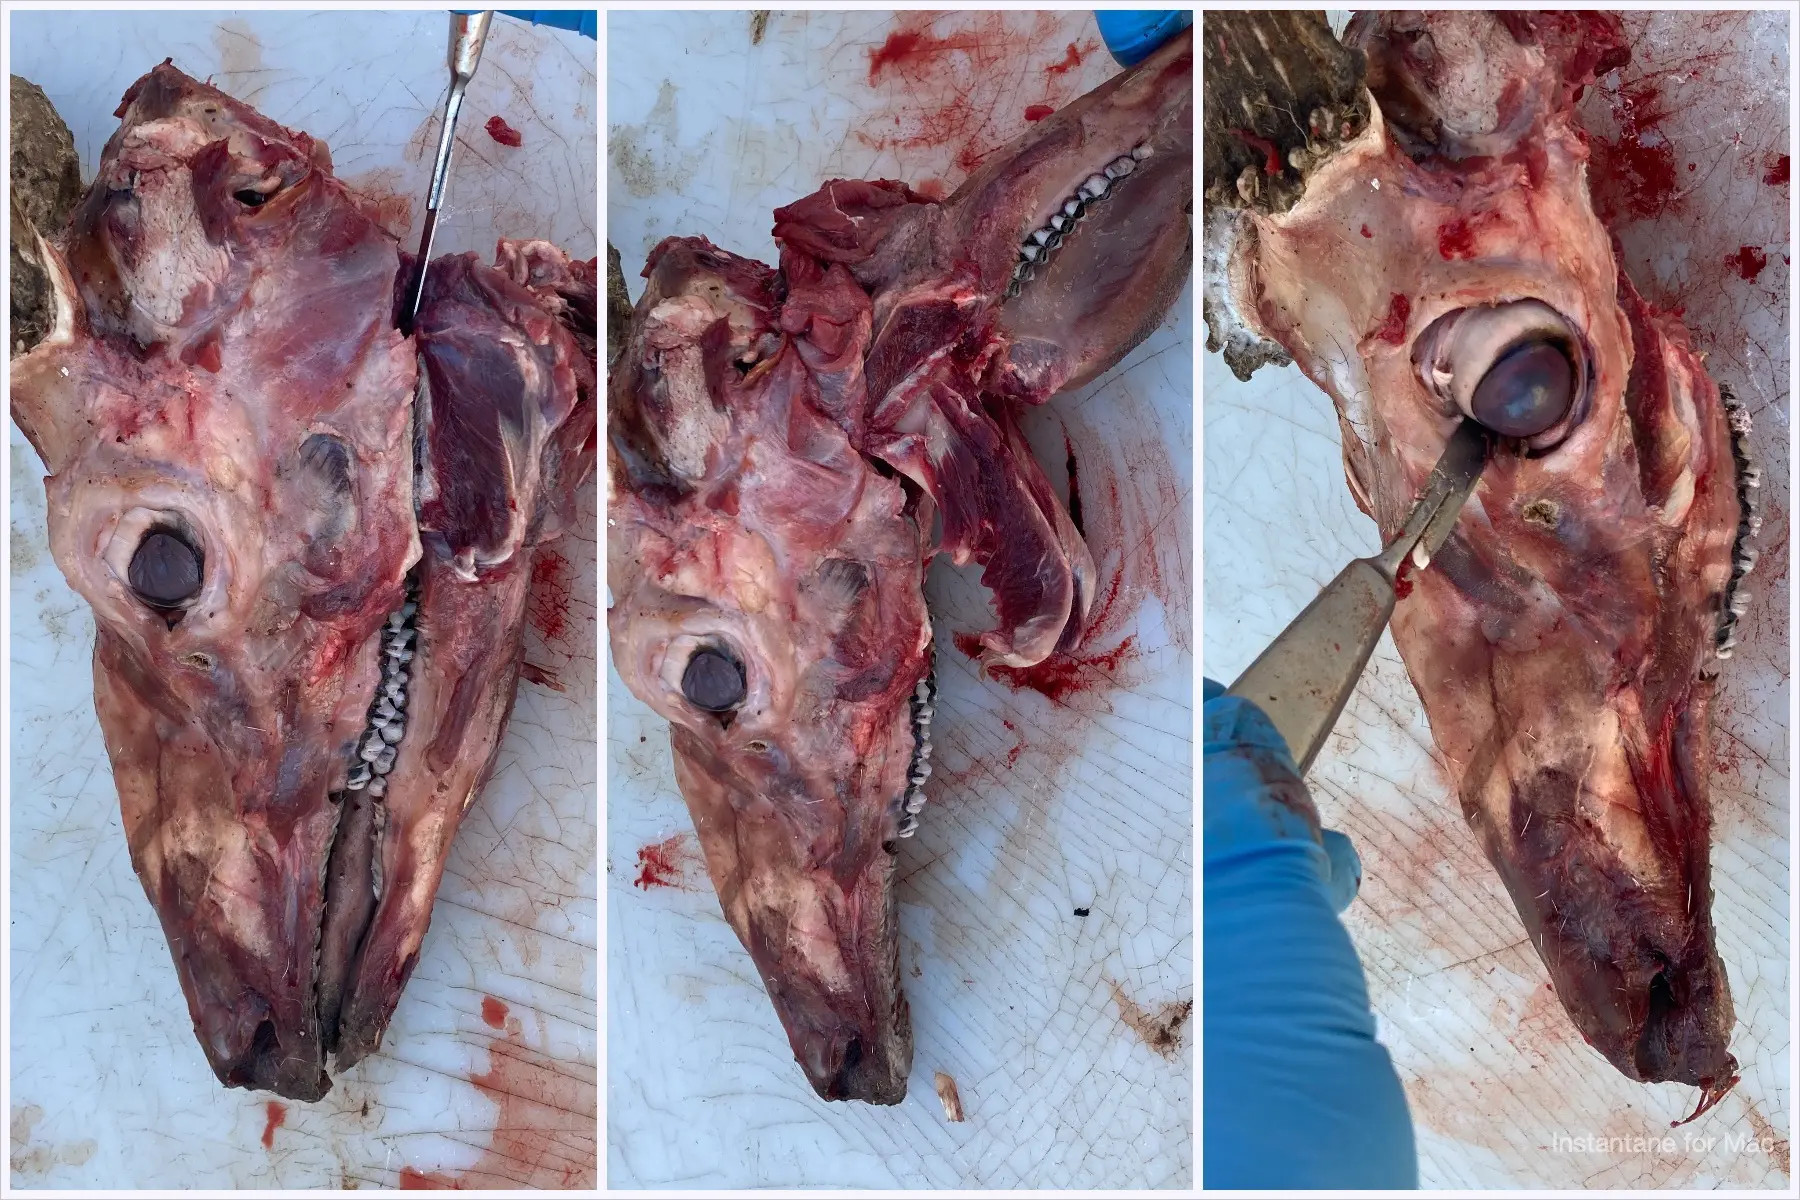
Alt text: Hands demonstrating removal of deer lower jaw from skull in preparation for euro mount cleaning.
With the hide fully removed from the deer skull, the next step involves detaching the lower jaw. Begin by making two incisions along the outer side of the jawbone, extending from the rear of the jaw towards the mouth. These cuts, performed on both sides of the skull, will loosen the muscles securing the jawbone. Next, firmly grasp the snout with one hand and the lower jaw with the other. Open the mouth and continue to widen the opening until the lower jaw is hyperextended backward, causing it to detach. Use your knife to sever any remaining muscle and connective tissue that still attach the lower jaw, as it will only be held by minimal attachments at this point.
Once the lower jaw is removed, proceed to extract the eyes. Using your knife, carefully make a circular incision around the entire circumference of each eyeball. This incision should sever all connective tissue surrounding the eye. Then, invert the skull and insert your knife into the rear of the eye socket, between the skull and orbital bone. Cut through any remaining connective tissue behind the eye. Now, you can easily pull the eye from its socket and detach it with minimal resistance.
After removing both eyes, use your knife to trim away as much excess meat from the skull’s exterior as possible. Minimizing the amount of meat present at this stage will significantly expedite the subsequent cleaning processes for your euro mount deer skull.
Brain Removal: An Essential Step for a Clean Euro Mount
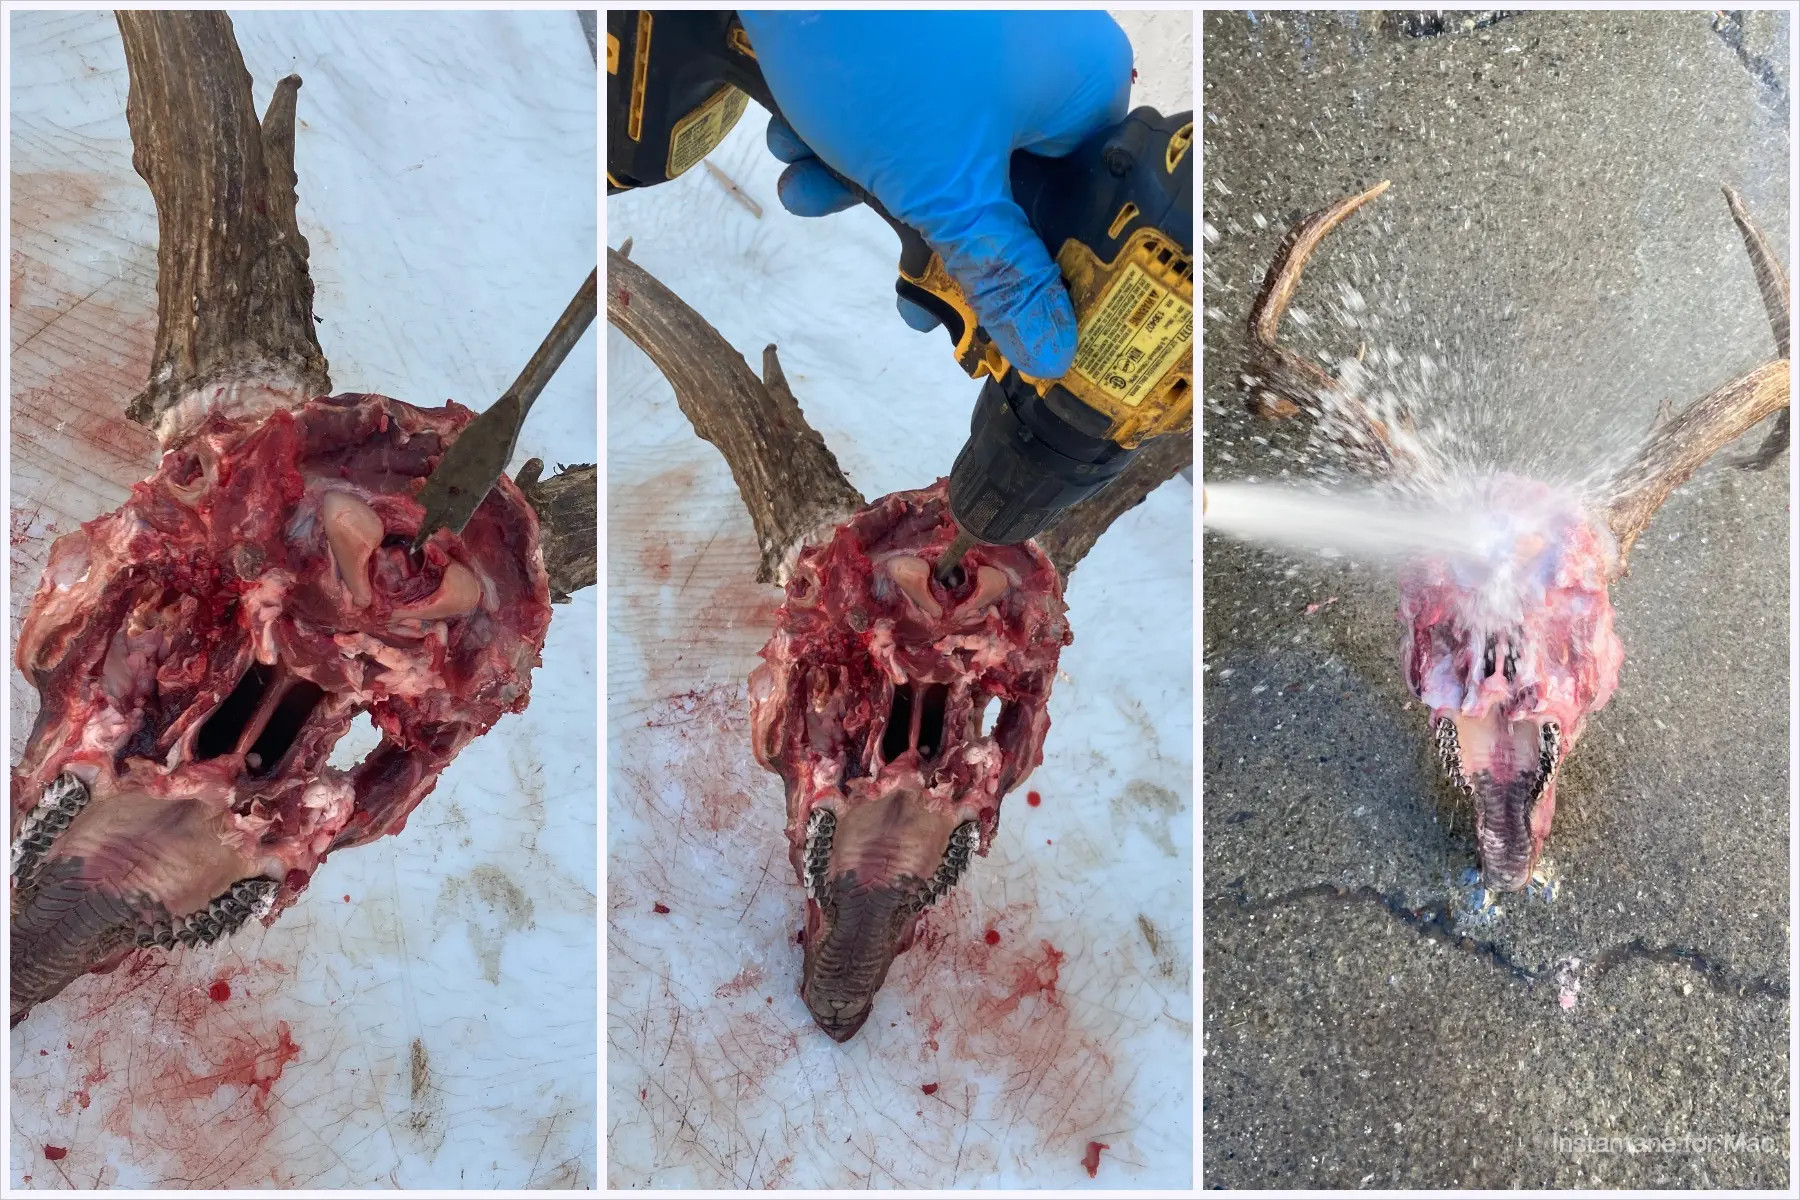
Alt text: Hunter using drill with spade bit to remove deer brain matter for euro mount preparation.
The final step in preparing your deer skull for transport or proceeding with the euro mount cleaning process is brain removal. A drill equipped with a 5/8” flat spade wood bit is an effective tool for this. Insert the drill bit into the foramen magnum, the large opening at the skull’s base where the spinal cord connected. Activate the drill and agitate the brain matter within the skull until it liquefies. Alternatively, a screwdriver or sturdy stick can achieve the same liquefying effect. The goal is to break down the brain’s consistency so it can be easily flushed out with a pressure washer or water hose. Once the brain matter is sufficiently liquefied, step back a safe distance and insert a water hose into the same opening used to access the brain cavity. Flush water through the skull until all brain matter is expelled, and then rinse thoroughly. If you are in a field setting without hose access, a self-service car wash’s pressure washer can be utilized to complete this step before transporting your skull.
Maceration: The Natural Cleaning Power for Your Deer Skull
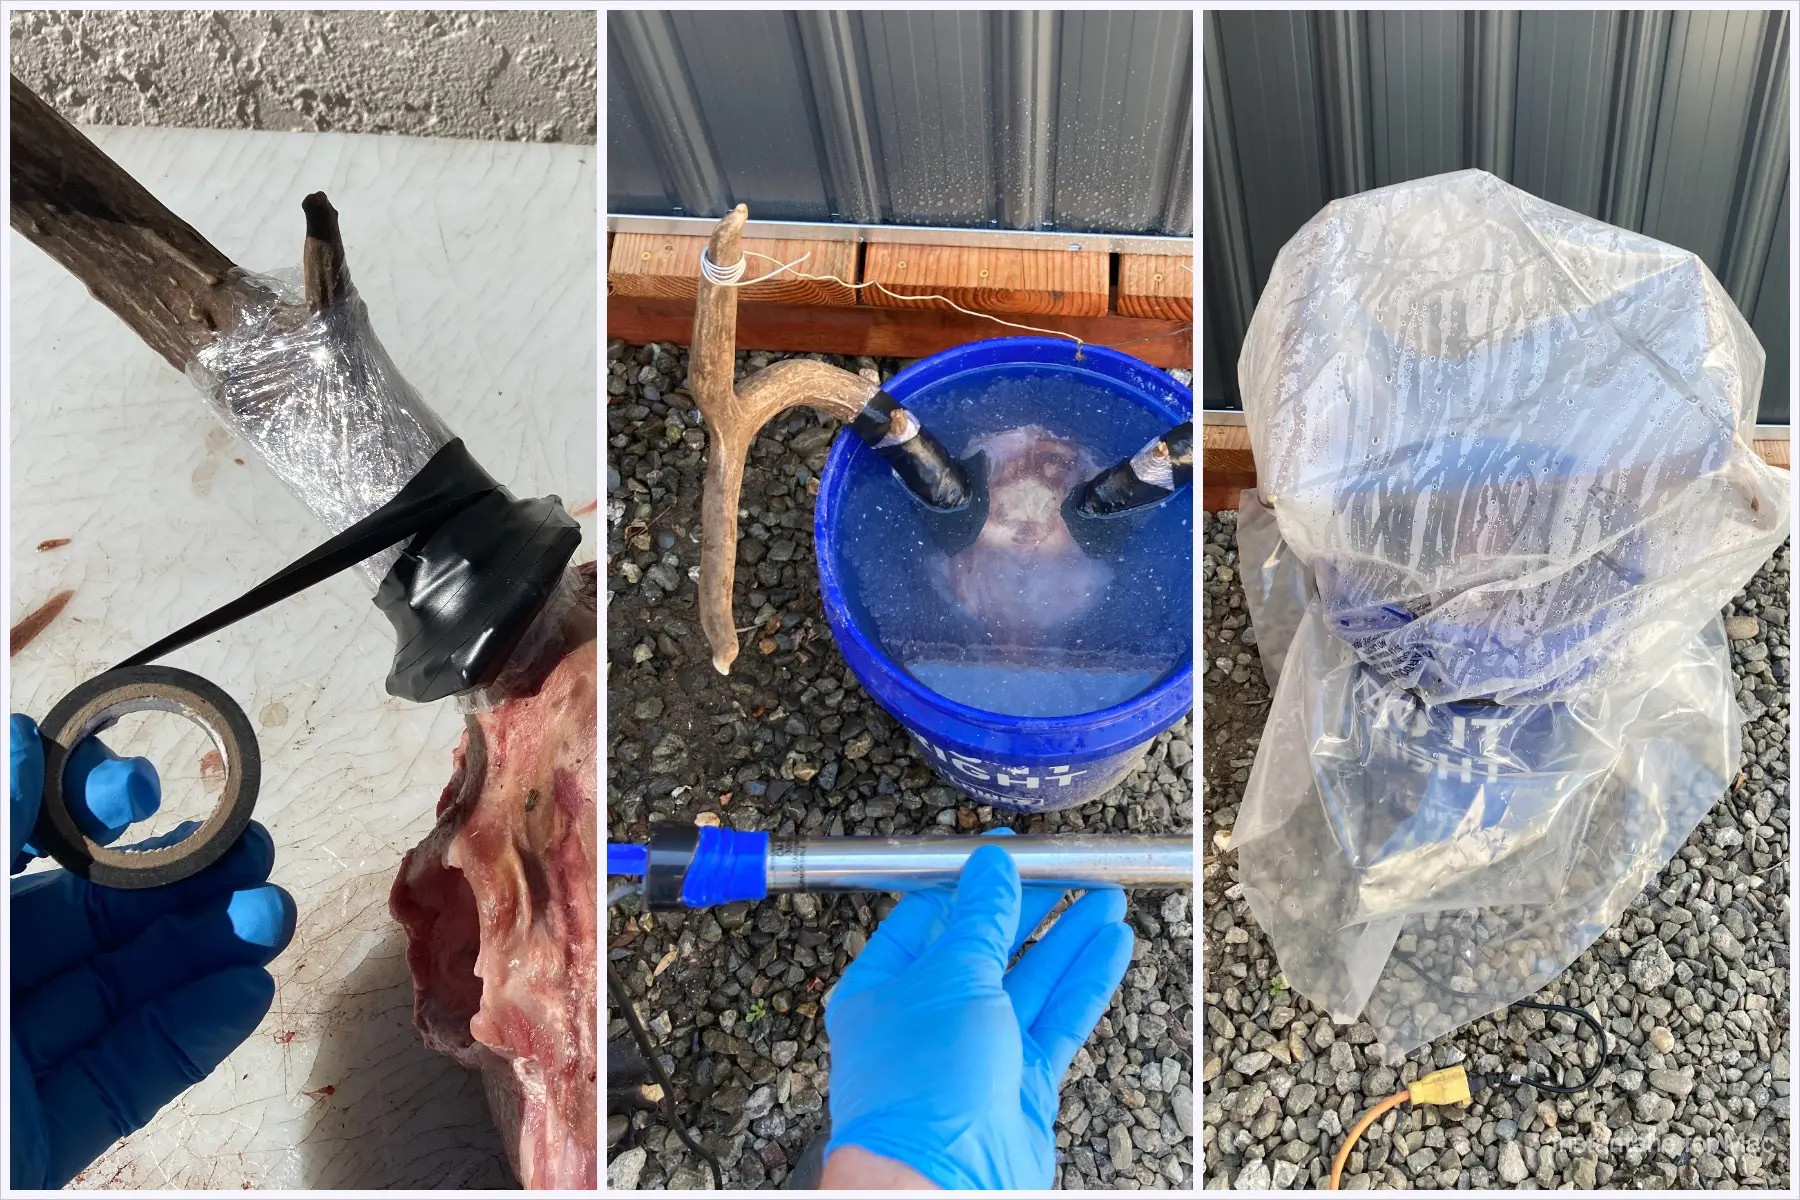
Alt text: Deer skull submerged in water maceration container with heater, euro mount skull cleaning process.
At this stage, your deer skull should be completely devoid of hide, meat, eyes, lower jaw, spinal fluid, and brain matter. It is now ready for transport or to begin the maceration process if you are already at your home or processing location.
Several skull cleaning methods exist, but maceration is a preferred technique for many, especially for euro mounts. Maceration involves soaking the skull in water maintained at a consistent temperature of 80-90 degrees Fahrenheit. This controlled warm water environment promotes optimal bacterial growth. This “slow cooking” of the bones at a steady temperature is advantageous because it preserves even the smallest, most intricate bones that can sometimes be lost or damaged during more aggressive cleaning methods like boiling.
To initiate maceration, you’ll need the following supplies:
- A water-tight plastic container: Choose a container large enough to fully submerge the skull in water. Avoid metal containers, as they can rust and potentially discolor the bone.
- A stainless steel fish tank heater: Select a heater capable of maintaining a water temperature of at least 80°F to encourage ideal bacterial activity.
- Plastic wrap and electrical tape: These are essential for protecting the antler bases. Wrap the antler bases, starting near the skull and extending 6-8 inches upwards, with clear plastic wrap. Then, apply electrical tape over the plastic wrap to create a watertight seal. This barrier prevents antler color loss during maceration. If any antler color is inadvertently lost, it can be touched up later with Minwax wood stain.
Now you can begin the maceration process. Choose a location for your maceration container that is inaccessible to animals and where the odor, which can become quite strong, will not be bothersome. Ensure the location also allows for safe electrical access for the tank heater. Once you’ve selected a suitable location and prepped your skull as described earlier, place it in the container.
Position the skull inside the container and add water until it is completely submerged. If the skull has antlers, fill the water level to approximately 1 inch above the antler bases (burrs). After the skull is submerged and the container is filled, set your fish tank heater to 80°F and submerge it in the water, ensuring it remains fully immersed to prevent overheating. If possible, use a lid to cover the container to minimize water evaporation and help contain some of the odor. If a lid isn’t feasible, draping a large plastic garbage bag over the container and securing it with a bungee cord is a helpful alternative.
With the skull in place, submerged, and the heater activated, allow the maceration process to work. For a deer-sized animal, this typically takes four to six days. During maceration, check the water level every two days and replenish as needed to ensure the skull remains fully submerged. After approximately four to six days, you’ll observe that most of the meat and connective tissue has decomposed and is detaching from the skull. Once roughly 90% of the soft tissue has rotted away, it’s time to remove the skull and proceed to the next stage of the euro mount process.
Carefully remove the macerated skull from the water and rinse it thoroughly. Exercise caution around the teeth, nasal passages, and sinus bones, as they will be softened and easily damaged at this stage. A gentle rinse with a garden hose will effectively remove the remaining meat and tissue.
Skull Whitening: Achieving the Classic Euro Mount Look
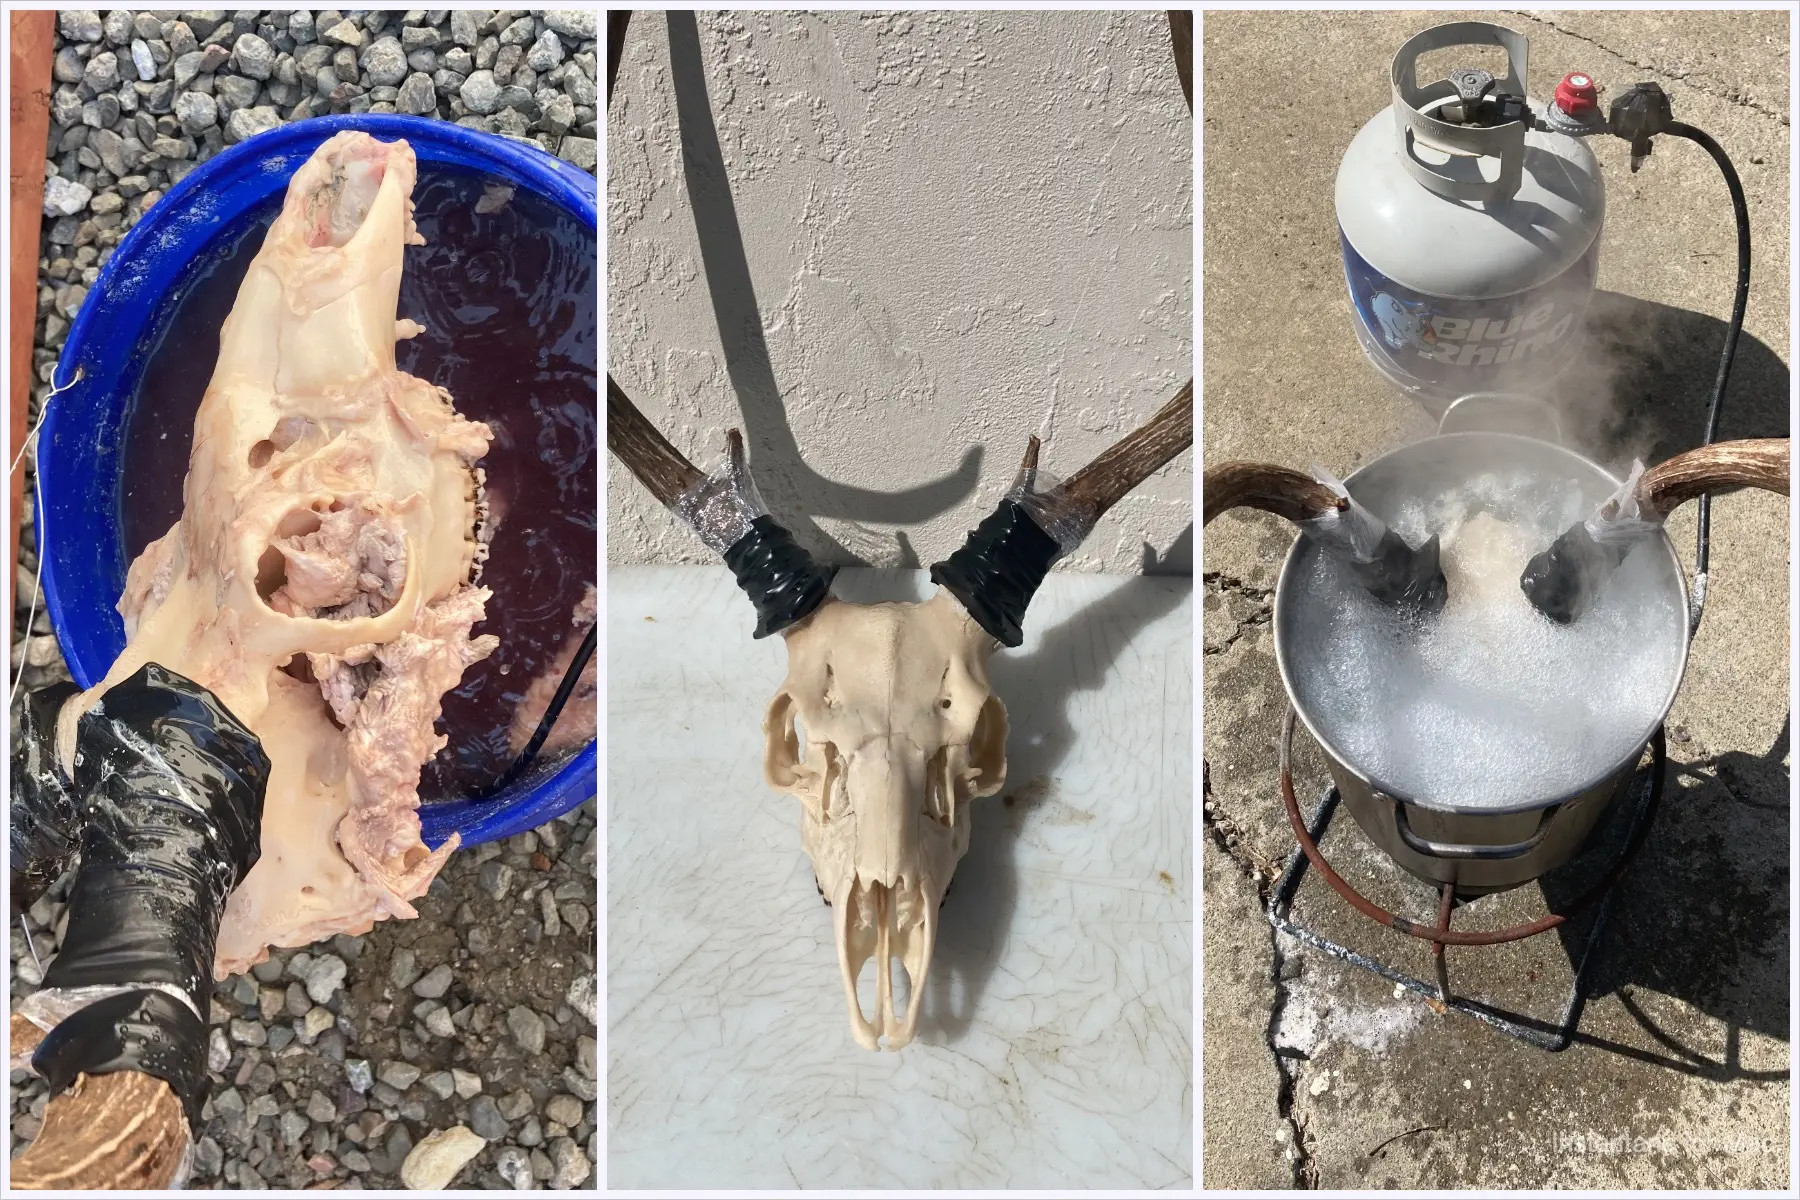
Alt text: Euro mount deer skull being whitened in hydrogen peroxide solution on outdoor burner.
The next step is whitening your deer skull, although this is optional. Some prefer the natural, unbleached bone color. For whitening, you’ll need an outdoor heat source, such as a turkey fryer or high-output BBQ burner, and a pot large enough to hold the whitening solution and fully immerse the skull.
For the whitening solution, a mixture of hydrogen peroxide and water works effectively. Standard 3% hydrogen peroxide, readily available at most pharmacies or general stores, is sufficient. Fill your pot approximately halfway with hydrogen peroxide, then place the skull inside. Complete filling the pot with water until the skull is completely submerged. Ensure the antler bases remain protected by the plastic wrap and tape, preventing the whitening solution from contacting them.
Once the solution is prepared, remove the skull temporarily. Bring the hydrogen peroxide solution to a rolling boil, then carefully submerge the skull in the boiling solution for 5-10 minutes. Throughout this process, ensure the solution does not reach the exposed antler portions, as it will whiten any area it contacts.
Between the 5-10 minute mark, periodically lift the skull to monitor the whitening progress and check for any bone deterioration. Remember that the skull will continue to whiten as it dries, so don’t be concerned if it doesn’t appear as white as desired immediately after removal from the pot. Follow the same whitening procedure for any teeth or nasal bones that may have detached during maceration.
Drying and Finishing Touches: Completing Your Euro Mount Deer Skull
Alt text: Close-up of whitened euro mount deer skull drying in sunlight, final stage of DIY project.
After whitening the skull and any loose bone fragments, drying is the next phase. While the bone is still damp, reposition any nasal bones into their correct locations and secure them with a rubber band. Nasal bones often separate as the skull dries, so a rubber band around the snout helps maintain alignment. Ideally, dry the skull in direct sunlight. If sunlight isn’t available due to weather conditions, a space heater can replicate the effect. Position the skull in front of a space heater until it is completely dry and no bones feel loose.
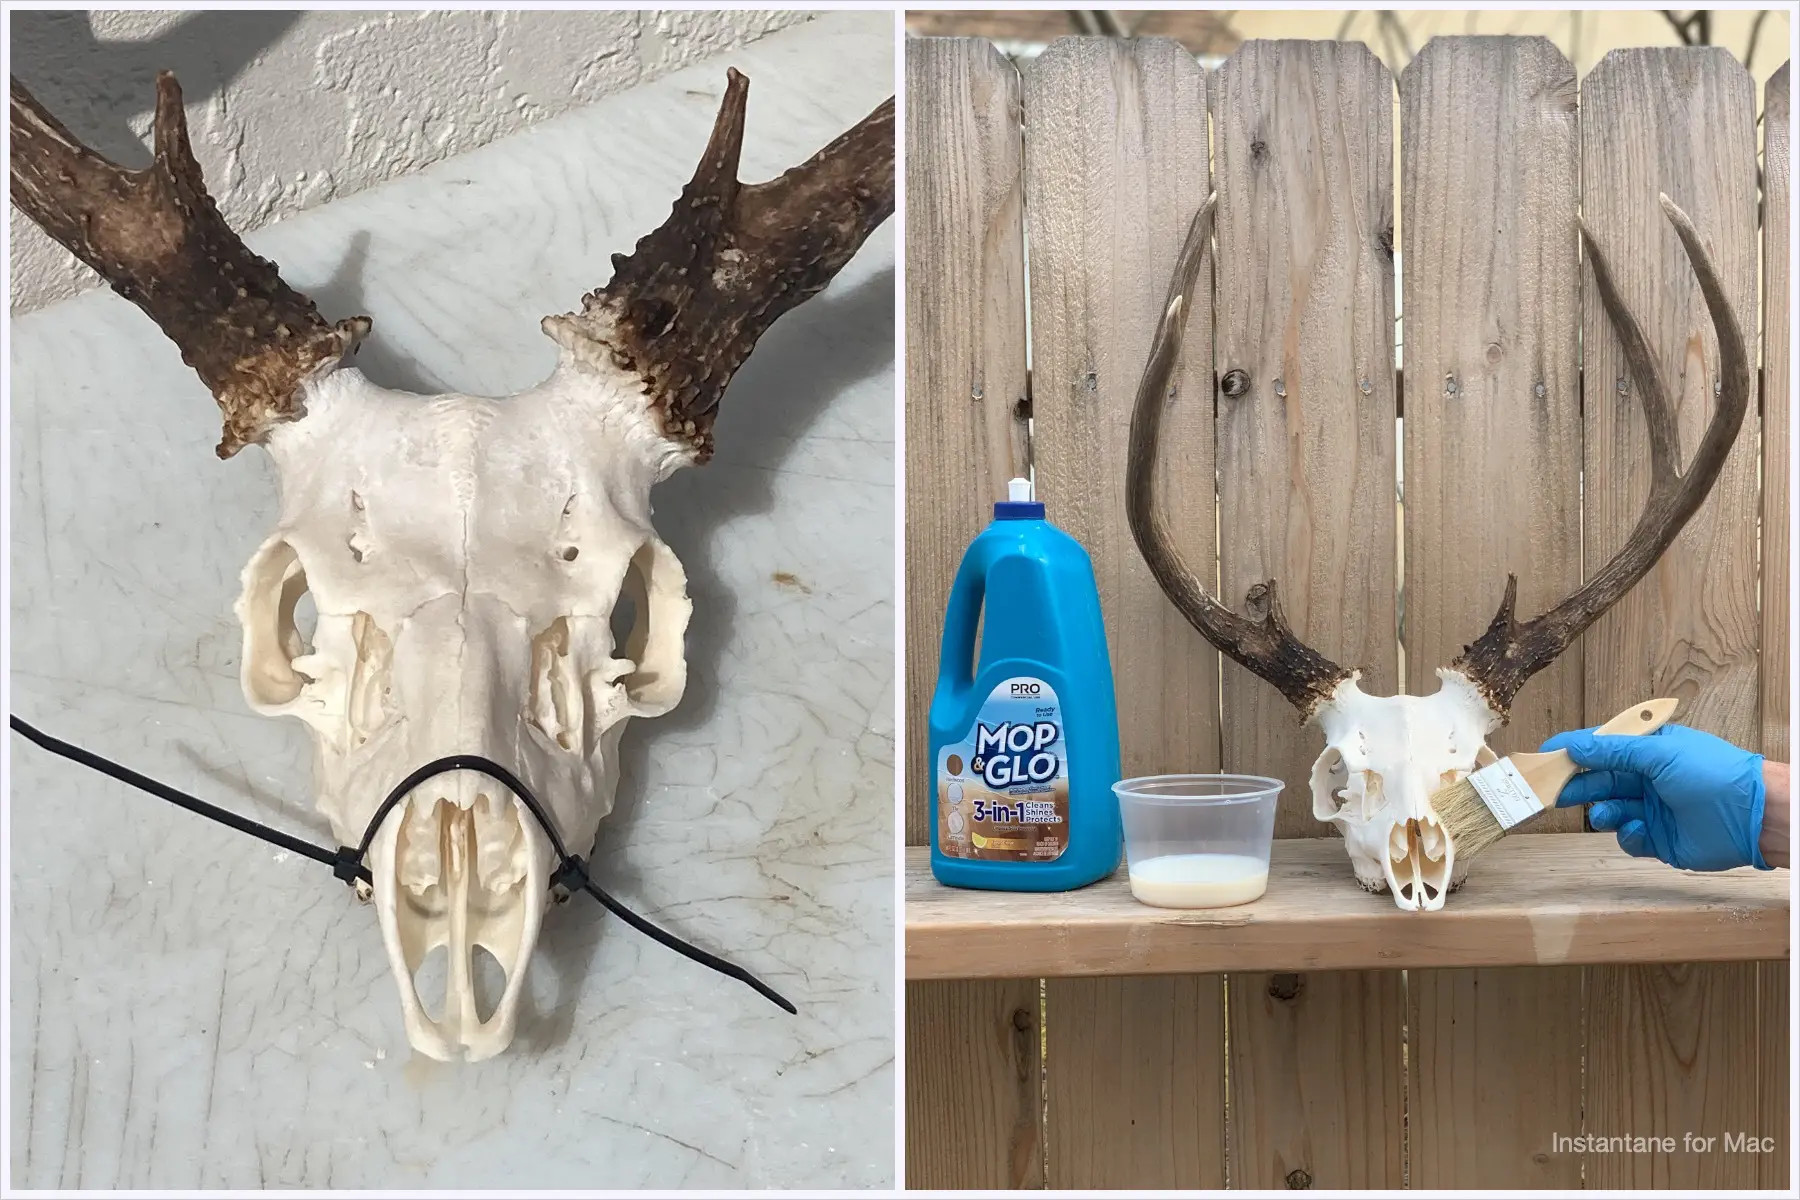
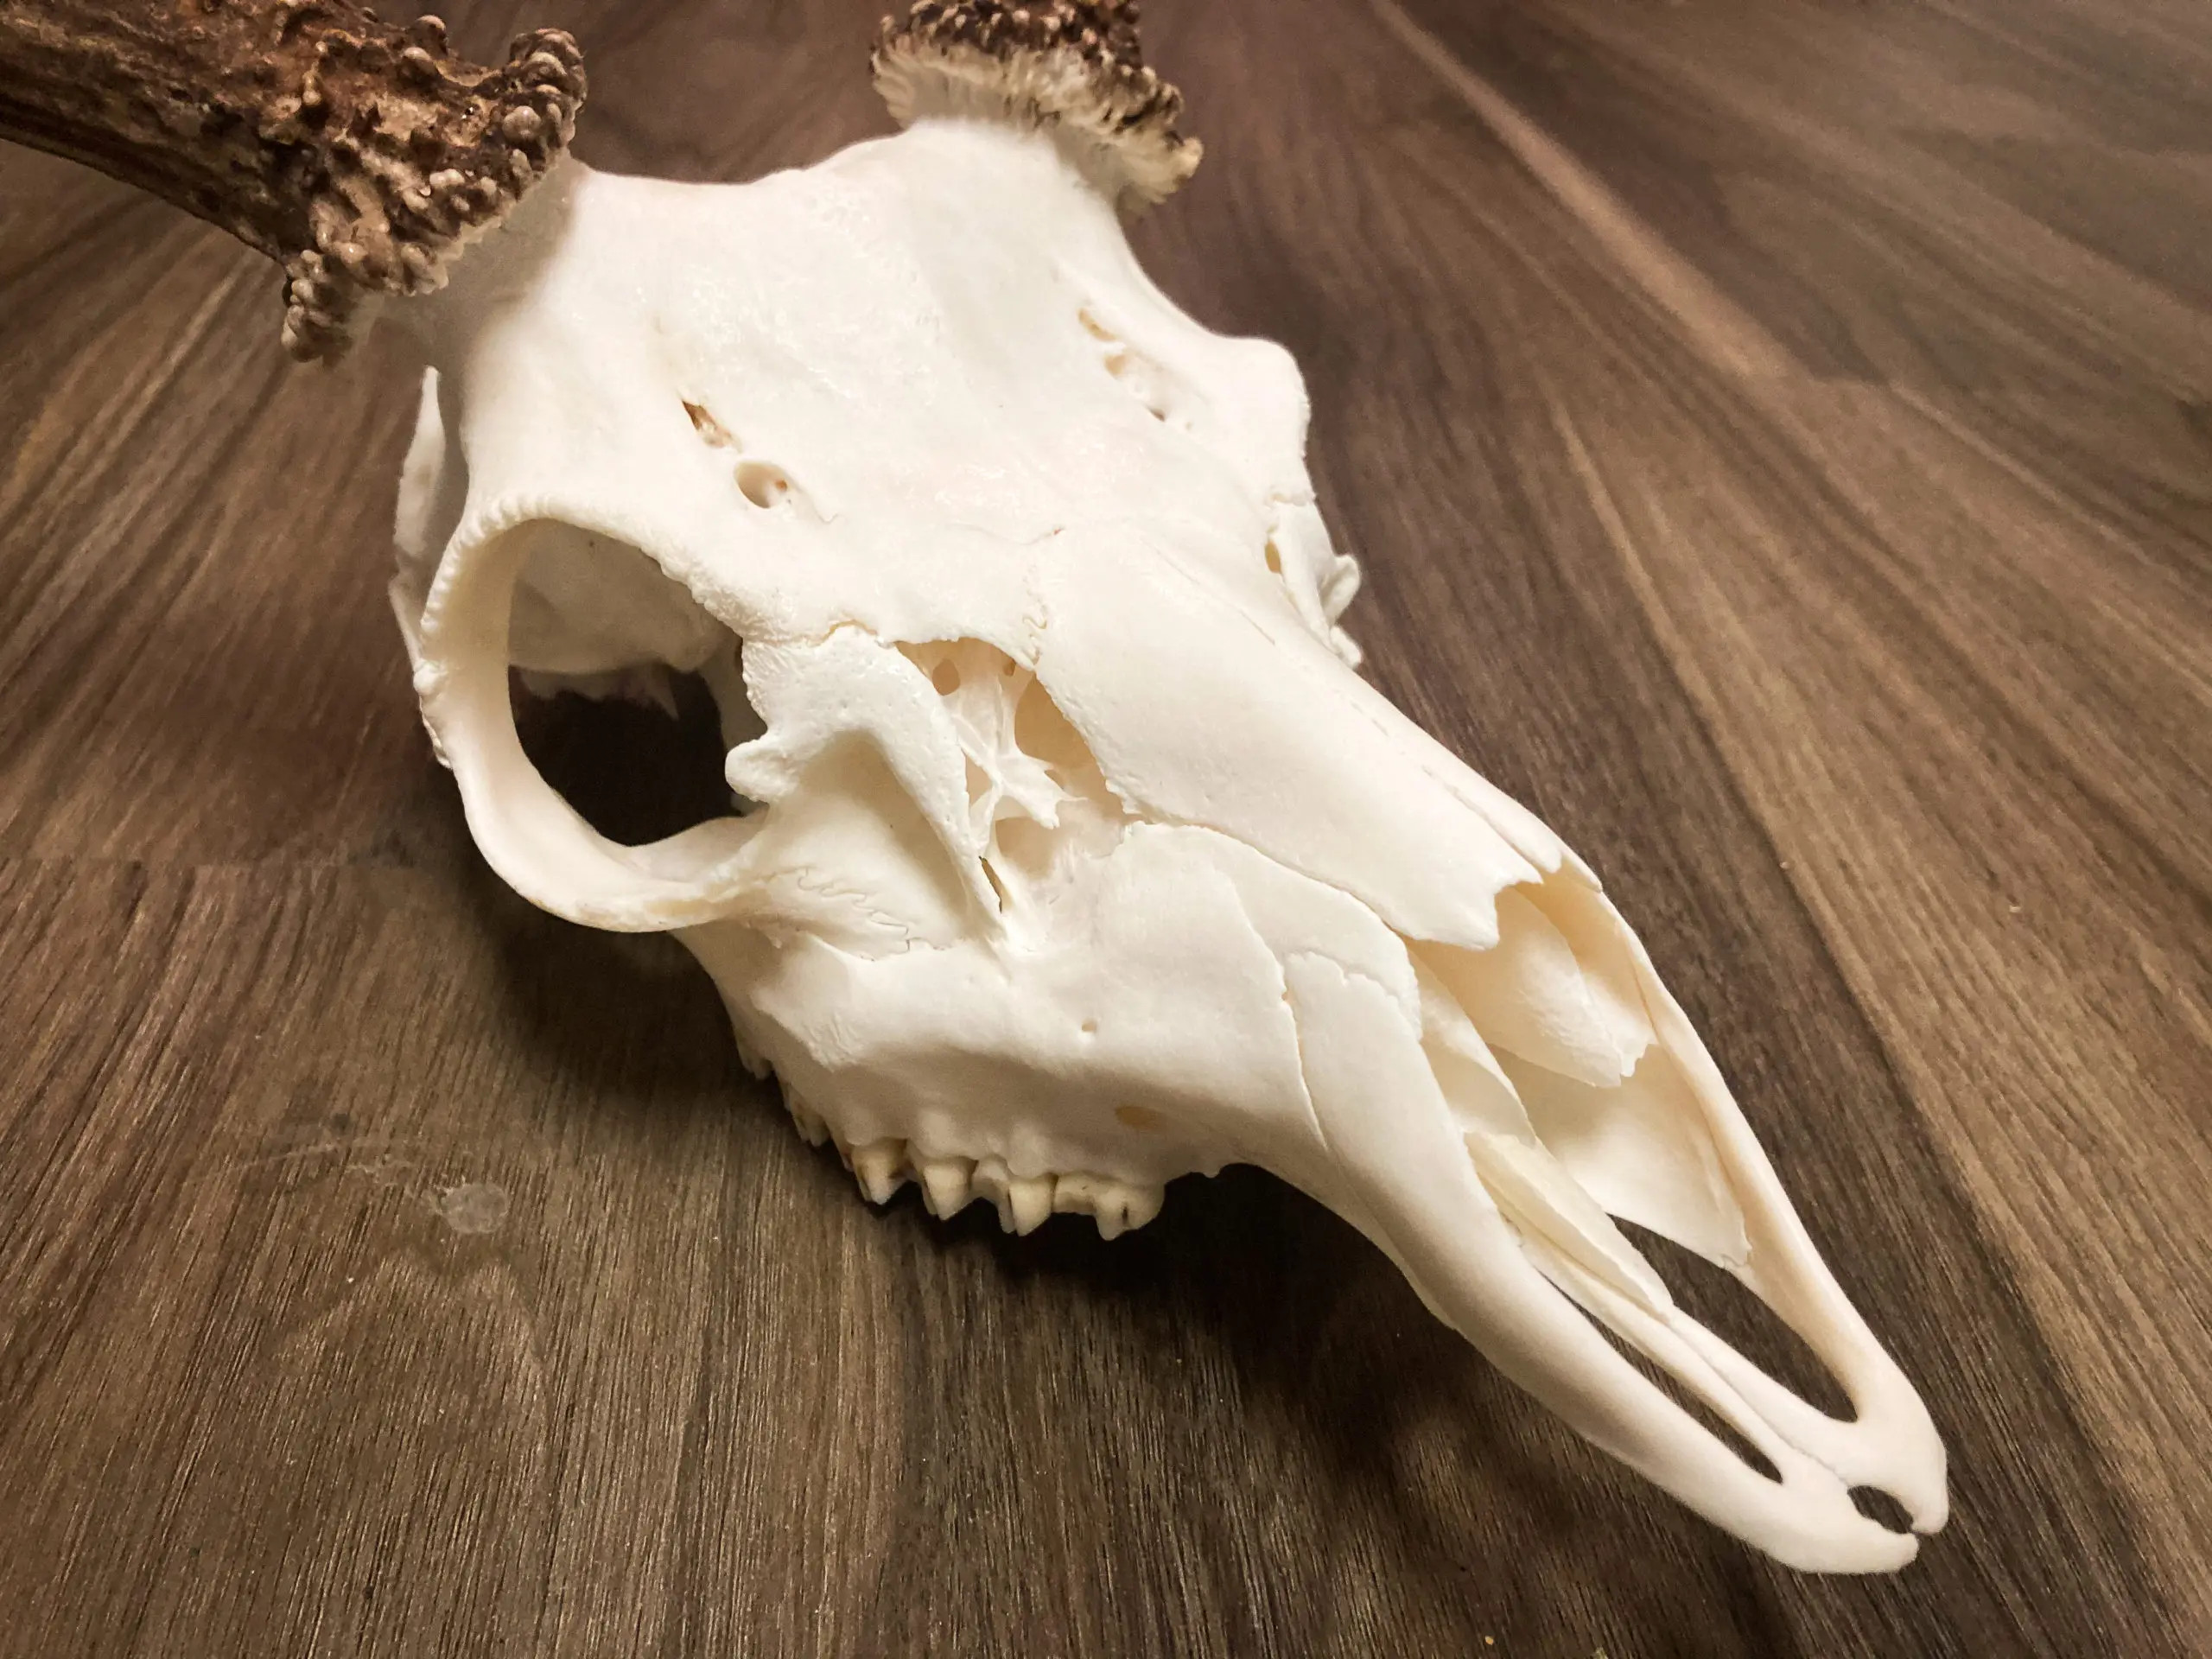
At this point, your euro mount deer skull will be exceptionally clean and white. Once fully dry, use a fast-drying clear super glue to reattach any teeth or nasal bones that didn’t remain in place during drying. For the final aesthetic touches, remove the plastic wrap and tape from the antler bases. If any antler discoloration occurred during the process, use Minwax provincial wood stain for touch-ups. Apply the stain sparingly with a Q-tip, repeating coats until the desired color is achieved. For a final protective and enhancing coat, consider applying a thin layer of Mop & Glo multi-surface floor finish. This seals the bone, preventing dust and dirt accumulation in the porous surface, and imparts a pleasant, clean scent.
By diligently following these steps, you will have created a wall-worthy European mount, a lasting tribute to your hunting success and a unique piece of DIY taxidermy to honor your trophy for years to come.
Alt text: Finished euro mount deer skull displayed on wooden wall, successful DIY taxidermy project.
Authored by Kyle Sibley, Owner/Operator of Sibley Skull Works.