
Are you struggling to find the euro (€) symbol on your Dell keyboard for your agricultural business accounting or when pricing European drip irrigation products? Getting the euro sign on your Dell keyboard is simple, and eurodripusa.net offers solutions and European-quality products. This guide will help you insert the euro symbol using various methods and explore how eurodripusa.net can enhance your irrigation systems with innovative, water-saving European technology.
1. What Are The Quick Methods To Type The Euro Sign (€) On A Dell Keyboard?
Yes, there are several quick methods to type the euro sign (€) on your Dell keyboard, including using Alt codes, the Character Map, or copying and pasting. Using Alt codes is a direct method: press and hold the Alt key, then type 0128 on the numeric keypad. Alternatively, the Character Map application in Windows allows you to find and copy the euro symbol. For convenience, copying and pasting from a reliable source is also an option.
1.1 Using Alt Codes to Insert the Euro Symbol
Alt codes provide a quick and easy way to type special characters, including the euro sign (€), on your Dell keyboard. This method involves holding down the Alt key while entering a specific numeric code on the numeric keypad. According to Microsoft Support, Alt codes are particularly useful for characters not directly available on the keyboard layout.
Steps:
- Enable Num Lock: Ensure that the
Num Lockkey is activated on your Dell keyboard. A light indicator usually indicates this. - Hold Alt Key: Press and hold the
Altkey on your keyboard. - Enter Alt Code: While holding down the
Altkey, type0128on the numeric keypad. - Release Alt Key: Release the
Altkey, and the euro sign (€) will appear in your document.
Tips:
- Ensure you use the numeric keypad for entering the Alt code. The number keys above the letter keys will not work.
- This method is compatible with most Windows applications, including word processors, email clients, and spreadsheets.
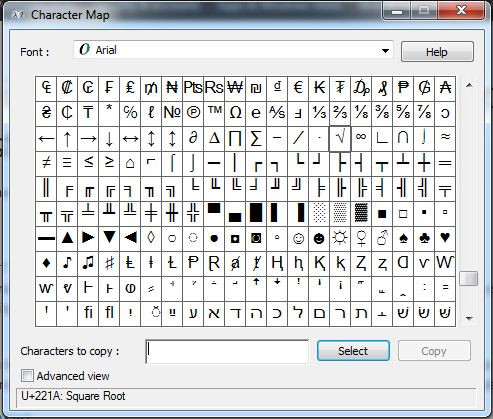
1.2 Using the Character Map to Find and Insert the Euro Symbol
The Character Map is a utility in Windows that allows you to find and insert special characters, including the euro sign (€). This method is particularly helpful if you don’t remember the Alt code or want to explore other available symbols.
Steps:
- Open Character Map:
- In Windows 10 and 11, type
Character Mapin the search box and select theCharacter Mapapp from the results.
- In Windows 10 and 11, type
 Character Map App
2. Find the Euro Symbol:
- Use the scroll bar to browse through the characters, or use the
Searchfunction to find the euro symbol. Typeeuroin the search box and clickSearch.
- Select and Copy:
- Select the euro symbol (€) from the list of characters.
- Click the
Selectbutton, then click theCopybutton.
- Paste into Your Document:
- Go to your document or application and paste the euro symbol (€) using
Ctrl + Vor right-click and selectPaste.
- Go to your document or application and paste the euro symbol (€) using
Tips:
- The Character Map allows you to select multiple characters and copy them all at once.
- You can change the font in the Character Map to find different styles of the euro symbol.
1.3 Copying and Pasting the Euro Symbol
Copying and pasting is a straightforward method to insert the euro sign (€) into your document. This method is particularly useful if you frequently need the euro symbol and want a quick solution.
Steps:
- Find the Euro Symbol: Locate the euro symbol (€) from a reliable source, such as a webpage or document.
- Copy the Symbol: Select the euro symbol (€) and press
Ctrl + Cor right-click and selectCopy. - Paste into Your Document: Go to your document or application and paste the euro symbol (€) using
Ctrl + Vor right-click and selectPaste.
Tips:
- Ensure you copy the euro symbol from a reliable source to avoid any formatting issues.
- This method is compatible with most applications and operating systems.
2. How Can I Type the Euro Symbol on a Dell Laptop Without a Numeric Keypad?
Yes, typing the euro symbol on a Dell laptop without a numeric keypad can be done using the Fn key combinations or the Character Map. Some Dell laptops have a number lock-activated keyboard integrated into the keyboard, where you can use the Fn key combined with other keys to input numbers. If this is not available, the Character Map provides a reliable alternative.
2.1 Using Fn Key Combinations on Dell Laptops
Some Dell laptops come with integrated numeric keypads that can be activated using the Fn key. This allows you to type Alt codes and insert special characters like the euro sign (€) without an external numeric keypad.
Steps:
- Identify Numeric Keypad Keys: Look for keys with small numbers printed on them, usually in a different color (e.g., blue) below the letters. These are the numeric keypad keys.
- Enable Num Lock: Press the
Fn+Num Lockkeys simultaneously to activate the numeric keypad. The exact key combination may vary depending on your Dell laptop model. - Type Alt Code: Press and hold the
Altkey, then use the numeric keypad keys to type0128. - Release Alt Key: Release the
Altkey, and the euro sign (€) should appear.
Tips:
- Refer to your Dell laptop’s manual to find the exact key combination for enabling the numeric keypad.
- Ensure that the
Num Lockis enabled before attempting to use the numeric keypad. - If you have trouble activating the numeric keypad, try restarting your laptop and trying again.
2.2 Alternative Methods for Laptops Without Numeric Keypads
If your Dell laptop does not have an integrated numeric keypad, you can use the Character Map or copy-paste methods to insert the euro sign (€). These methods are reliable and do not require a numeric keypad.
Character Map:
- Open Character Map: Type
Character Mapin the Windows search box and select theCharacter Mapapp. - Find the Euro Symbol: Search for the euro symbol (€) in the Character Map.
- Select and Copy: Select the euro symbol, click
Select, then clickCopy. - Paste into Your Document: Paste the euro symbol using
Ctrl + V.
Copy and Paste:
- Find the Euro Symbol: Locate the euro symbol (€) from a reliable source.
- Copy the Symbol: Select the euro symbol and press
Ctrl + C. - Paste into Your Document: Paste the euro symbol using
Ctrl + V.
3. What If The Alt Code For The Euro Sign Is Not Working?
If the Alt code for the euro sign (€) is not working on your Dell keyboard, ensure that Num Lock is enabled, use the numeric keypad, and verify the correct Alt code (0128). Also, check for keyboard layout settings and application compatibility. If issues persist, try the Character Map or copy-paste method.
3.1 Troubleshooting Num Lock and Numeric Keypad Issues
One of the most common reasons for Alt codes not working is that the Num Lock key is not enabled or the numeric keypad is not being used correctly.
Steps:
- Check Num Lock: Ensure that the
Num Lockkey is activated on your Dell keyboard. A light indicator usually indicates this. - Use Numeric Keypad: Use the numeric keypad to enter the Alt code. The number keys above the letter keys will not work.
- Restart Your Computer: Sometimes, a simple restart can resolve keyboard issues.
Tips:
- If you are using a laptop with an integrated numeric keypad, ensure that you have enabled it using the
Fn+Num Lockkey combination. - Test the numeric keypad by typing numbers in a document to ensure it is working correctly.
3.2 Verifying Correct Alt Code and Keyboard Layout Settings
Another potential issue is using the wrong Alt code or having an incorrect keyboard layout setting.
Steps:
- Verify Alt Code: Ensure that you are using the correct Alt code for the euro sign, which is
0128. - Check Keyboard Layout: Verify that your keyboard layout is set to a language that supports the euro symbol. In Windows, go to
Settings>Time & Language>Languageand check the preferred languages.
Tips:
- Try adding a different keyboard layout and see if the Alt code works with that layout.
- Ensure that your operating system and keyboard drivers are up to date.
3.3 Resolving Application Compatibility Issues
In some cases, certain applications may not support Alt codes or special characters.
Steps:
- Test in Different Applications: Try using the Alt code in different applications, such as Notepad, Microsoft Word, or a web browser.
- Update Application: Ensure that the application is up to date.
- Use Character Map: If the Alt code does not work in a specific application, use the Character Map or copy-paste method as an alternative.
4. How Do I Create a Keyboard Shortcut for the Euro Symbol on My Dell?
Creating a keyboard shortcut for the euro symbol (€) on your Dell involves using the AutoCorrect feature in Microsoft Word or a third-party macro program. AutoCorrect allows you to assign a specific key combination to automatically insert the euro symbol, while macro programs offer more advanced customization options.
4.1 Using Microsoft Word’s AutoCorrect Feature
Microsoft Word’s AutoCorrect feature is a convenient way to create a custom keyboard shortcut for the euro symbol (€). This feature automatically replaces specific text with the euro symbol as you type.
Steps:
- Open Microsoft Word: Launch Microsoft Word on your Dell computer.
- Go to AutoCorrect Options:
- Click on
Filein the top-left corner. - Select
Optionsat the bottom of the menu. - In the Word Options window, click on
Proofing. - Click on the
AutoCorrect Options...button.
- Click on
- Create AutoCorrect Entry:
- In the AutoCorrect window, ensure the
AutoCorrecttab is selected. - In the
Replacefield, type the text you want to use as the shortcut (e.g.,(euro)). - In the
Withfield, type or paste the euro symbol (€). You can copy the euro symbol from the Character Map or use the Alt code method. - Click the
Addbutton, then clickOKto close the AutoCorrect window. ClickOKagain to close the Word Options window.
- In the AutoCorrect window, ensure the
- Test the Shortcut:
- In a Word document, type the shortcut text (e.g.,
(euro)) and press theSpacebarorEnterkey. Word should automatically replace the text with the euro symbol (€).
- In a Word document, type the shortcut text (e.g.,
Tips:
- Choose a shortcut text that you don’t commonly use to avoid unintended replacements.
- This method is specific to Microsoft Word and will not work in other applications unless they have similar AutoCorrect features.
4.2 Using Third-Party Macro Programs for Custom Shortcuts
For more advanced customization, you can use third-party macro programs to create custom keyboard shortcuts for the euro symbol (€) that work across all applications on your Dell computer.
Examples of Macro Programs:
- AutoHotkey: A free, open-source scripting language for Windows that allows you to create custom keyboard shortcuts and automate tasks.
- PhraseExpress: A text expander and macro program that allows you to create shortcuts for frequently used text snippets, including the euro symbol.
Steps Using AutoHotkey:
- Download and Install AutoHotkey:
- Go to the AutoHotkey website (https://www.autohotkey.com/) and download the latest version.
- Install AutoHotkey on your Dell computer.
- Create a New AutoHotkey Script:
- Right-click on your desktop or in a folder, select
New, and chooseAutoHotkey Script. - Give the script a name (e.g.,
EuroSymbol.ahk).
- Right-click on your desktop or in a folder, select
- Edit the Script:
- Right-click on the script file and select
Edit. This will open the script in a text editor like Notepad. - Add the following code to the script:
- Right-click on the script file and select
::euro::
Send, €
return- This code creates a shortcut that replaces the text
eurowith the euro symbol (€). You can change the shortcut text as needed.
- Save the Script: Save the script file and close the text editor.
- Run the Script: Double-click on the script file to run it. The AutoHotkey icon will appear in the system tray.
- Test the Shortcut: In any application, type the shortcut text (e.g.,
euro) and press theSpacebarorEnterkey. AutoHotkey should automatically replace the text with the euro symbol (€).
Tips:
- AutoHotkey is a powerful tool that can be used to create complex macros and automate various tasks.
- PhraseExpress offers a user-friendly interface for creating text snippets and assigning shortcuts.
5. What Are Some Common Special Characters and Their Alt Codes on Dell Keyboards?
There are many common special characters that can be typed using Alt codes on Dell keyboards, including the trademark sign (™), registered sign (®), degree sign (°), cent sign (¢), pilcrow sign (¶), Omega (Ω), infinity (∞), and square root (√). Knowing these codes can save time and effort when you need to insert these symbols into your documents.
5.1 Table of Common Special Characters and Alt Codes
| Special Character (Symbol) | Alt Code to Type |
|---|---|
| ™ (Trademark Sign) | Alt+0153 |
| ® (Registered Sign) | Alt+0174 |
| ° (Degree Sign) | Alt+0176 |
| € (Euro Sign) | Alt+0128 |
| ¢ (Cent Sign) | Alt+0162 |
| ¶ (Pilcrow Sign) | Alt+0182 |
| Ω (Omega) | Alt+234 |
| ∞ (Infinity) | Alt+236 |
| √ (Square Root) | Alt+251 |
Tips:
- Ensure that
Num Lockis enabled and use the numeric keypad to enter the Alt codes. - These Alt codes are compatible with most Windows applications.
5.2 Tips for Using Alt Codes Effectively
To use Alt codes effectively, keep a list of frequently used codes handy and practice typing them to improve your speed and accuracy.
Tips:
- Create a cheat sheet of commonly used Alt codes and keep it near your computer.
- Use a text expander program like PhraseExpress to create shortcuts for Alt codes.
- Practice typing Alt codes regularly to improve your muscle memory.
6. Where Can I Find a Complete List of Alt Codes for Dell Keyboards?
Finding a complete list of Alt codes for Dell keyboards involves consulting online resources such as the official Microsoft documentation, dedicated Alt code websites, and comprehensive character maps. These resources provide extensive lists of Alt codes for various symbols and characters, helping you to efficiently insert them into your documents.
6.1 Online Resources for Alt Codes
Several online resources offer comprehensive lists of Alt codes for Dell keyboards, including the official Microsoft documentation and dedicated Alt code websites.
Microsoft Support:
- Microsoft Support provides detailed information about ASCII characters, special characters, and Alt codes.
- Visit the Insert ASCII or Unicode Latin-based symbols and characters page for more information.
Dedicated Alt Code Websites:
- Websites like alt-codes.net offer extensive lists of Alt codes for various symbols and characters.
- These websites often provide search functions and categorized lists to help you find the specific Alt code you need.
6.2 Using the Character Map for Discovering Alt Codes
The Character Map utility in Windows can also be used to discover the Alt codes for specific characters.
Steps:
- Open Character Map: Type
Character Mapin the Windows search box and select theCharacter Mapapp. - Find the Character: Browse through the characters or use the search function to find the character you need.
- View Alt Code: Select the character, and the Alt code will be displayed in the bottom-right corner of the Character Map window.
Tips:
- The Character Map allows you to see the Alt code for any character available in your selected font.
- Use the Character Map to explore different fonts and discover new characters and their corresponding Alt codes.
7. How Can Eurodrip USA Help With My Irrigation Needs?
Eurodrip USA can help with your irrigation needs by providing top-quality drip irrigation systems and components manufactured in Europe. We offer customized solutions, expert support, and innovative water-saving technologies. With a focus on sustainability and efficiency, Eurodrip USA is committed to helping you optimize your agricultural or gardening practices while conserving water and reducing costs.
Alt text: Eurodrip drip irrigation system in an agricultural field
7.1 Drip Irrigation Solutions for Efficient Water Use
Eurodrip USA specializes in drip irrigation solutions that deliver water directly to the roots of plants, minimizing water waste and maximizing efficiency. According to research from the University of California, Davis, Department of Plant Sciences, in July 2025, drip irrigation provides up to 60% more water savings compared to traditional sprinkler systems.
Benefits of Eurodrip Drip Irrigation:
- Water Conservation: Drip irrigation reduces water loss through evaporation and runoff.
- Precise Watering: Water is delivered directly to the root zone, ensuring plants receive the optimal amount of moisture.
- Reduced Weed Growth: By keeping the soil surface dry, drip irrigation inhibits weed growth.
- Cost Savings: Lower water consumption translates to reduced water bills.
Eurodrip Products:
- Drip Lines: High-quality drip lines with integrated emitters for uniform water distribution.
- Fittings and Connectors: A wide range of fittings and connectors for easy installation and customization.
- Filters: Filtration systems to prevent clogging and ensure optimal performance.
7.2 Customized Irrigation Systems for Various Applications
Eurodrip USA offers customized irrigation systems tailored to meet the specific needs of various applications, including agriculture, landscaping, and home gardening.
Applications:
- Agriculture: Drip irrigation systems for row crops, orchards, and vineyards.
- Landscaping: Efficient watering solutions for lawns, gardens, and flower beds.
- Home Gardening: Easy-to-install drip irrigation kits for vegetable gardens and flower pots.
Customization Options:
- Emitter Spacing: Choose the appropriate emitter spacing based on the plant type and soil conditions.
- Flow Rate: Select the optimal flow rate to deliver the right amount of water to each plant.
- System Design: Eurodrip USA provides expert system design services to ensure your irrigation system is efficient and effective.
7.3 European Quality and Innovative Technology
Eurodrip USA is committed to providing products that meet the highest standards of quality and performance. Our drip irrigation systems are manufactured in Europe using advanced technology and premium materials.
Key Features:
- Durable Materials: Eurodrip products are made from high-quality materials that are resistant to UV radiation and chemical degradation.
- Precision Engineering: Our drip emitters are precision-engineered to ensure consistent and reliable performance.
- Water-Saving Technology: Eurodrip systems incorporate innovative water-saving technologies to help you conserve water and reduce costs.
8. What Are The Advantages Of Using European Drip Irrigation Products?
The advantages of using European drip irrigation products include superior quality, advanced technology, and a strong focus on sustainability. European manufacturers adhere to stringent quality control standards, ensuring reliable and long-lasting products. They also invest heavily in research and development, leading to innovative solutions that optimize water use and improve crop yields.
Alt text: Close-up of a Eurodrip drip emitter
8.1 High-Quality Manufacturing Standards
European drip irrigation products are known for their superior quality and durability. Manufacturers in Europe adhere to strict quality control standards, ensuring that their products meet the highest levels of performance and reliability.
Key Advantages:
- Premium Materials: European drip irrigation products are made from high-quality materials that are resistant to UV radiation, chemicals, and physical wear.
- Stringent Testing: Products undergo rigorous testing to ensure they meet performance and durability standards.
- Long Lifespan: High-quality manufacturing ensures that European drip irrigation products have a long lifespan, reducing the need for frequent replacements.
8.2 Innovative Water-Saving Technologies
European drip irrigation manufacturers are at the forefront of developing innovative water-saving technologies. They invest heavily in research and development to create products that optimize water use and improve crop yields.
Examples of Innovative Technologies:
- Pressure-Compensating Emitters: These emitters deliver a consistent flow rate, regardless of pressure variations in the system.
- Anti-Siphon Devices: These devices prevent water from flowing back into the system, reducing the risk of contamination.
- Smart Irrigation Controllers: These controllers use weather data and soil moisture sensors to automatically adjust watering schedules, optimizing water use.
8.3 Commitment to Sustainability
European drip irrigation manufacturers are committed to sustainability and environmental responsibility. They design their products to minimize water waste, reduce energy consumption, and promote sustainable agricultural practices.
Sustainable Practices:
- Water Conservation: European drip irrigation products are designed to conserve water and reduce water waste.
- Energy Efficiency: Products are designed to minimize energy consumption, reducing the carbon footprint of irrigation systems.
- Recyclable Materials: Many European manufacturers use recyclable materials in their products, reducing environmental impact.
9. How Do I Choose The Right Drip Irrigation System For My Farm Or Garden?
Choosing the right drip irrigation system for your farm or garden depends on several factors, including the type of plants you are growing, the size of your property, the soil type, and your budget. Consider pressure compensating emitters for uniform watering, filtration to prevent clogging, and consulting with Eurodrip USA for expert advice.
9.1 Assessing Your Irrigation Needs
Before choosing a drip irrigation system, it’s essential to assess your specific irrigation needs. This involves evaluating the type of plants you are growing, the size of your property, the soil type, and your budget.
Factors to Consider:
- Plant Type: Different plants have different water requirements. Choose a drip irrigation system that can deliver the appropriate amount of water to each plant.
- Property Size: The size of your property will determine the size and complexity of the drip irrigation system you need.
- Soil Type: Soil type affects water infiltration and drainage. Choose a drip irrigation system that is appropriate for your soil type.
- Budget: Drip irrigation systems range in price from affordable DIY kits to more expensive, professionally installed systems. Determine your budget before you start shopping.
9.2 Types of Drip Emitters and Their Applications
Different types of drip emitters are designed for specific applications. Understanding the different types of emitters will help you choose the right system for your needs.
Types of Drip Emitters:
- Pressure-Compensating Emitters: These emitters deliver a consistent flow rate, regardless of pressure variations in the system. They are ideal for use on sloped terrain or in systems with long runs of tubing.
- Non-Pressure-Compensating Emitters: These emitters deliver a flow rate that varies with pressure. They are less expensive than pressure-compensating emitters but are not as accurate.
- Adjustable Emitters: These emitters allow you to adjust the flow rate to meet the specific needs of each plant.
- Inline Emitters: These emitters are integrated into the drip tubing, making installation quick and easy.
- Base Emitters: These emitters are designed to be placed at the base of plants, delivering water directly to the root zone.
9.3 Importance of Filtration and Pressure Regulation
Filtration and pressure regulation are essential components of any drip irrigation system. Filtration prevents clogging, while pressure regulation ensures that the system operates at the correct pressure.
Filtration:
- Prevents Clogging: Filtration removes particles from the water, preventing them from clogging the drip emitters.
- Extends System Lifespan: By preventing clogging, filtration helps to extend the lifespan of the drip irrigation system.
Pressure Regulation:
- Ensures Consistent Flow: Pressure regulation ensures that the drip emitters deliver a consistent flow rate, regardless of pressure variations in the system.
- Protects System Components: Operating the system at the correct pressure helps to protect the system components from damage.
10. How Do I Install And Maintain A Drip Irrigation System?
Installing a drip irrigation system involves planning the layout, connecting the components, and testing the system for leaks. Proper maintenance includes regular inspections, cleaning or replacing clogged emitters, and winterizing the system to protect it from freezing temperatures. Eurodrip USA provides detailed guides and support to help you install and maintain your drip irrigation system effectively.
Alt text: Man installing a drip irrigation system in a garden
10.1 Step-by-Step Guide to Installing a Drip Irrigation System
Installing a drip irrigation system can be a straightforward process with the right planning and preparation. Here’s a step-by-step guide to help you get started:
Steps:
- Plan the Layout:
- Sketch out the layout of your garden or farm, noting the location of each plant.
- Determine the placement of the main water line, drip tubing, and emitters.
- Gather the Materials:
- Collect all the necessary materials, including drip tubing, emitters, fittings, filters, pressure regulators, and connectors.
- Ensure you have the right tools, such as tubing cutters, hole punchers, and pliers.
- Connect the Main Water Line:
- Connect the main water line to your water source, such as a faucet or a water tank.
- Install a backflow preventer to prevent water from flowing back into the water source.
- Install the Filter and Pressure Regulator:
- Install the filter to remove particles from the water and prevent clogging.
- Install the pressure regulator to ensure the system operates at the correct pressure.
- Lay Out the Drip Tubing:
- Lay out the drip tubing according to your planned layout.
- Secure the tubing with stakes or ground staples.
- Install the Emitters:
- Use a hole puncher to create holes in the drip tubing at the desired locations.
- Insert the emitters into the holes.
- Connect the Fittings:
- Use fittings to connect the drip tubing to the main water line and to connect sections of tubing together.
- Test the System:
- Turn on the water and check the system for leaks.
- Adjust the emitters to ensure they are delivering the correct amount of water.
10.2 Tips for Maintaining Your Drip Irrigation System
Proper maintenance is essential for ensuring the longevity and efficiency of your drip irrigation system. Here are some tips for maintaining your system:
Maintenance Tips:
- Regular Inspections: Inspect the system regularly for leaks, clogs, and damage.
- Clean or Replace Clogged Emitters: Clean or replace clogged emitters to ensure consistent water flow.
- Flush the System: Flush the system periodically to remove sediment and debris.
- Winterize the System: Winterize the system to protect it from freezing temperatures.
10.3 Troubleshooting Common Drip Irrigation Problems
Even with proper installation and maintenance, you may encounter some common problems with your drip irrigation system. Here are some troubleshooting tips:
Common Problems:
- Clogged Emitters: Clean or replace clogged emitters.
- Leaks: Repair leaks by replacing damaged tubing or fittings.
- Low Pressure: Check the pressure regulator and adjust as needed.
- Uneven Water Distribution: Ensure that the emitters are properly spaced and that the system is operating at the correct pressure.
For further assistance and to explore our range of European drip irrigation products, visit eurodripusa.net today!