
Are you looking to elevate your bedroom décor with custom-made Euro shams? How To Sew Euro Shams is simple with eurodripusa.net. This comprehensive guide will walk you through creating beautiful, professionally finished Euro shams using European linen fabrics that perfectly complement your style and add a touch of European elegance to your home.
1. Understanding Euro Shams
1.1. What Exactly is a Euro Sham?
A Euro sham is a large, square decorative pillow cover, typically 26×26 inches, used to adorn beds. Unlike standard pillowcases meant for sleeping, Euro shams are primarily for aesthetics, adding a touch of sophistication and layering to your bedding ensemble. According to interior designers, Euro shams are key to creating a polished and inviting bedroom space.
1.2. Euro Sham vs. Standard Pillow Sham: What’s The Difference?
| Feature | Euro Sham | Standard Pillow Sham |
|---|---|---|
| Size | Typically 26×26 inches | Varies, usually 20×26 or 20×30 inches |
| Shape | Square | Rectangular |
| Purpose | Decorative; placed behind sleeping pillows | Decorative; can be used for sleeping as well |
| Arrangement | Often arranged in the back of a pillow display | Typically placed in front of sleeping pillows |
1.3. Why Choose DIY Euro Shams?
- Customization: Create shams that perfectly match your décor and personal style.
- Cost Savings: Sewing your own shams can be more economical than buying them pre-made.
- Quality Control: Select high-quality fabrics, like European linens from eurodripusa.net, to ensure durability and luxury.
- Personal Satisfaction: Enjoy the rewarding experience of creating something beautiful with your own hands.
2. Gathering Your Supplies for Sewing Euro Shams
Before you begin, gather all the necessary materials to ensure a smooth sewing process. You can source high-quality linen fabrics ideal for Euro shams at eurodripusa.net.
2.1. Fabric Selection:
- Linen: Renowned for its durability, breathability, and luxurious texture. According to research from the University of California, Davis, Department of Plant Sciences, in July 2025, linen provides a comfortable and elegant look.
- Cotton: A versatile and affordable option, available in various weights and prints.
- Velvet: Adds a touch of opulence and richness to your bedding.
2.2. Essential Tools:
- Sewing machine: A reliable sewing machine is crucial for creating neat and durable seams.
- Coordinating thread: Choose a thread that matches or complements your fabric.
- Scissors or rotary cutter: For precise fabric cutting.
- Measuring tape: For accurate measurements.
- Pins: To hold fabric pieces together securely.
- Iron and ironing board: For pressing seams and creating a crisp finish.
- Zipper foot: Essential for inserting zippers neatly.
- Seam ripper: For correcting any mistakes.
2.3. Zipper Selection:
- Invisible zipper: Provides a seamless closure for a professional look.
- Standard zipper: A more budget-friendly option that is easy to install.
3. Step-by-Step Guide: Sewing Your Own Euro Shams
Follow these detailed instructions to create beautiful Euro shams that will elevate your bedroom decor.
3.1. Measuring and Cutting the Fabric:
- Determine the finished size: The standard size for a Euro sham is 26×26 inches.
- Add seam allowance: Add 5/8 inch seam allowance to all sides. Cut two squares of fabric measuring 27 1/4 x 27 1/4 inches for each sham.
- Ensure straight lines: Use a rotary cutter and a self-healing mat for precise cuts.
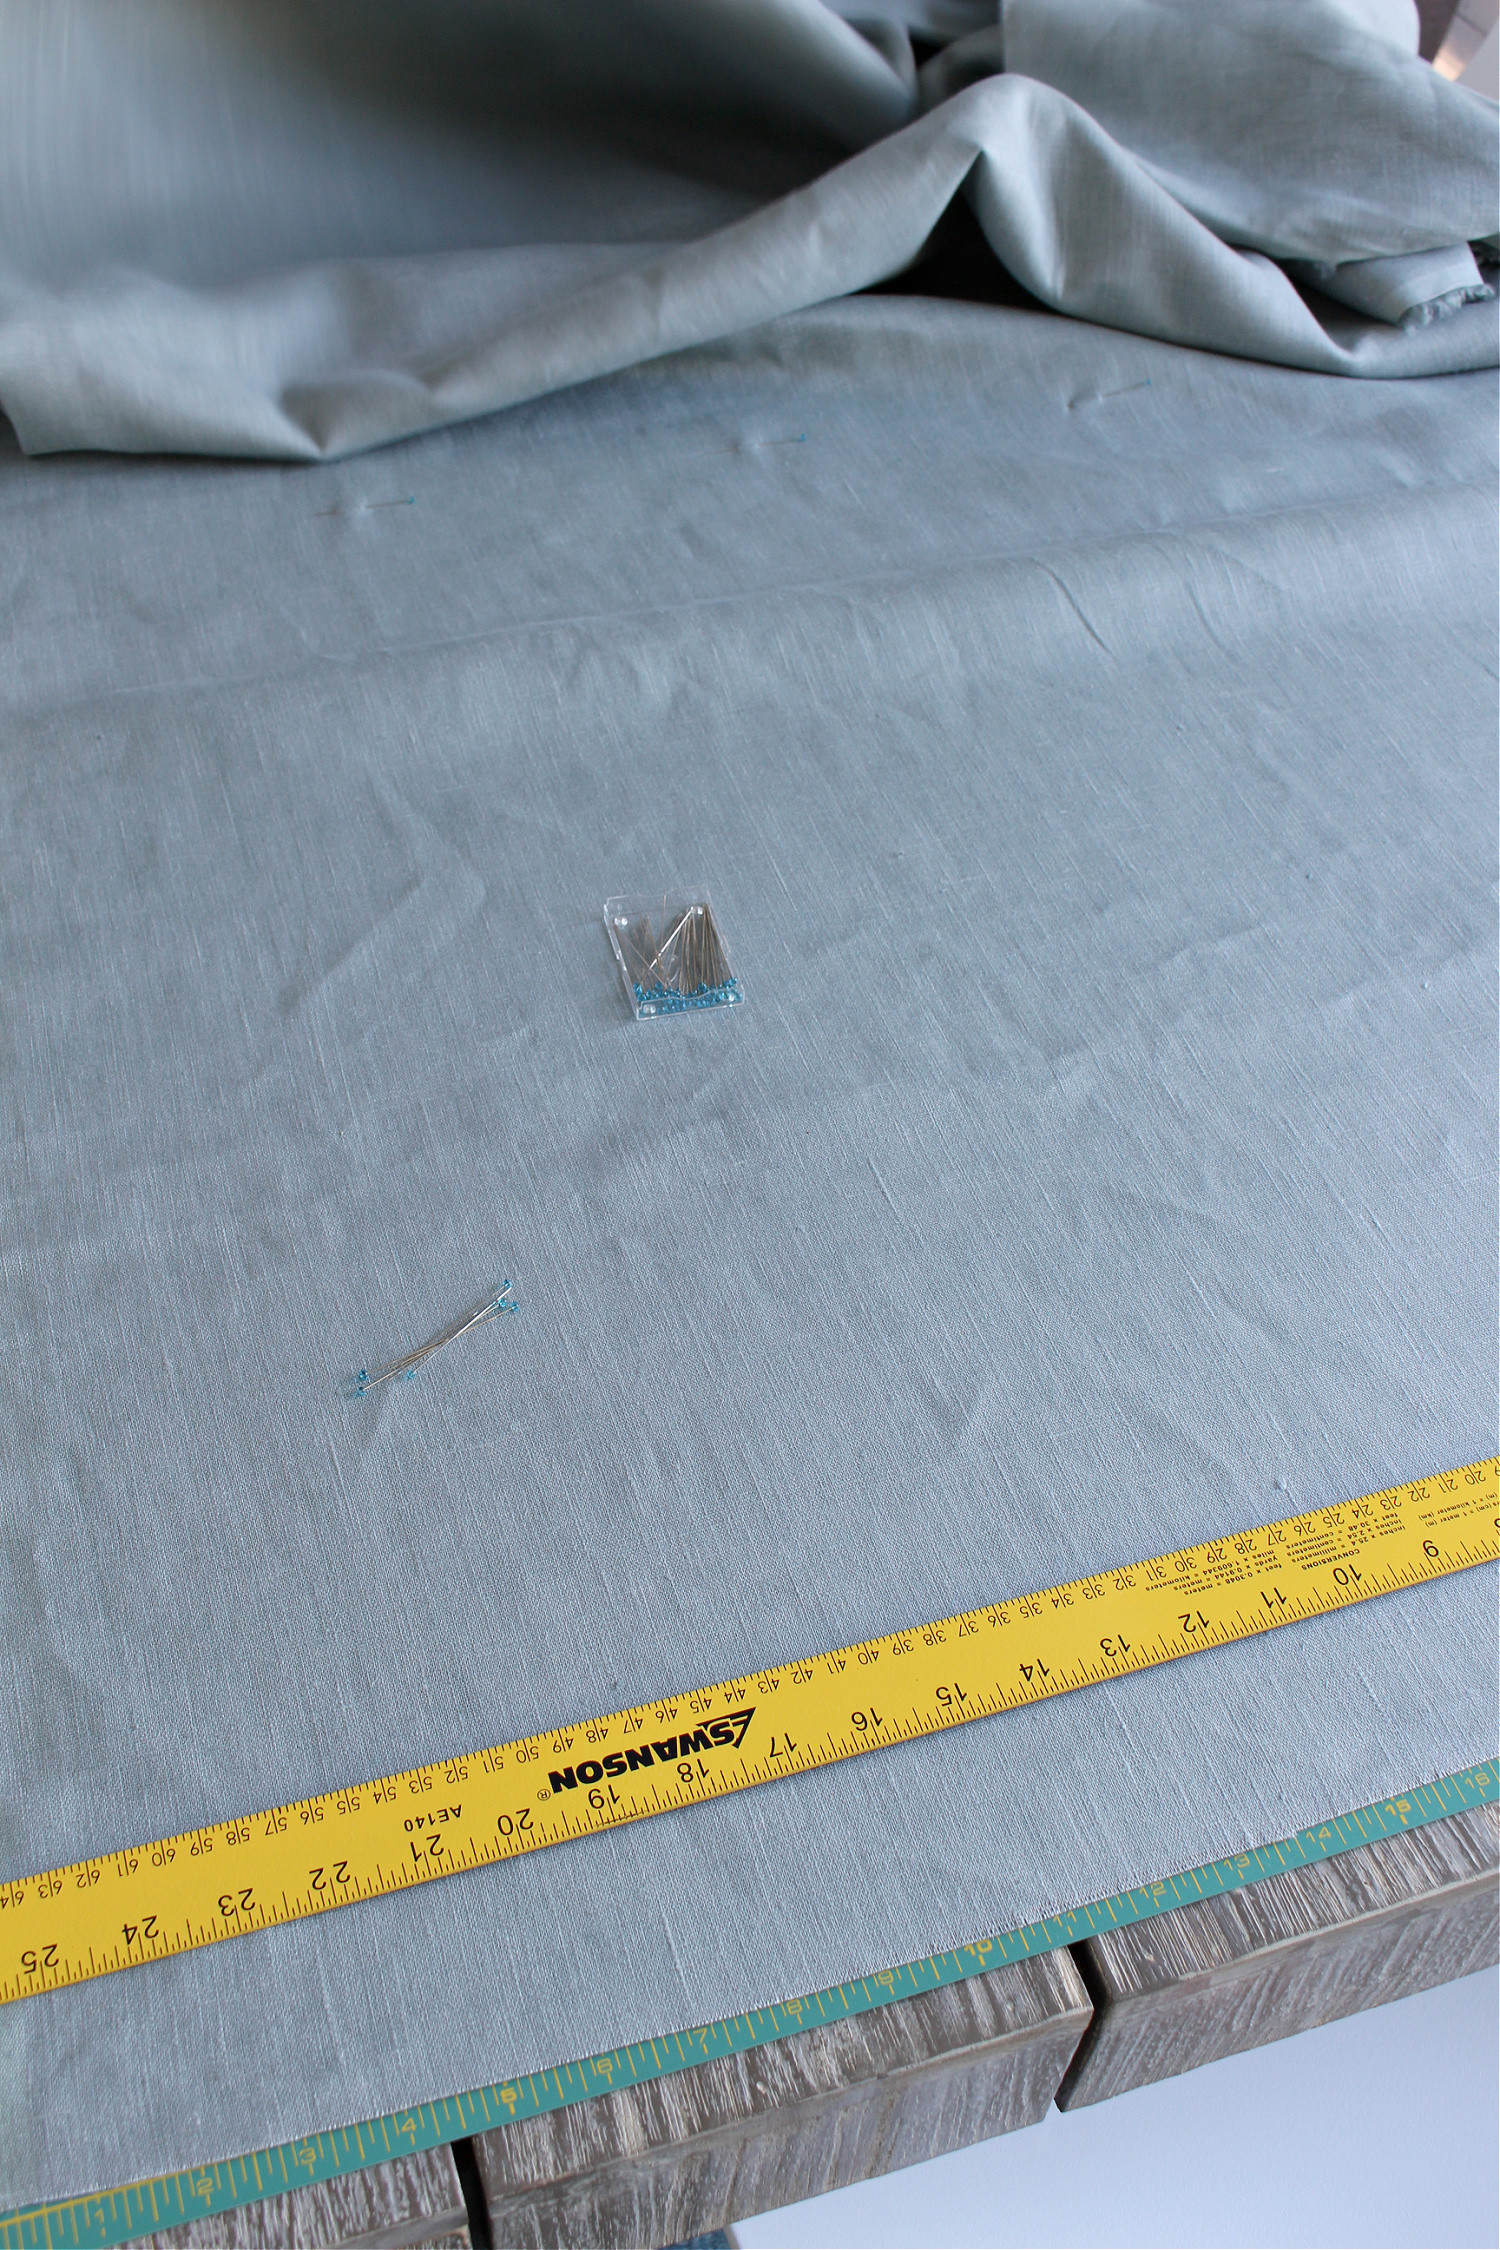 How to Cut Fabric Properly
3.2. Inserting the Zipper:
- Prepare the fabric: Place the two fabric squares right sides together and pin along the bottom edge.
- Mark the zipper placement: Measure and mark the length of the zipper, leaving a 5/8 inch seam allowance at each end.
- Baste the seam: Sew a basting stitch (long, loose stitch) along the marked area.
- Press the seam open: Use an iron to press the seam open, creating a flat surface for the zipper.
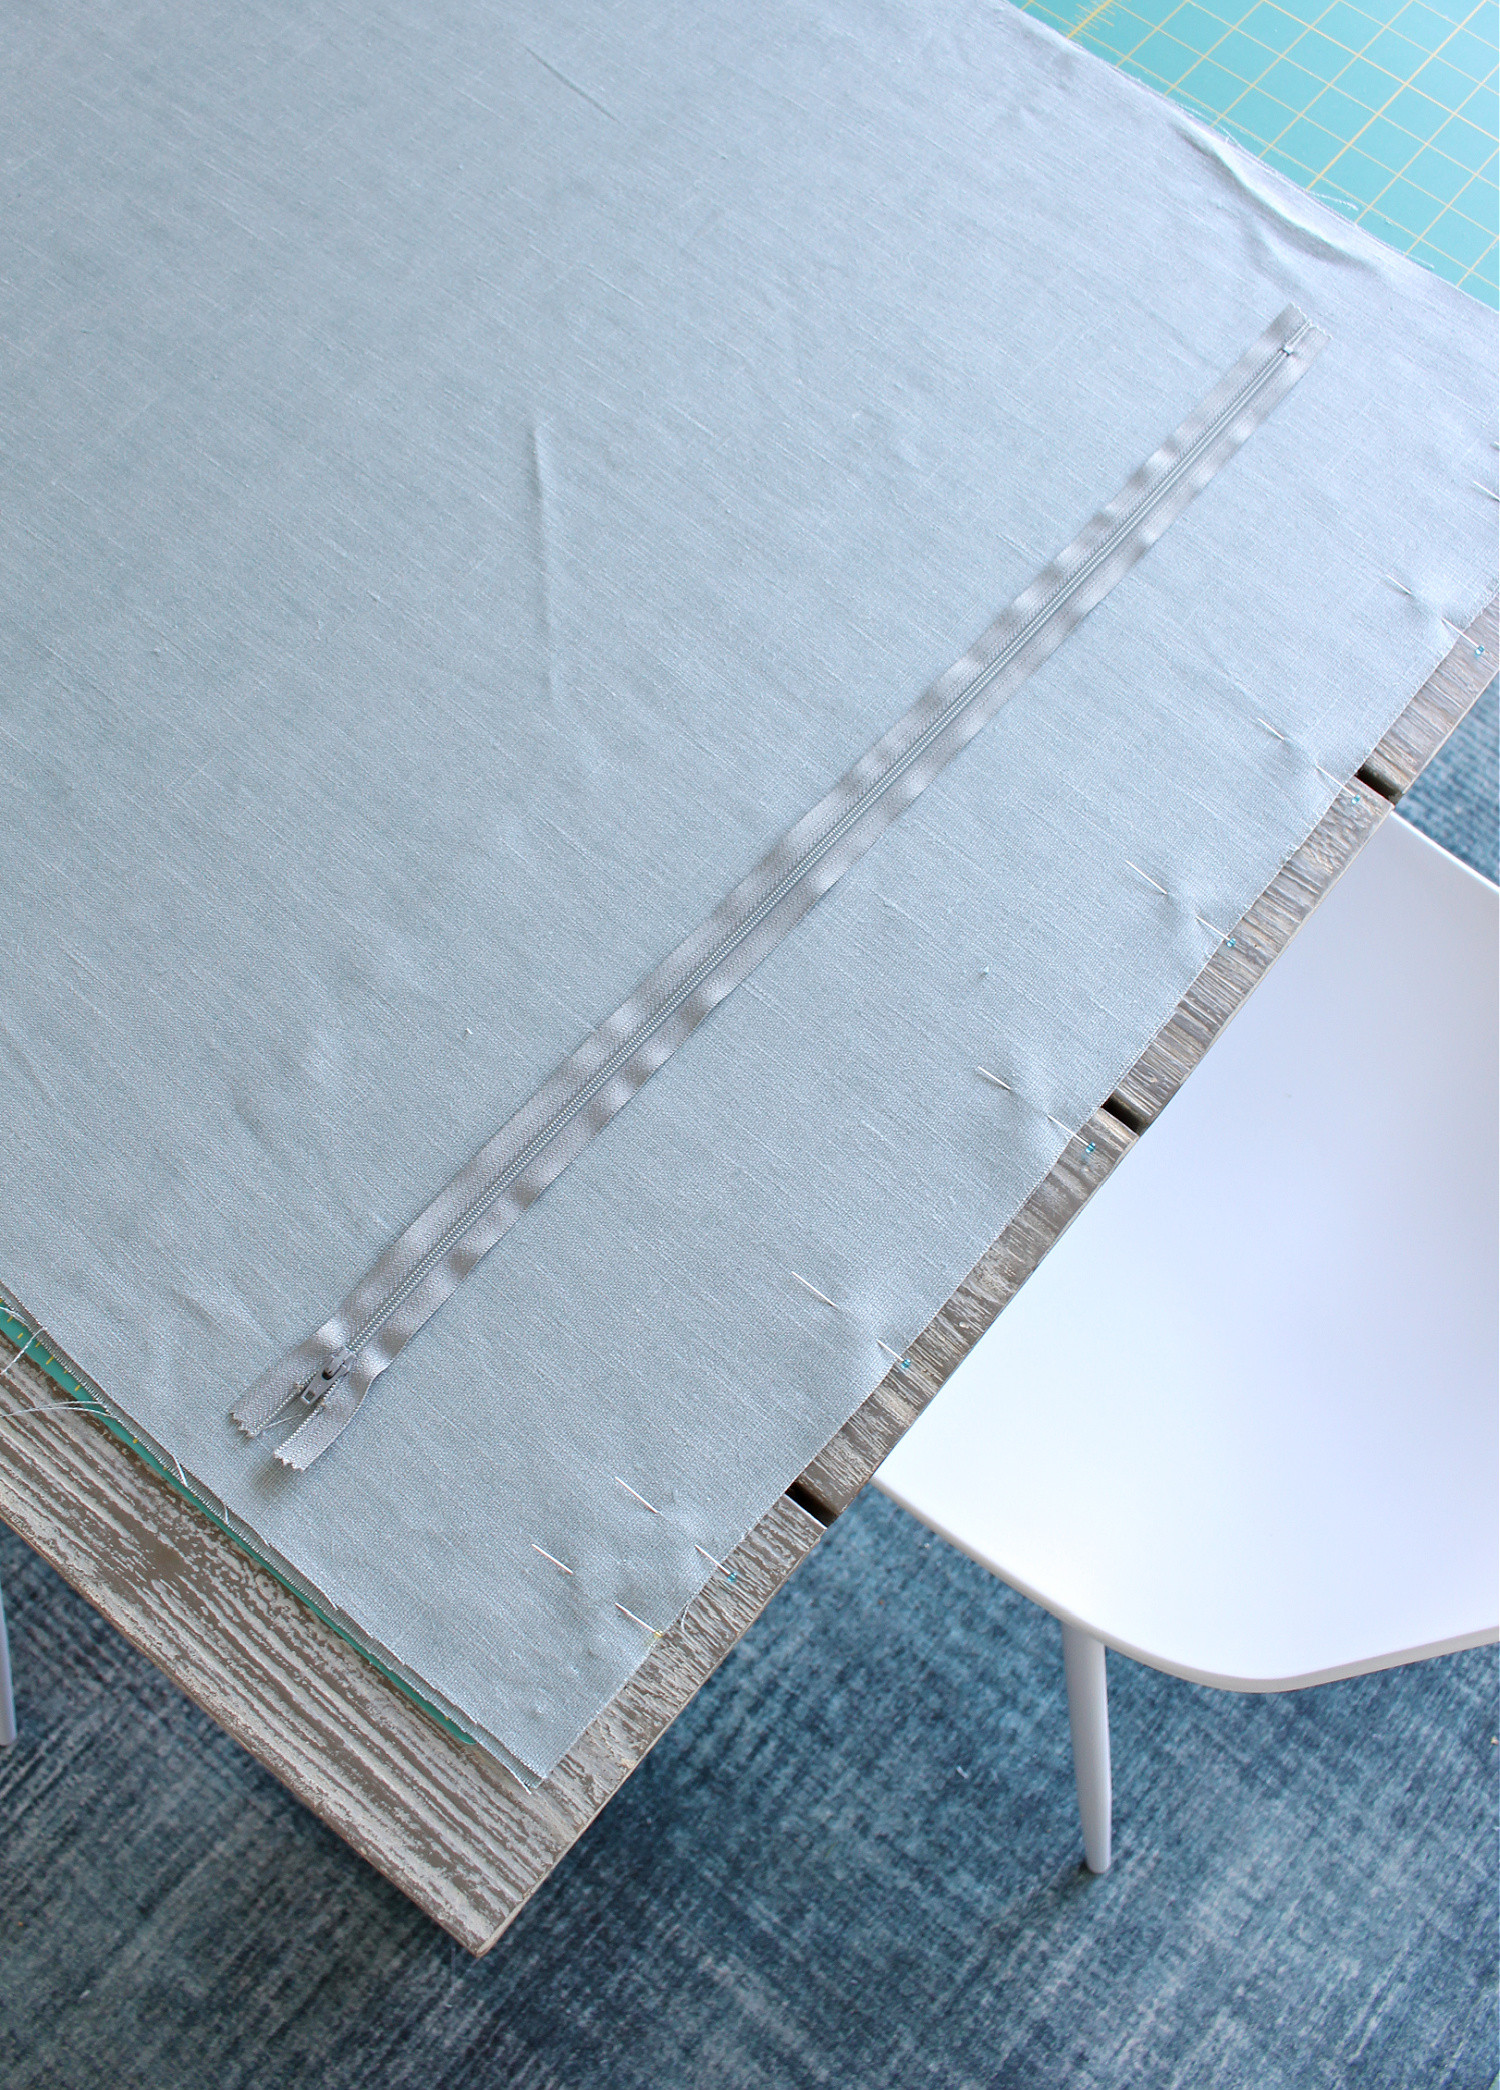 How to Make a Zippered Euro Sham Pillow
- Position the zipper: Place the zipper face down on the open seam, aligning the zipper tape with the seam allowance. Pin in place.
- Sew the zipper: Attach the zipper foot to your sewing machine. Sew along both sides of the zipper, close to the zipper teeth.
- Remove the basting stitches: Use a seam ripper to carefully remove the basting stitches, revealing the zipper.
 Sewing a Zipper into a Throw Pillow
3.3. Sewing the Remaining Seams:
- Open the zipper: Before sewing the remaining seams, ensure the zipper is partially open. This allows you to turn the sham right side out later.
- Pin the edges: Place the fabric squares right sides together again and pin along the remaining three sides.
 DIY Linen Throw Pillows
- Sew the seams: Sew along the pinned edges with a 5/8 inch seam allowance. Backstitch at the beginning and end of each seam to secure the stitches.
- Trim the corners: Trim the corners of the sham at a 45-degree angle to reduce bulk.
3.4. Turning and Finishing:
- Turn right side out: Carefully turn the sham right side out through the open zipper.
- Push out the corners: Use a point turner or a blunt tool to gently push out the corners, creating sharp, defined edges.
- Press the seams: Use an iron to press all the seams, creating a crisp, professional finish.
- Insert the pillow: Insert a 26×26 inch pillow form into the sham through the zipper opening.
4. Advanced Techniques for Euro Shams
Elevate your Euro sham sewing skills with these advanced techniques.
4.1. Adding Piping:
Piping adds a decorative touch and enhances the structure of your Euro sham.
- Prepare the piping: Cut a strip of fabric 2 inches wide and long enough to go around the perimeter of the sham. Fold the fabric in half lengthwise and insert cording into the fold.
- Sew the piping: Use a zipper foot to sew close to the cording, creating the piping.
- Attach the piping: Pin the piping to the right side of the sham front, aligning the raw edges. Sew the piping in place using a zipper foot.
- Complete the sham: Follow the standard sewing instructions to complete the sham.
4.2. Creating a Flanged Edge:
A flanged edge adds a soft, elegant border to your Euro sham.
- Cut fabric larger: Cut the fabric squares larger than the finished size, adding extra inches for the flange.
- Sew the seams: Sew the sham as usual, leaving the desired amount of the flange unsewn.
- Press the flange: Press the flange flat, creating a decorative border.
4.3. Incorporating Decorative Details:
- Embroidery: Add personalized designs or monograms to your shams.
- Appliqués: Incorporate fabric scraps to create unique patterns and textures.
- Buttons: Add buttons for a vintage or rustic look.
- Ruffles: Create soft, romantic ruffles along the edges of the sham.
5. Choosing the Right Fabrics from eurodripusa.net
When selecting fabrics for your Euro shams, eurodripusa.net offers a wide range of high-quality European linens that are perfect for this project.
5.1. European Linen Fabrics:
- Durability: European linen is known for its strength and longevity.
- Texture: The natural texture of linen adds a touch of elegance and sophistication.
- Breathability: Linen is breathable, making it comfortable year-round.
- Sustainability: Linen is a sustainable fabric made from flax fibers.
5.2. Color and Pattern Selection:
- Coordinate with your bedding: Choose fabrics that complement your duvet cover, sheets, and other decorative pillows.
- Consider your bedroom décor: Select colors and patterns that match the overall style of your bedroom.
- Experiment with textures: Mix and match different textures to add depth and visual interest.
5.3. Fabric Care:
- Wash in cold water: Use a gentle cycle and mild detergent to preserve the fabric’s color and texture.
- Tumble dry low: Avoid high heat, which can damage the fibers.
- Iron when slightly damp: Ironing linen when slightly damp helps to remove wrinkles and create a crisp finish.
6. Styling Your Euro Shams
Once you’ve sewn your Euro shams, it’s time to style them on your bed.
6.1. Arranging Euro Shams:
- Placement: Place Euro shams at the back of your pillow arrangement, against the headboard.
- Quantity: Use two or three Euro shams on a queen or king-sized bed.
- Symmetry: Arrange the shams symmetrically for a balanced look.
6.2. Layering with Other Pillows:
- Mix sizes and shapes: Combine Euro shams with standard pillow shams, decorative pillows, and lumbar pillows.
- Create depth: Layer the pillows in front of the Euro shams to create a sense of depth.
- Add texture: Incorporate pillows with different textures, such as velvet, linen, and faux fur.
6.3. Complementing Your Bedding:
- Coordinate colors: Choose pillows that complement the colors in your duvet cover and sheets.
- Introduce patterns: Add patterned pillows to create visual interest.
- Consider the season: Swap out your pillows seasonally to reflect the changing colors and textures of the year.
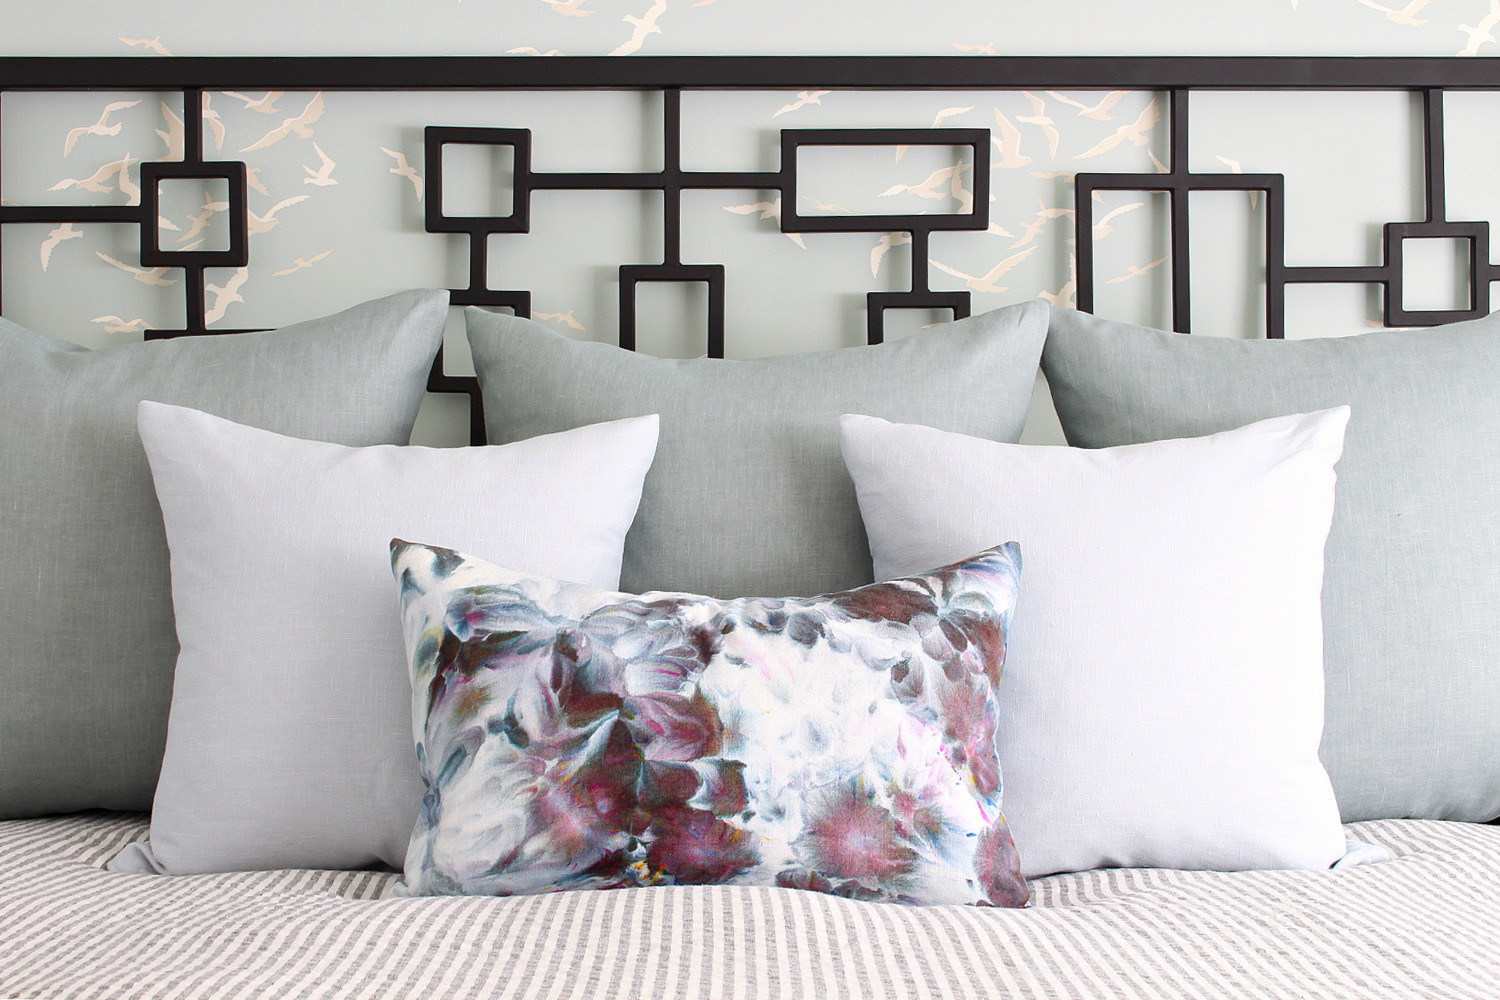 DIY Euro Sham Pillows
7. Eurodripusa.net: Your Source for Quality European Fabrics and Irrigation Solutions
While eurodripusa.net primarily specializes in high-quality European irrigation systems, exploring our selection of fine European fabrics can also inspire your home décor projects. Discover the quality and craftsmanship that define European products.
7.1. Exploring European Irrigation Systems:
At eurodripusa.net, we understand the importance of efficient and sustainable irrigation, especially in regions like California. Our advanced drip irrigation systems help farmers, landscapers, and home gardeners optimize water usage, reduce costs, and promote healthy plant growth.
7.2. Benefits of Drip Irrigation:
- Water Conservation: Drip irrigation delivers water directly to the plant roots, minimizing water loss through evaporation and runoff.
- Cost Savings: By using water more efficiently, drip irrigation can significantly reduce water bills.
- Improved Plant Health: Drip irrigation provides a consistent and controlled water supply, promoting healthy plant growth and reducing the risk of disease.
- Reduced Weed Growth: By delivering water directly to the plants, drip irrigation helps to suppress weed growth.
7.3. eurodripusa.net Product Range:
- Drip Tape: Ideal for row crops and vegetable gardens.
- Drip Line: Perfect for orchards, vineyards, and landscaping.
- Micro-Sprinklers: Suitable for larger plants and trees.
- Controllers and Timers: For automated irrigation scheduling.
- Filters and Accessories: To ensure clean and efficient water delivery.
8. Maintaining Your Drip Irrigation System for Longevity
Ensuring the longevity and efficiency of your drip irrigation system involves regular maintenance and care. Here are key steps to follow:
8.1. Regular Inspection
Regularly inspect your drip lines, emitters, and connections. Look for signs of leaks, cracks, or damage. Early detection can prevent significant water loss and system failure.
8.2. Cleaning Emitters
Emitters can become clogged with mineral deposits or debris over time. Clean them regularly by flushing the system or using a small brush to remove any blockages.
8.3. Checking Water Pressure
Maintain the correct water pressure as recommended by the system manufacturer. Too much pressure can damage the lines and emitters, while too little pressure can result in uneven water distribution.
8.4. Winterizing the System
In colder climates, winterize your drip irrigation system to prevent freezing and damage. Drain the lines, disconnect the system from the water source, and store any removable components in a safe place.
8.5. Implementing a Filtration System
Install a filtration system to remove sediment and debris from the water source before it enters the drip lines. This will help prevent clogging and ensure consistent water flow.
8.6. Monitoring Soil Moisture
Regularly monitor the soil moisture levels to ensure plants are receiving the right amount of water. Use a soil moisture meter or simply check the soil by hand.
8.7. Adjusting Watering Schedule
Adjust your watering schedule based on the weather conditions and the needs of your plants. During hot, dry periods, increase the frequency and duration of watering.
8.8. Avoiding Physical Damage
Protect your drip lines from physical damage caused by gardening tools, foot traffic, or animals. Bury the lines or cover them with mulch to prevent accidental damage.
8.9. Using High-Quality Components
Invest in high-quality drip irrigation components from eurodripusa.net to ensure durability and reliability. Our products are designed to withstand the rigors of outdoor use and provide long-lasting performance.
8.10. Following Manufacturer’s Instructions
Always follow the manufacturer’s instructions for installation, operation, and maintenance. This will help you get the most out of your drip irrigation system and avoid costly mistakes.
9. Frequently Asked Questions About Sewing Euro Shams
9.1. What Size Pillow Form Should I Use for a Euro Sham?
A 26×26 inch pillow form is the standard size for a Euro sham.
9.2. Can I Use a Different Fabric Instead of Linen?
Yes, you can use cotton, velvet, or any other fabric that suits your style and budget.
9.3. How Do I Clean My Euro Shams?
Follow the fabric care instructions for the specific fabric you used. Generally, washing in cold water and tumble drying on low is recommended.
9.4. What is the Best Type of Zipper to Use?
An invisible zipper provides a seamless closure, while a standard zipper is a more budget-friendly option.
9.5. How Do I Add Piping to My Euro Sham?
Cut a strip of fabric, insert cording, sew the piping, and then attach it to the sham front before completing the seams.
9.6. Can I Make Euro Shams Without a Zipper?
Yes, you can create an envelope closure or use buttons or snaps instead of a zipper.
9.7. How Much Fabric Do I Need to Make One Euro Sham?
You will need approximately one yard of fabric for one Euro sham.
9.8. What is a Flanged Edge?
A flanged edge is a decorative border created by leaving extra fabric unsewn around the edges of the sham.
9.9. How Do I Prevent the Zipper from Showing?
Use an invisible zipper and sew it close to the zipper teeth for a seamless look.
9.10. Can I Add Embroidery or Appliqués to My Euro Shams?
Yes, you can add personalized designs or fabric scraps to create unique and decorative shams.
10. Conclusion: Transform Your Bedroom with Custom Euro Shams
Sewing your own Euro shams is a rewarding project that allows you to create custom bedding that perfectly matches your style. With high-quality European linen fabrics from eurodripusa.net, you can add a touch of luxury and elegance to your bedroom décor.
For those interested in sustainable and efficient irrigation solutions, explore the range of products available at eurodripusa.net to optimize your water usage and promote healthy plant growth.
Ready to transform your bedroom and garden? Visit eurodripusa.net today to discover the finest European fabrics and advanced irrigation systems available in the USA. Contact us at +1 (530) 752-1011 or visit our location at 1 Shields Ave, Davis, CA 95616, United States, to learn more and start your next project!