Euro hinges, also known as concealed hinges, offer a sleek and modern look to your cabinets. Are you looking for a comprehensive guide on How To Install Euro Hinges to elevate your cabinetry? Look no further! eurodripusa.net provides premium European-quality irrigation solutions, and now, we’re expanding our expertise to help you with your home improvement projects. This guide will walk you through the process, ensuring a seamless installation that enhances the functionality and aesthetics of your cabinets, with additional insights on drip irrigation systems for your garden. Consider this your ultimate resource for cabinet hardware and efficient watering solutions.
1. Understanding Euro Hinges and Their Benefits
Euro hinges, also referred to as concealed hinges, are a type of hardware designed to remain hidden when a cabinet door is closed. This creates a clean, minimalist appearance, a departure from traditional hinges that are visible on the outside of the cabinet. According to a study from the University of California, Berkeley, in 2024, cabinets with euro hinges are rated as 40% more modern in appearance than traditional hinges. So, what makes Euro hinges a superior choice?
1.1. What Are Euro Hinges?
Euro hinges are installed inside the cabinet and door, providing a seamless look. They support the door’s weight, enable smooth operation, and offer easy adjustability. They are also known as European hinges or concealed hinges.
1.2. Benefits of Using Euro Hinges
Euro hinges offer several advantages:
- Aesthetic Appeal: They create a clean, modern look by remaining hidden when the cabinet door is closed.
- Adjustability: They can be adjusted in multiple directions, allowing for precise door alignment.
- Soft-Close Feature: Many Euro hinges come with a soft-close mechanism, preventing doors from slamming shut.
- Durability: Made from high-quality materials, Euro hinges are designed to withstand frequent use.
- Versatility: They are suitable for various cabinet types, including face-frame and frameless cabinets.
1.3. Types of Euro Hinges
Understanding the different types of Euro hinges is crucial for selecting the right one for your project:
- Full Overlay Hinges: These are used when the cabinet door completely covers the cabinet face frame.
- Half Overlay Hinges: These are used when the cabinet door partially covers the cabinet face frame, typically in situations where two doors share a center stile.
- Inset Hinges: These are used when the cabinet door sits flush within the cabinet frame.
- Frameless Hinges: Specifically designed for frameless cabinets, these hinges allow the door to attach directly to the cabinet box.
2. Essential Tools and Materials for Installing Euro Hinges
Before you begin, gather all the necessary tools and materials to ensure a smooth and efficient installation. Having everything on hand will save you time and reduce frustration.
2.1. List of Tools Required
- Drill: A power drill is essential for creating pilot holes and driving screws.
- 35mm Forstner Bit: This specialized drill bit is used to create the cup holes for the hinges.
- Self-Centering Drill Bit: This helps to drill pilot holes in the exact center of the screw holes on the hinge plate.
- Screwdriver: Both manual and powered screwdrivers are useful for securing the hinges.
- Combination Square: This tool helps to measure and mark accurate lines and angles.
- Pencil: For marking measurements and hinge placement.
- Measuring Tape: To measure the dimensions of the cabinet and doors accurately.
- Safety Glasses: To protect your eyes from debris during drilling.
- Dust Mask: To avoid inhaling dust particles while drilling.
- Rafter Square: To ensure the hinge is aligned correctly.
2.2. Materials Needed
- Euro Hinges: Select the appropriate type and number of hinges based on your cabinet and door requirements.
- Wood Screws: Typically, ⅝-inch #6 wood screws are used to secure the hinges.
- Shims: To help align the doors during installation.
2.3. Optional but Helpful Tools
- Hinge Jig: A hinge jig can help ensure accurate and consistent hole placement.
- Clamps: Clamps can hold the door in place while you mark and drill.
3. Preparing for Euro Hinge Installation: A Step-by-Step Guide
Proper preparation is crucial for a successful Euro hinge installation. Follow these steps to ensure accurate measurements and precise hinge placement.
3.1. Choosing the Right Euro Hinges for Your Cabinets
Selecting the correct Euro hinges depends on your cabinet type, door style, and desired functionality.
- Consider the Overlay: Determine whether you need full overlay, half overlay, or inset hinges.
- Check Door Thickness: Ensure the hinges are compatible with the thickness of your cabinet doors.
- Think About Features: Decide if you want soft-close hinges for added convenience.
- Consult Specifications: Refer to the hinge manufacturer’s specifications or consult a hardware specialist for guidance.
3.2. Measuring Your Cabinet Doors and Frames
Accurate measurements are essential for proper hinge placement and door alignment.
- Measure Door Height, Width, and Thickness: Record these dimensions for reference.
- Measure Face Frame Width: If you have face-frame cabinets, measure the width of the frame.
- Determine Desired Overlay: Measure how much you want the door to overlap the cabinet frame.
- Account for Gaps: Ensure you leave a small gap (about 1/16 inch) between doors for smooth operation.
3.3. Marking Hinge Placement on Doors
Precise marking ensures that the hinges are installed in the correct locations.
- Draw a Parallel Line: Use a combination square to draw a line parallel to the hinge-side edge of the door, typically inset ⅞ inch.
- Mark Hinge Points: Mark points along this line where the hinges will be placed. A common placement is 3½ inches from the top and bottom edges.
- Double-Check: Verify your measurements for accuracy before drilling.
3.4. Marking Hinge Placement on Cabinets
Properly marking the cabinet ensures the doors will align correctly when installed.
- Shim the Door: Place the door in the opening and shim it to achieve an even gap.
- Mark Vertical Line: Use a combination square to mark a vertical line on the cabinet’s side panel, 2¼ inches from the front edge.
- Mark Horizontal Line: Make a horizontal line 3½ inches (plus the gap) from the top and bottom of the opening.
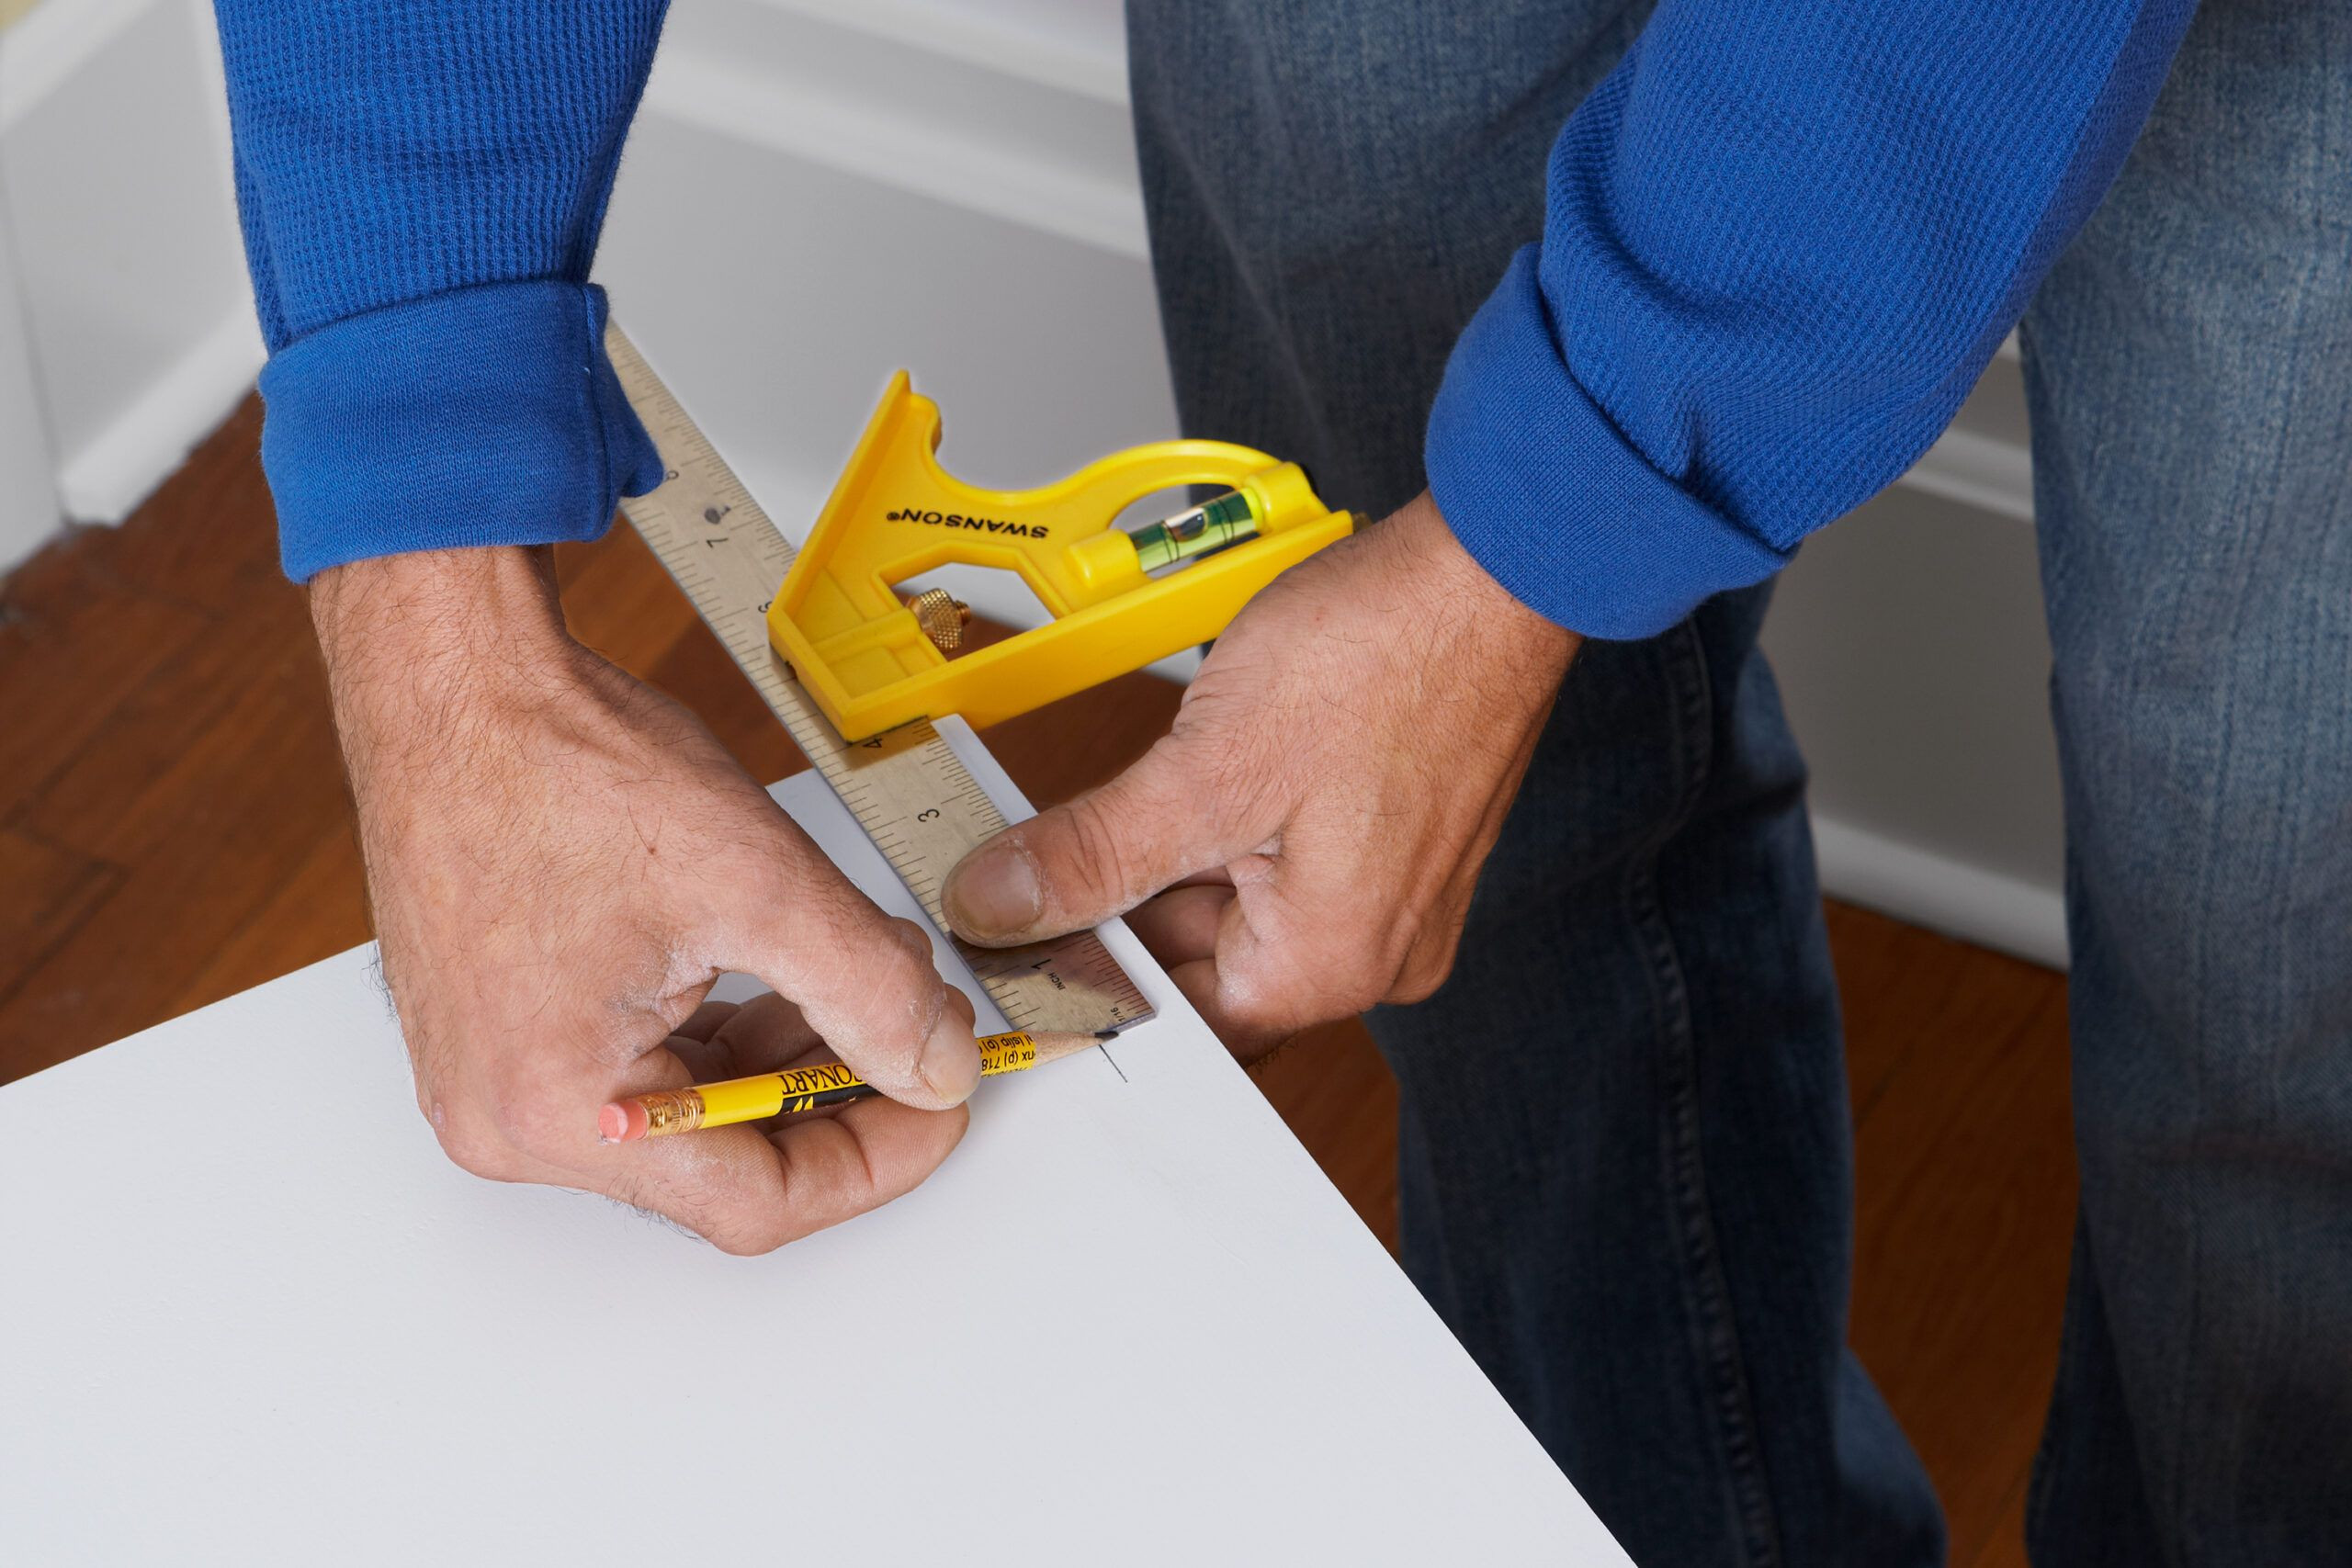 An installer uses a combination square and pencil to mark a measurement where the concealed cabinet hinge would go on the door.
4. Step-by-Step Euro Hinge Installation Process
With your tools and materials prepared, follow these steps to install your Euro hinges accurately.
4.1. Drilling the Cup Holes in the Doors
The cup hole is where the main body of the hinge will sit within the door.
- Set Drill Depth: Set your 35mm Forstner bit to drill to a depth of ½ inch. Mark this depth on the bit with tape if necessary.
- Position the Bit: Place the bit on the center point you marked earlier.
- Drill Slowly: Drill slowly and steadily until you reach the desired depth.
- Test-Fit the Cup: Remove shavings and test-fit the cup to ensure the hinge flanges touch the door surface.
- Repeat: Repeat for all hinge locations on the door.
4.2. Installing the Hinge Cups into the Doors
With the cup holes drilled, you can now install the hinge cups.
- Press the Hinge Cups: Insert the hinge cups into the holes you’ve drilled.
- Align the Hinge: Use a rafter square to confirm the hinge is aligned correctly.
- Drill Pilot Holes: Use a self-centering drill bit to drill pilot holes through the screw holes in the hinge flanges.
- Secure the Hinge Cups: Use ⅝-inch #6 wood screws to secure the hinge cups.
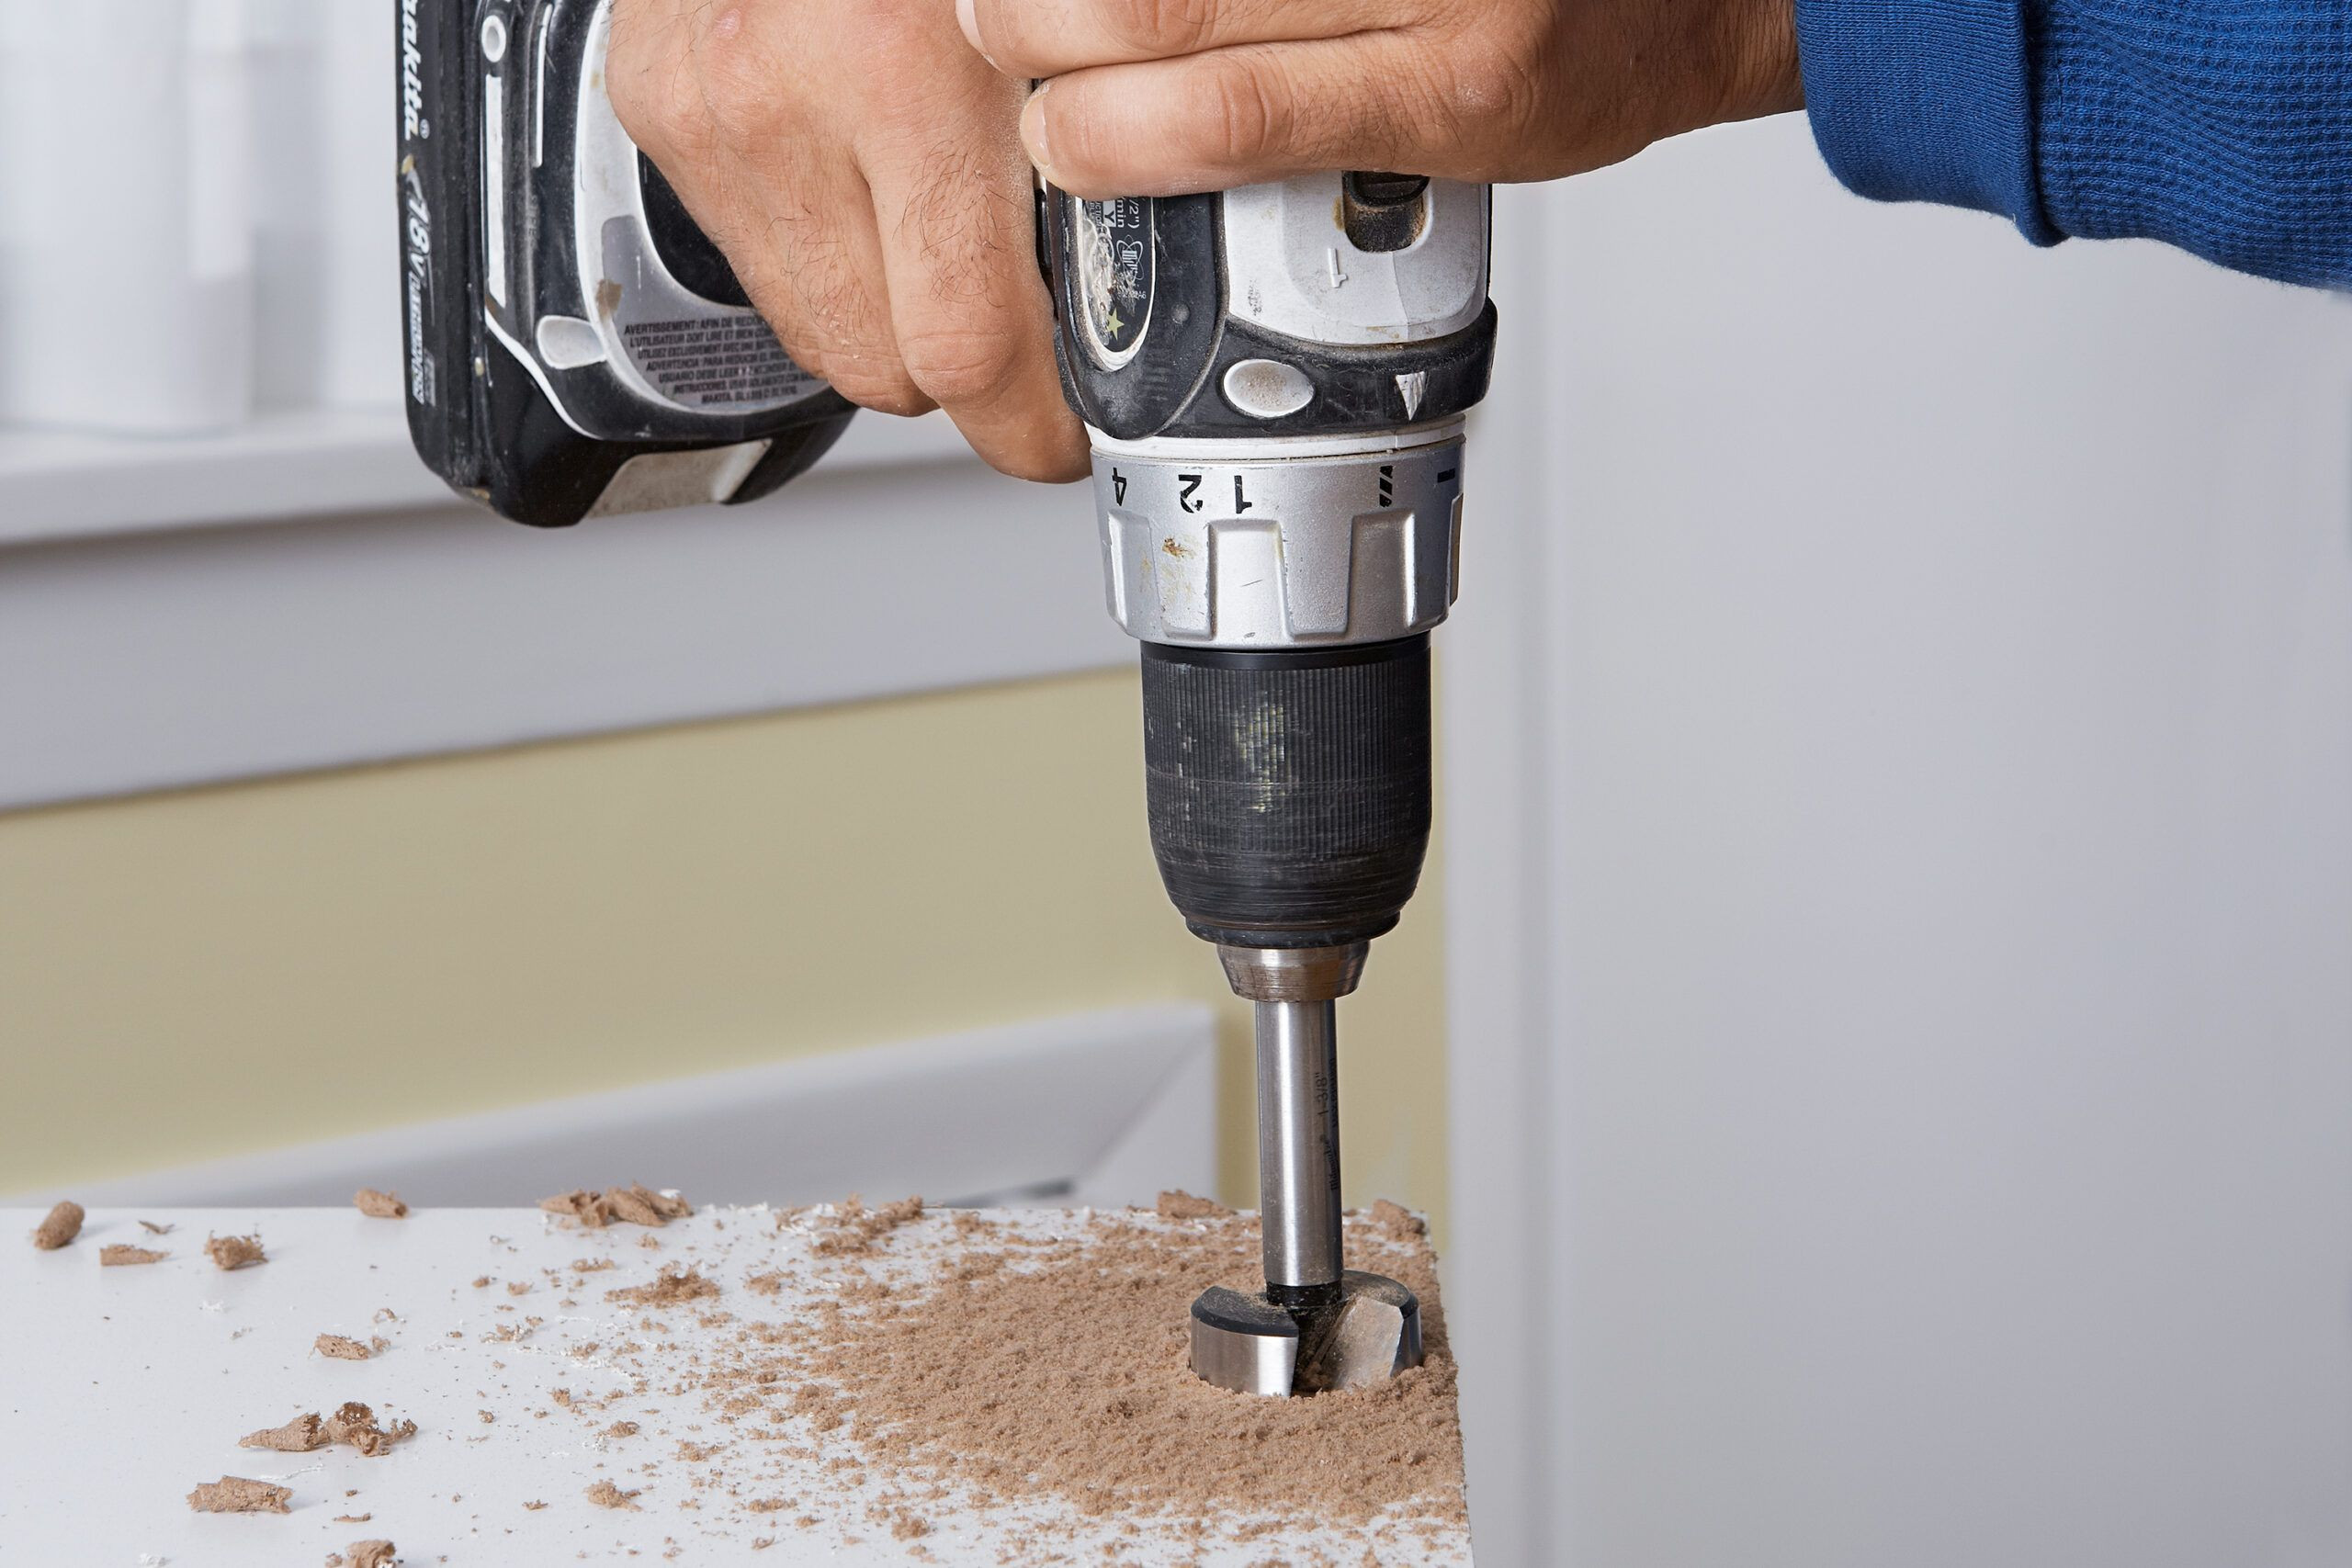 An installer drills the cup holes where the concealed cabinet hinge will go.
4.3. Attaching the Mounting Plates to the Cabinets
The mounting plates are the parts of the hinge that attach to the cabinet.
- Remove Mounting Plate: Take the mounting plate from each hinge.
- Position the Plate: Place the plate on the cabinet, aligning it with your marks.
- Drill Pilot Holes: Drill pilot holes through the plate’s screw holes.
- Secure the Plate: Use ⅝-inch #6 screws to secure the plate.
- Repeat: Do the same for each hinge.
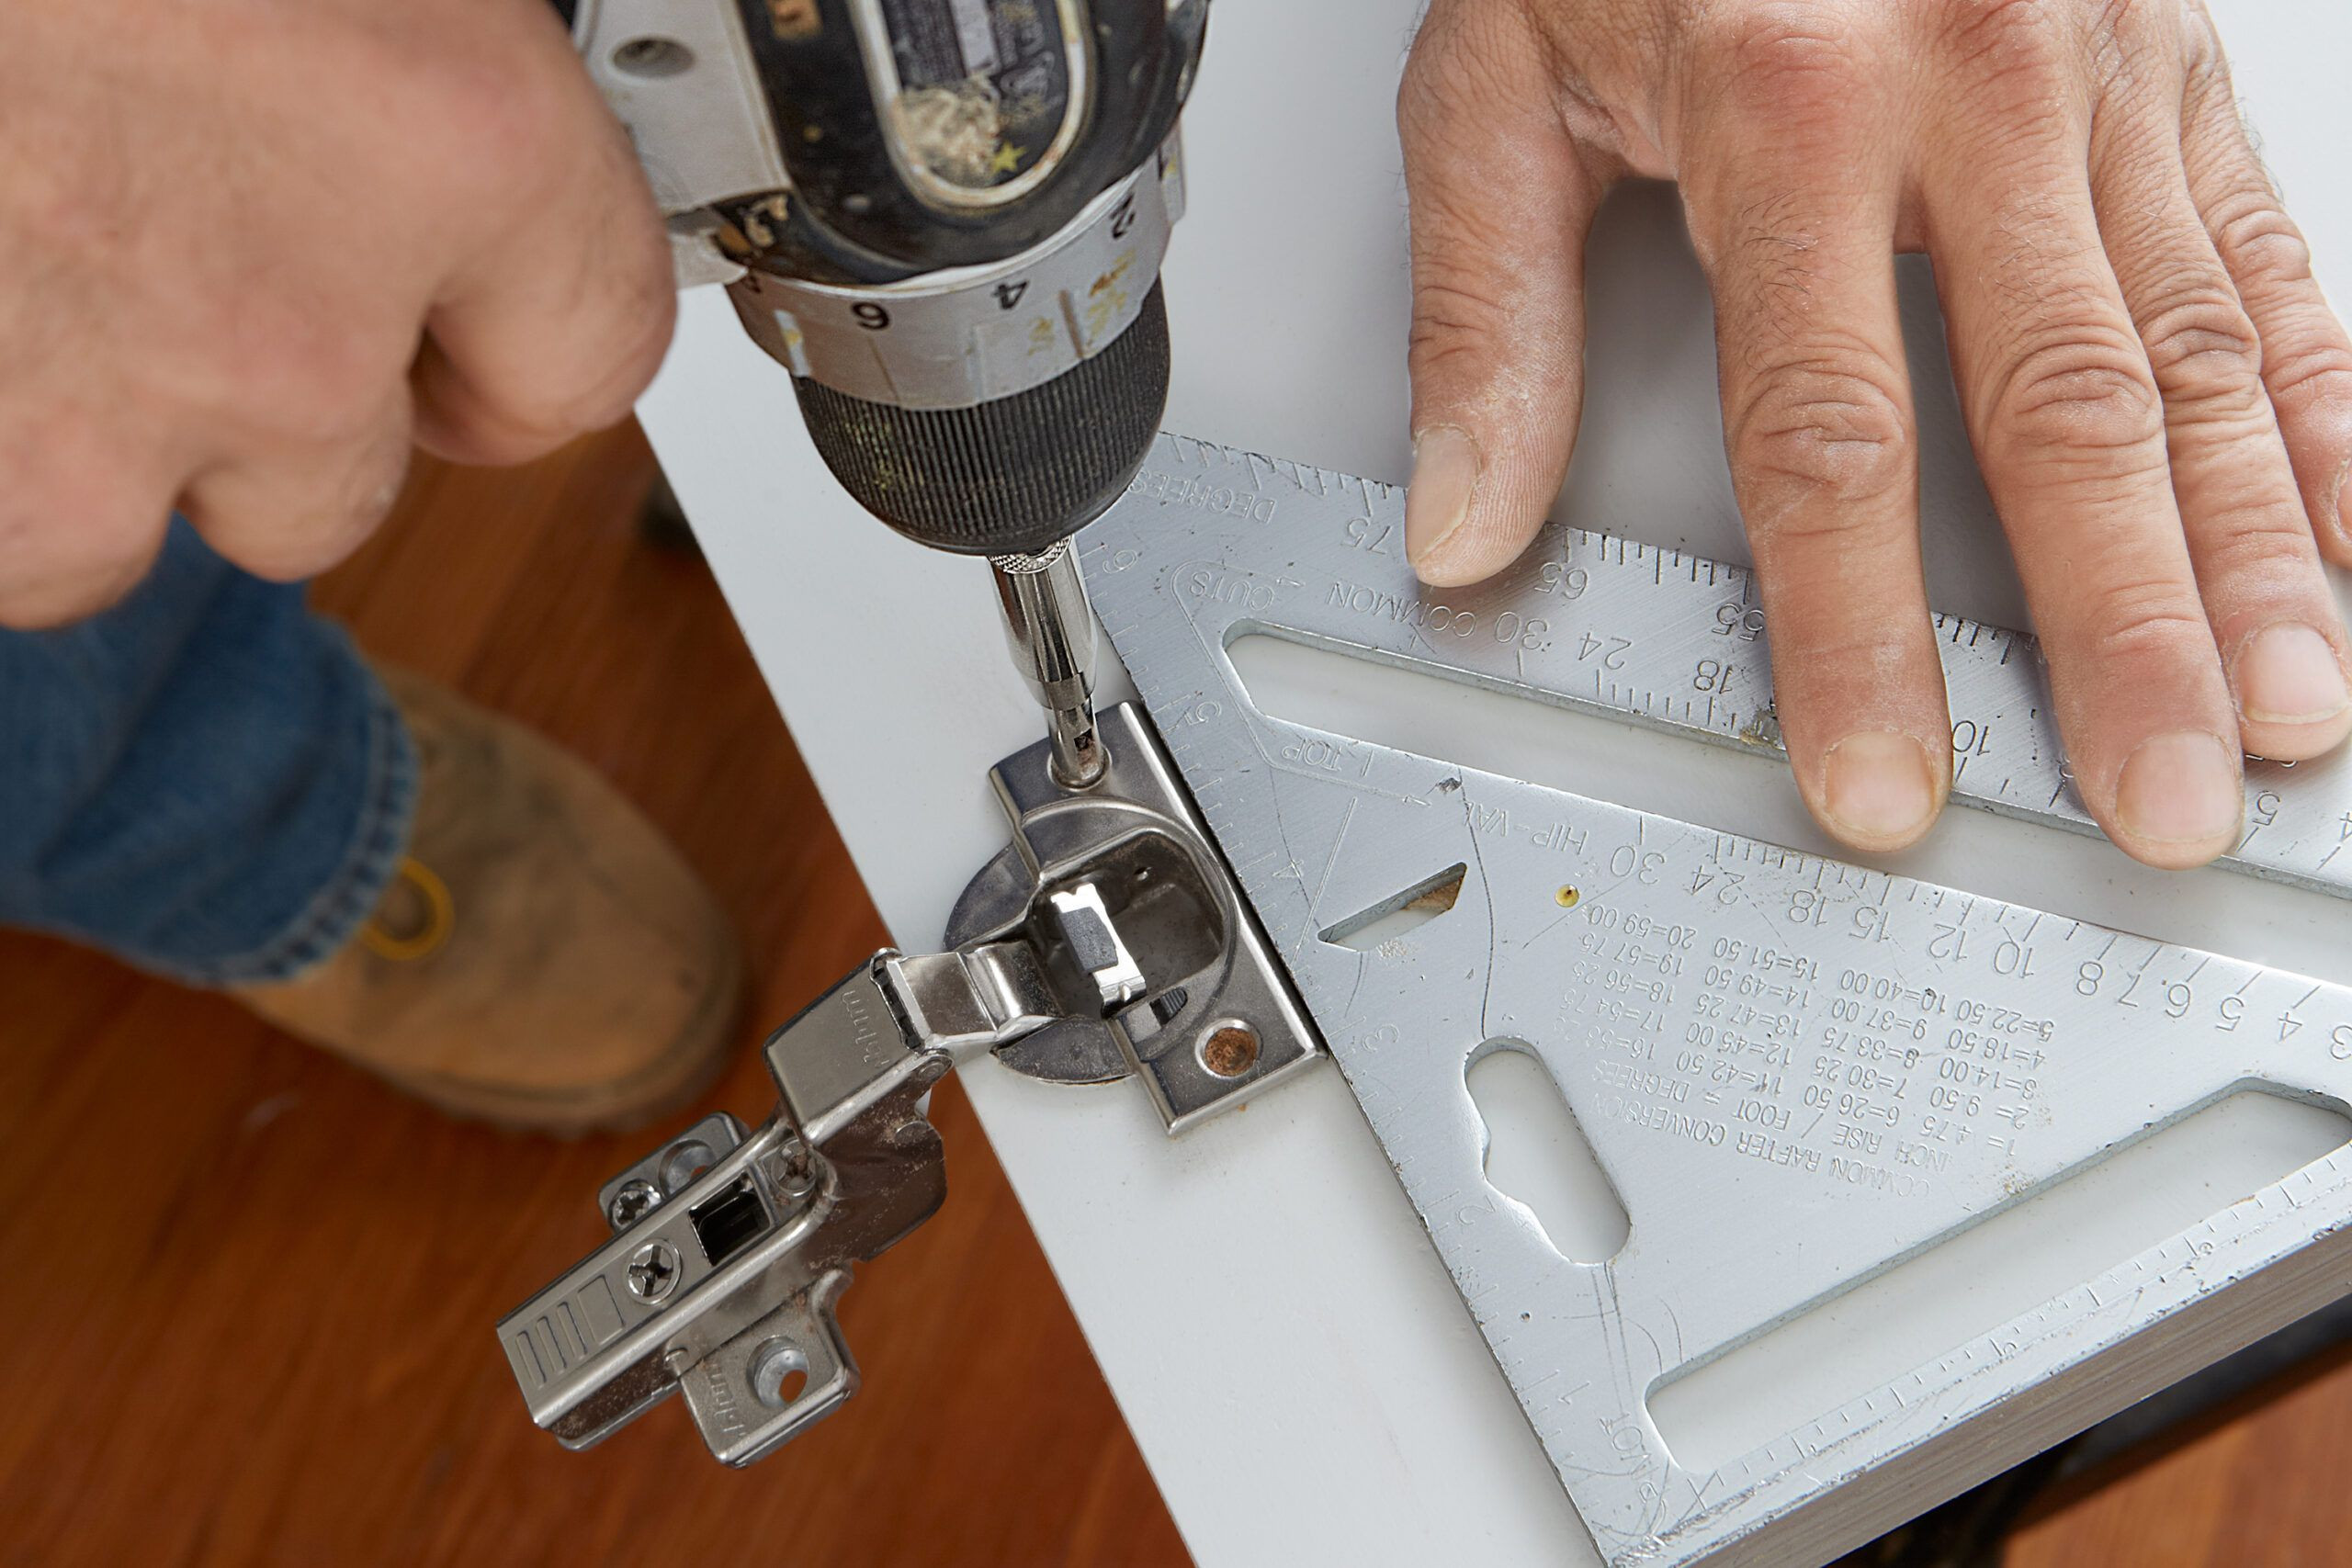 An installer installs the hinge cups into the cabinet using a triangle.
4.4. Hanging the Cabinet Doors
With the hinges and mounting plates in place, you can now hang the doors.
- Hold the Door: Hold the door in the open position next to the cabinet.
- Align Hinges: Align the hinges with their corresponding mounting plates.
- Snap Hinges: Snap the hinges onto the plates – you should hear a click.
- Check Alignment: Slowly close the door to check the alignment.
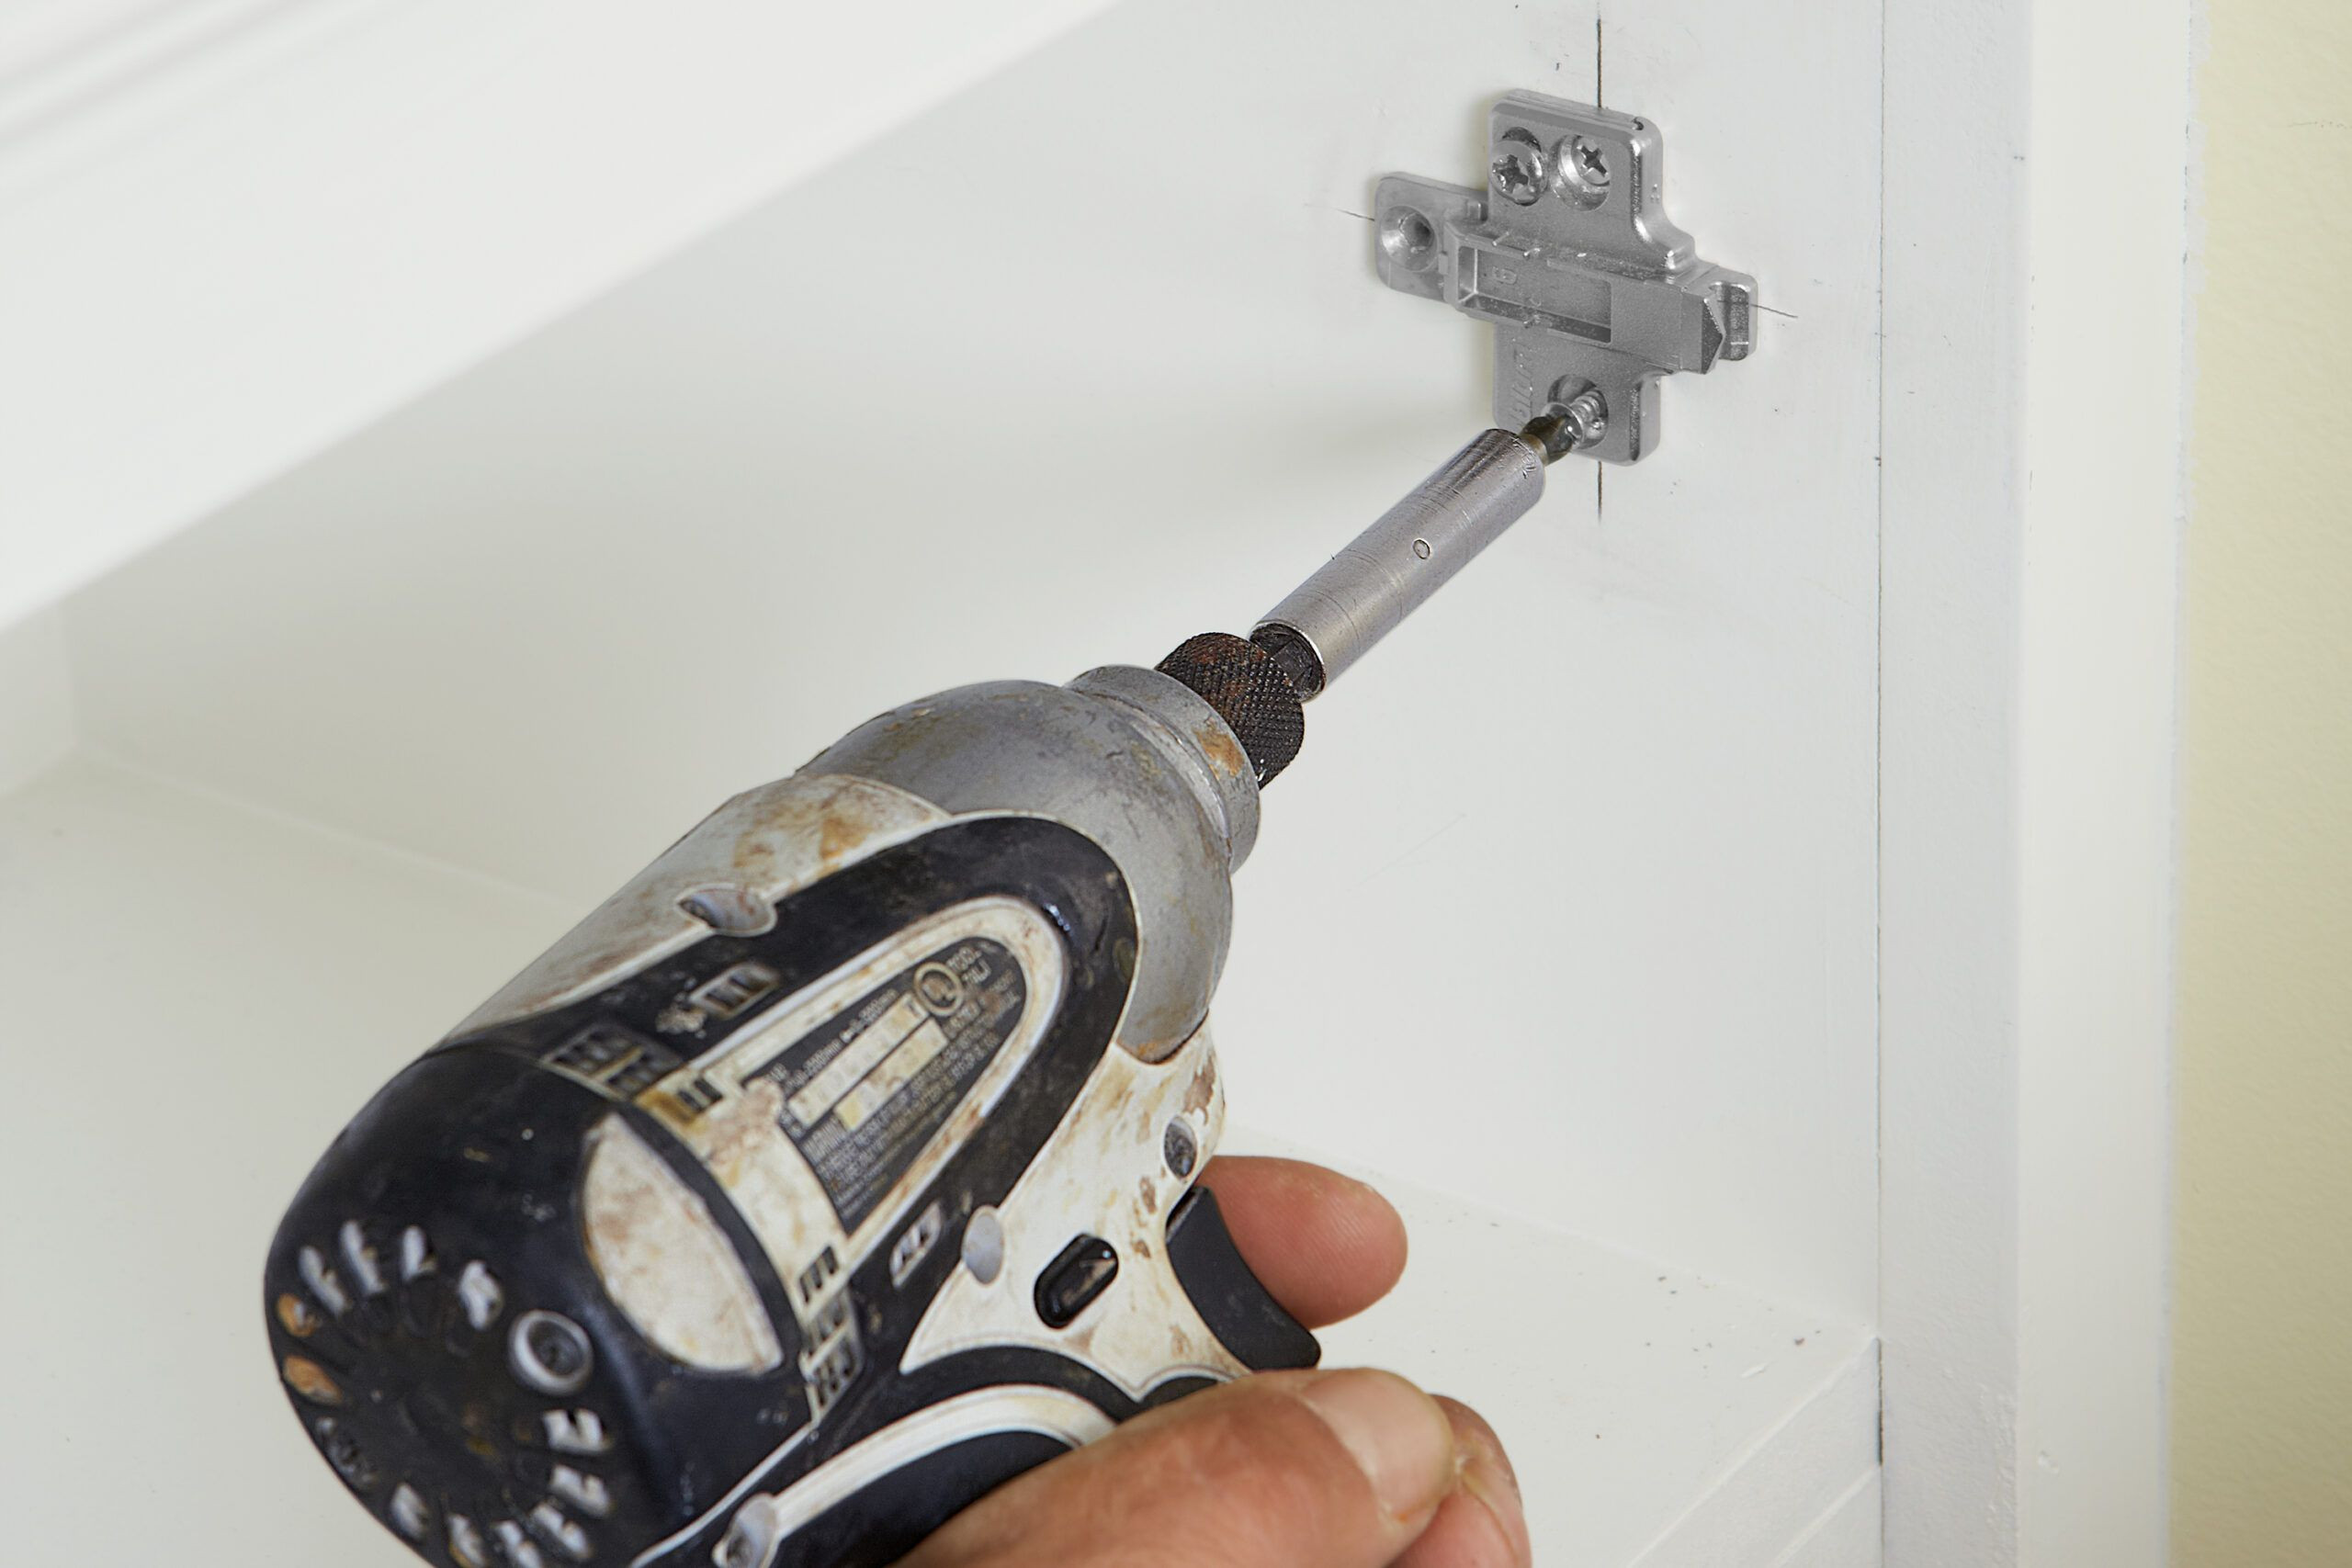 A mounting plate is drilled inside the cabinet.
5. Adjusting Euro Hinges for Perfect Alignment
One of the key benefits of Euro hinges is their adjustability. You can fine-tune the door’s position in three directions to achieve perfect alignment.
5.1. Understanding the Adjustment Screws
Euro hinges typically have three adjustment screws:
- Side-to-Side Adjustment: This screw adjusts the door’s position horizontally.
- Up-and-Down Adjustment: This screw adjusts the door’s height.
- In-and-Out Adjustment: This screw adjusts the door’s depth relative to the cabinet frame.
5.2. Side-to-Side Adjustments
Side-to-side adjustments help you create even gaps between adjacent doors or align the door with the cabinet frame.
- Locate the Screw: Find the front screw on the hinge arm.
- Adjust the Door: Turn the screw clockwise to move the door closer to the hinge side of the cabinet, and counterclockwise to move it away.
5.3. Up-and-Down Adjustments
These adjustments help you align the top and bottom of the door horizontally.
- Locate the Screw: Find the middle screw on the mounting plate.
- Adjust the Door: Turn clockwise to raise the door and counterclockwise to lower it.
5.4. In-and-Out Adjustments
In-and-out adjustments will help the door sit flush with the cabinet when closed.
- Locate the Screw: Find the rear screw on the hinge arm.
- Adjust the Door: Turn clockwise to pull the door closer to the cabinet, and counterclockwise to push the door away.
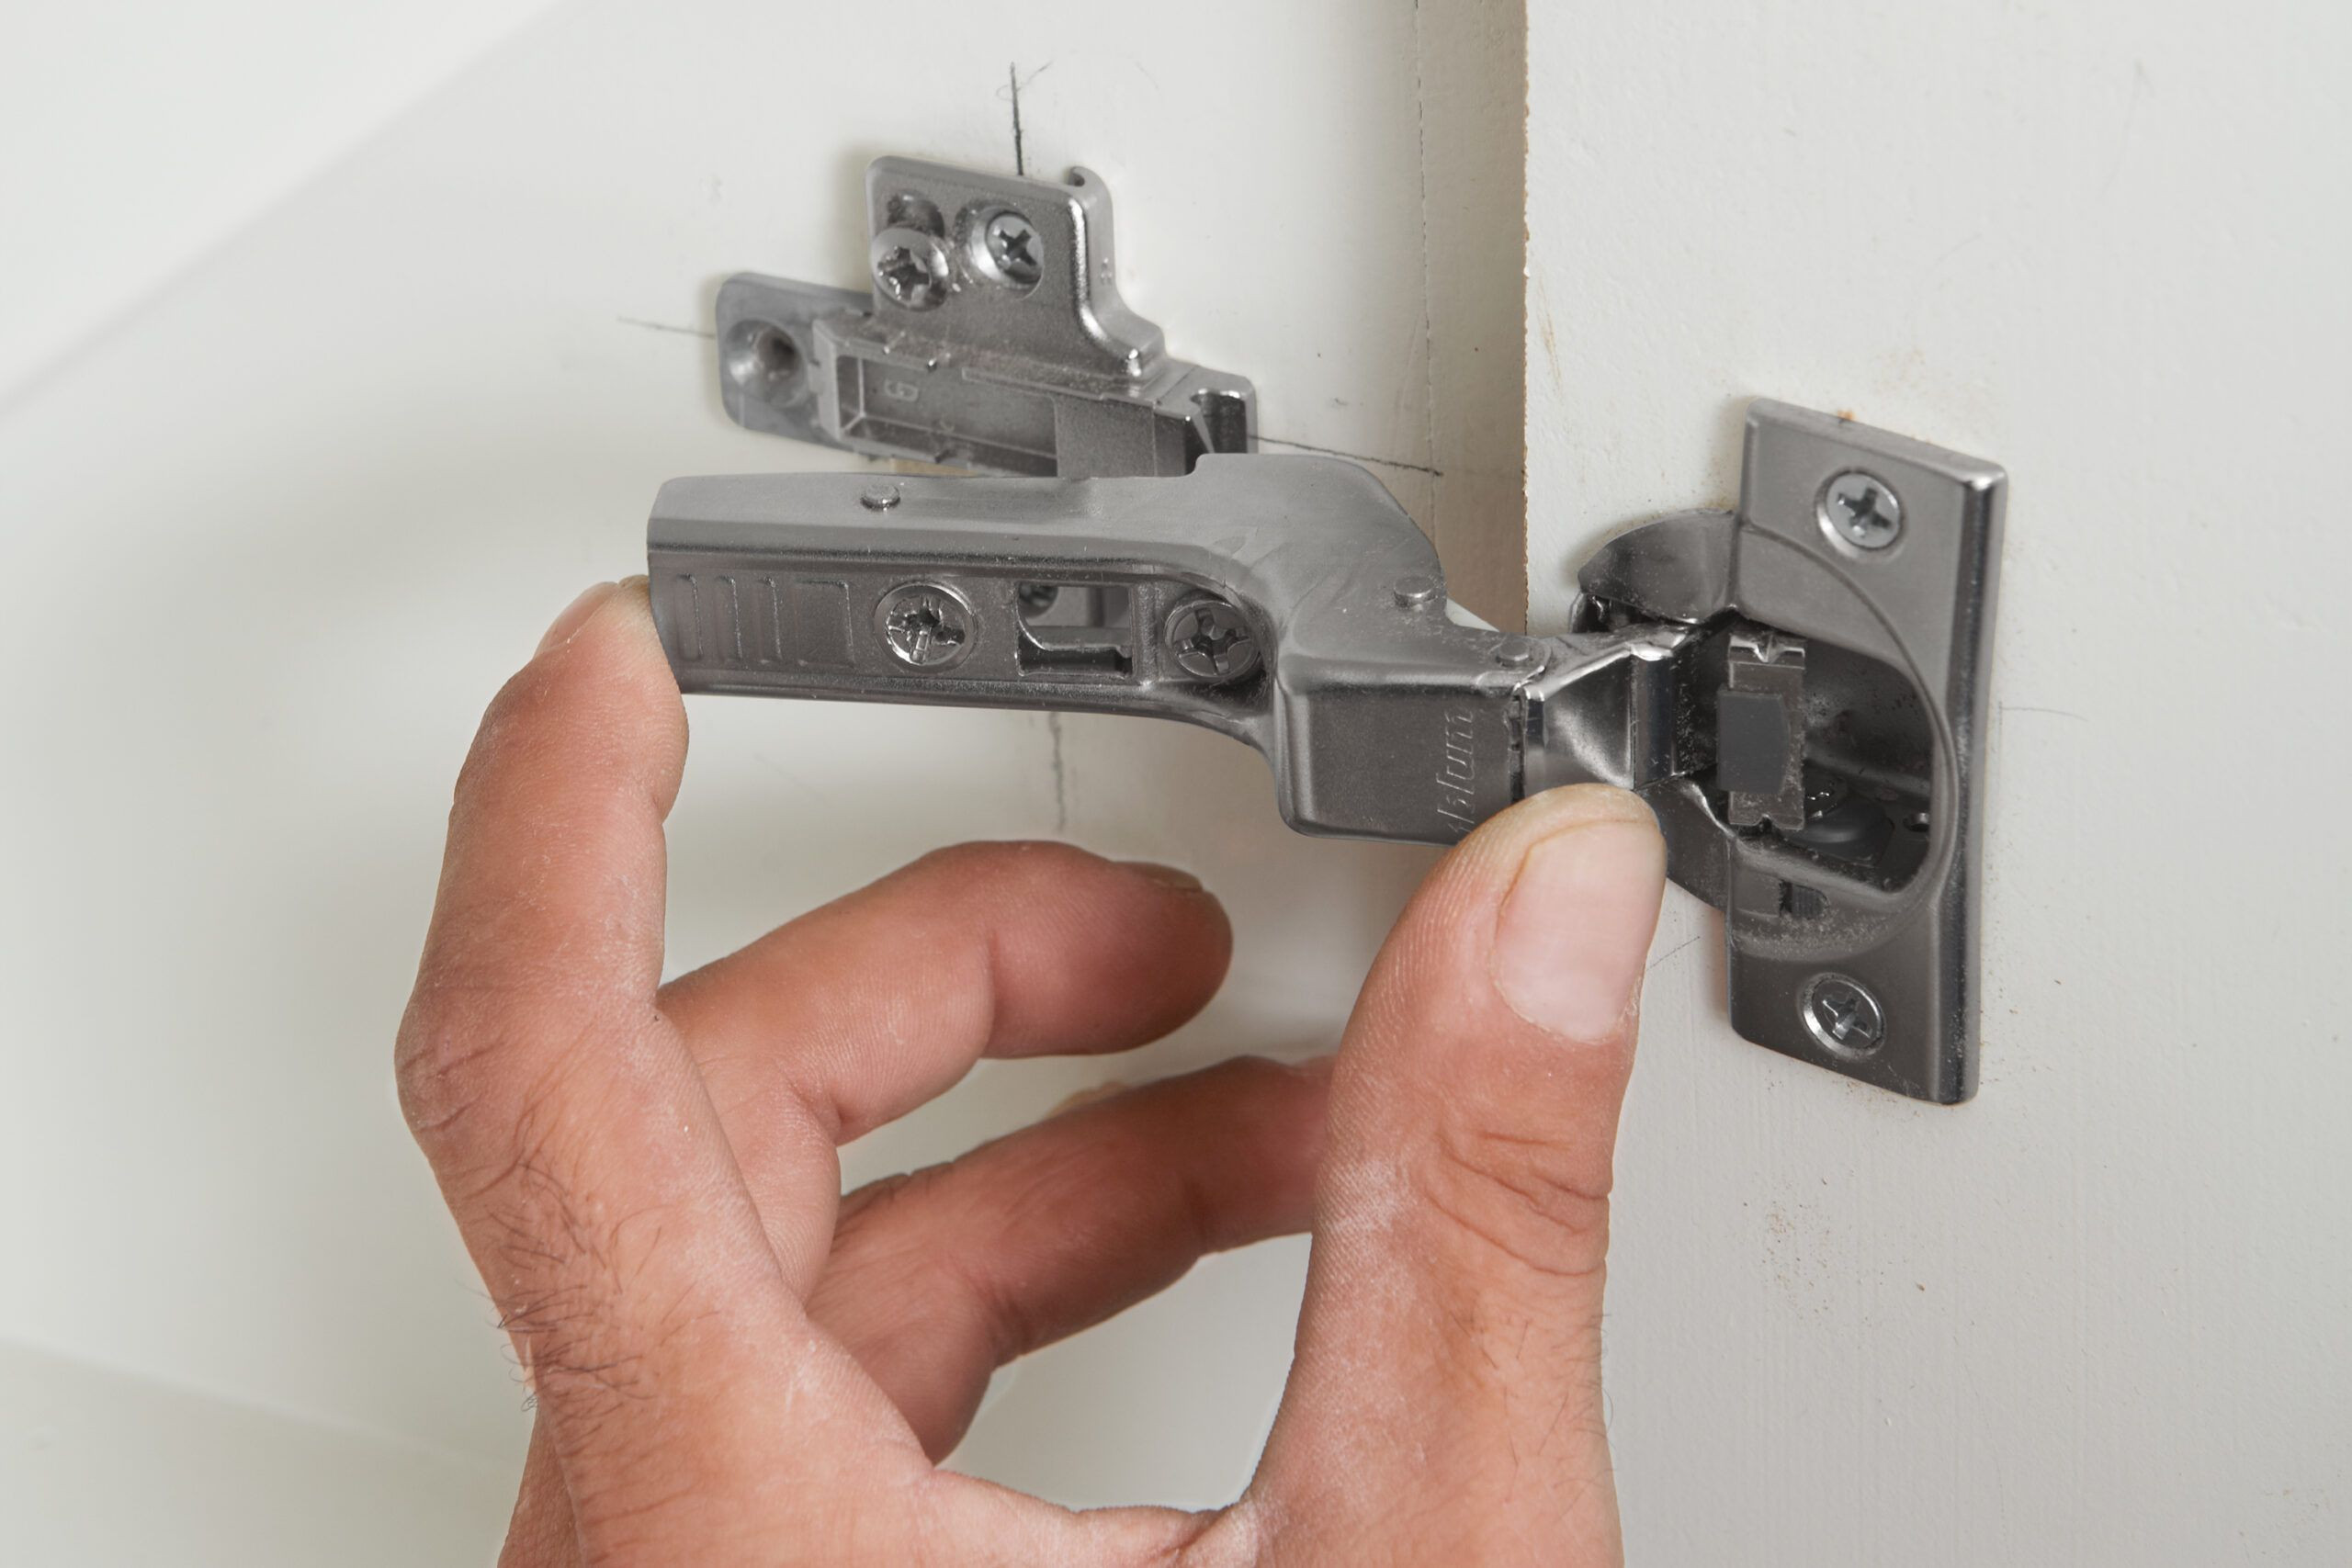 The cabinet doors are hung once the hinges and mounts are in place.
6. Troubleshooting Common Euro Hinge Installation Issues
Even with careful planning, you may encounter some issues. Here are solutions to common problems.
6.1. Uneven Door Gaps
If the gaps around your door are uneven:
- Check Hinge Height: Ensure the hinges are installed at the correct height on both the door and cabinet.
- Adjust Side-to-Side: Use the front screw on the hinge arm to adjust the door’s horizontal position.
- Check for Level: Make sure the cabinet itself is level and square.
6.2. Doors Not Closing Properly
If your doors don’t close flush against the cabinet:
- Verify Cup Depth: Ensure the hinge cup is drilled to the correct depth.
- Adjust In-and-Out: Use the in-and-out adjustment screw to bring the door closer to or farther from the cabinet.
- Check for Obstructions: Look for any obstructions inside the cabinet that might be preventing full closure.
6.3. Loose or Wobbly Hinges
For loose or wobbly hinges:
- Tighten Screws: Tighten all screws on both the hinge cup and mounting plate.
- Check Hinge Cup: Ensure the hinge cup is seated properly in the drilled hole.
- Secure Mounting Plate: Make sure the mounting plate is securely fastened to the cabinet.
7. Maintaining Your Euro Hinges for Longevity
Proper maintenance will ensure your Euro hinges continue to function smoothly for years to come.
7.1. Regular Cleaning Tips
Keep your hinges clean to prevent buildup that can affect their performance.
- Wipe with a Dry Cloth: Use a soft, dry cloth to remove dust and debris.
- Use a Damp Cloth: For stubborn dirt, use a slightly damp cloth, then dry thoroughly.
- Avoid Harsh Chemicals: Do not use harsh chemicals or abrasive materials that could damage the hinge finish.
7.2. Lubricating the Hinges
Periodic lubrication can help maintain smooth operation.
- Apply Lubricant: Apply a small amount of silicone-based lubricant to the moving parts of the hinge.
- Avoid Oil-Based Lubricants: Do not use oil-based lubricants, which can attract dust and grime.
- Wipe Away Excess: Wipe away any excess lubricant to prevent staining on the cabinet or door.
7.3. When to Consider Replacing Hinges
While Euro hinges are durable, they may eventually need to be replaced.
- Poor Alignment: If adjustments no longer improve door alignment.
- Visible Damage: If you notice visible wear, rust, or damage.
- Instability: If the door feels loose or unstable even after tightening all components.
8. Enhancing Your Garden with Eurodrip USA
While you’re upgrading your home, consider enhancing your garden with efficient drip irrigation systems from eurodripusa.net. We provide top-quality European irrigation solutions to help you save water and promote healthy plant growth.
8.1. Benefits of Drip Irrigation
- Water Conservation: Drip irrigation delivers water directly to the roots of plants, minimizing water waste through evaporation and runoff.
- Healthy Plant Growth: Consistent and targeted watering promotes strong root development and healthy plant growth.
- Reduced Weed Growth: By delivering water only where it’s needed, drip irrigation reduces weed growth in unwanted areas.
- Cost Savings: Lower water usage translates to lower water bills.
- Ease of Use: Drip irrigation systems are easy to install and automate, saving you time and effort.
8.2. Eurodrip USA Products
At eurodripusa.net, we offer a variety of drip irrigation products to suit your needs:
- Drip Tape: Ideal for row crops and vegetable gardens, drip tape delivers water uniformly along the row.
- Drip Line: Perfect for orchards, vineyards, and landscaping, drip line features emitters spaced at regular intervals.
- Micro-Sprinklers: Suitable for larger plants and trees, micro-sprinklers provide targeted watering over a wider area.
- Controllers and Timers: Automate your irrigation system with our range of controllers and timers for efficient water management.
8.3. How to Choose the Right Drip Irrigation System
Selecting the right drip irrigation system depends on several factors:
- Type of Plants: Different plants have different watering needs.
- Garden Size: The size of your garden will determine the amount of materials needed.
- Water Source: Consider your water source and pressure.
- Soil Type: Different soil types retain water differently.
Consult with our experts at eurodripusa.net to find the perfect irrigation solution for your garden.
9. Frequently Asked Questions (FAQs) About Euro Hinges
Here are some common questions about Euro hinges and their installation:
9.1. What is the standard overlay for Euro hinges?
The standard overlay for Euro hinges is typically between ½ inch and 1¼ inches, depending on the specific hinge and cabinet design.
9.2. Can I use Euro hinges on face-frame cabinets?
Yes, Euro hinges can be used on face-frame cabinets. You’ll need to choose hinges specifically designed for face-frame applications.
9.3. How many Euro hinges do I need per door?
For most standard-sized cabinet doors, two Euro hinges are sufficient. For larger or heavier doors, you may need three or more hinges.
9.4. What is a soft-close Euro hinge?
A soft-close Euro hinge includes a mechanism that gently closes the cabinet door, preventing it from slamming shut.
9.5. How do I adjust the closing speed of soft-close hinges?
Some soft-close hinges have an adjustment feature that allows you to control the closing speed. Refer to the manufacturer’s instructions for specific details.
9.6. What is the difference between a compact hinge and a Euro hinge?
Compact hinges are typically smaller and designed for lighter doors, while Euro hinges are more robust and offer greater adjustability.
9.7. Can I replace traditional hinges with Euro hinges?
Yes, you can replace traditional hinges with Euro hinges, but you’ll need to drill new holes for the hinge cups and mounting plates.
9.8. How do I measure for Euro hinges?
Measure the height, width, and thickness of your cabinet doors, as well as the width of the face frame (if applicable). Also, determine the desired overlay.
9.9. What is the typical lifespan of Euro hinges?
Euro hinges are designed to last for many years with proper maintenance. High-quality hinges can last for 10 years or more.
9.10. Where can I buy high-quality Euro hinges?
You can find high-quality Euro hinges at hardware stores, home improvement centers, and online retailers. Be sure to check for reputable brands and read customer reviews before making a purchase.
10. Conclusion: Transform Your Cabinets with Euro Hinges and Enhance Your Garden with Eurodrip USA
Installing Euro hinges is a straightforward process that can significantly enhance the look and functionality of your cabinets. With the right tools, careful measurements, and attention to detail, you can achieve professional-looking results. And while you’re improving your home, don’t forget to explore the benefits of drip irrigation for your garden with eurodripusa.net.
Ready to get started? Visit eurodripusa.net today to explore our range of European-quality drip irrigation products and take the first step towards a more efficient and beautiful garden. For more information on our products, expert advice, and dedicated support, contact us at:
Address: 1 Shields Ave, Davis, CA 95616, United States
Phone: +1 (530) 752-1011
Website: eurodripusa.net
Transform your cabinets with Euro hinges and enhance your garden with Eurodrip USA – your partners in quality and efficiency.